Add Approver and send for Approval
- Default Approver
- Add Approver
- Remove Approver
- Re-send the Approver Email
- Approver - Declines or Approves the Request
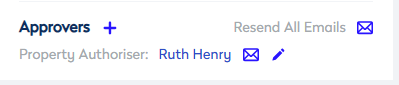
Default Approver
If you have the default people, for the authorizes, set up then they will display in this section.

The default authorizers can be set up in the configuration, see Configure Service Request Default People and Authorizers.
Add Approver
When there are no default approvers, then the Approvers section will be blank.

You can add approvers to the service request, complete the following:
- Click the Add
 icon and the new line displays.

- From the Approver type drop-down, select the approver type. For example, Assignee Email, F.Y.I., Property Authorizer, or IT Authorizer.
- In the search people field, enter the name of the approver.
- The field will search as you type and then select the name of the approver from the list. Then the approver's name displays in the section.
- Click the Email
 icon to send out the Service Request Approval email.
When an Approver is first assigned to a Service Request (as a contact or approver) they will receive the Service Request Assignment email. If the user doesn't yet exist, then the default email template will explain to the user how to reset their password.
Remove an Approver
To remove an approver, click the Edit  icon next to the approver's name and then click the X icon.
Re-send the Approver Email
If needed, you can either:
- re-send the email to the approver; click the Email
 icon, and the approval email is re-sent.
 - re-send all the emails to all of the FYI contacts and approvers, click the Resend All Emails
 icon, and then all the approvers are re-sent the email.
Approver - Declines or Approves the Request
The approver will review the service request and either reject or approve the request; see Service Request Approval to see the email and the approval screen. Afterwards, the Approvers section will update:
Declined
If the service request is declined, then a cross  icon displays to the left of the approver’s name.

Approved
If the service request is approved, then a check  icon displays to the left of the approver’s name.
