Set up Space Reservations with Calendar Integration
Serraview Engage
Level: System Administrator / Eptura Implementation Team
You can configure which spaces (such as a meeting room) are reservable and by whom.
Prerequisite
If using room bookings then you must have the Engage Calendar Integration activated for:
The space type, such as a meeting room, must be set up to be Interactive so that employees can reserve the space, see Set up the Space Types for Engage.
Step 1. Set up the Space to be Reserved
From Serraview, complete the following:
- Navigate to the Spaces.
- Use the Building Selector to open the building and floor.
- Click the Edit Floor button.
- Navigate to the space. For example a meeting room.
- Double click the space. The Update Space form displays.
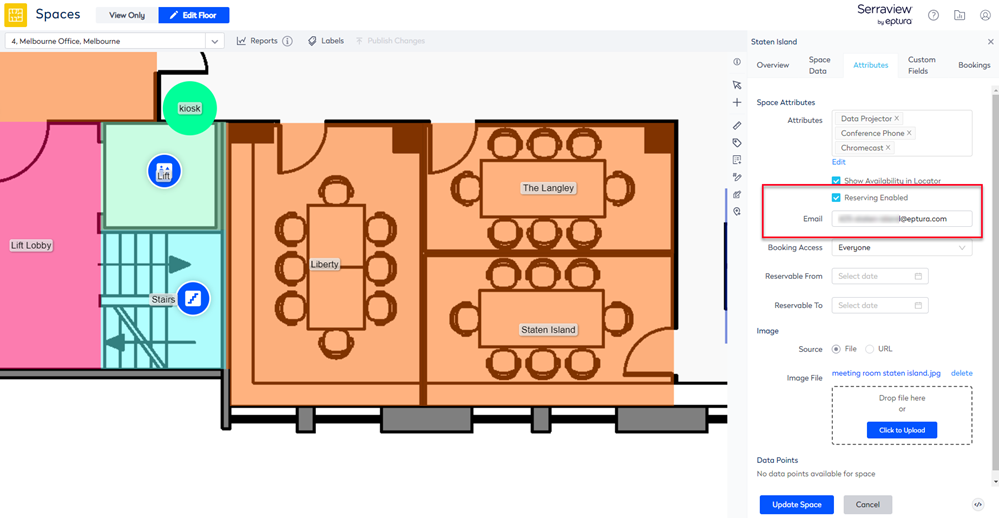
- Click the Attributes tab.
- Check the Reserving Enabled check box.
- In the Email field, enter the calendar's email address. For example, staten_island@eptura.com
If you want the Reserving Enable setting can be updated in bulk via:
- the Bulk Update Module, refer to Bulk Update Space.
- an import, refer to Workpoint Import and Engage.
The Email field can updated in bulk via:
- an import, refer to Workpoint Import and Engage.
Step 2. Set up who can Reserve the Space
In the Attributes tab, complete the following:
- From the Booking Access drop-down, select one of:
- Assigned to desk -only the assigned occupant can reserve the space. This can be used for you need a meeting room to be used as an office. For how to assign an occupant to a space, refer to Add a Person to a Workpoint (Space).
- Everyone - anyone with access to Engage can reserve the space.
- Team - anyone who is part of the team.
- Neighborhood - anyone who is part of the neighborhood.
- Floor - anyone who is assigned to the same floor that the space is on.
- Building - anyone who is assigned to the same building that the space is in.
- Region - anyone who is assigned to a space in the same region that the space is in. This can be used for campus-wide sharing or opening up spaces to people who can float between buildings in the same city.
- Click the Update Space button.
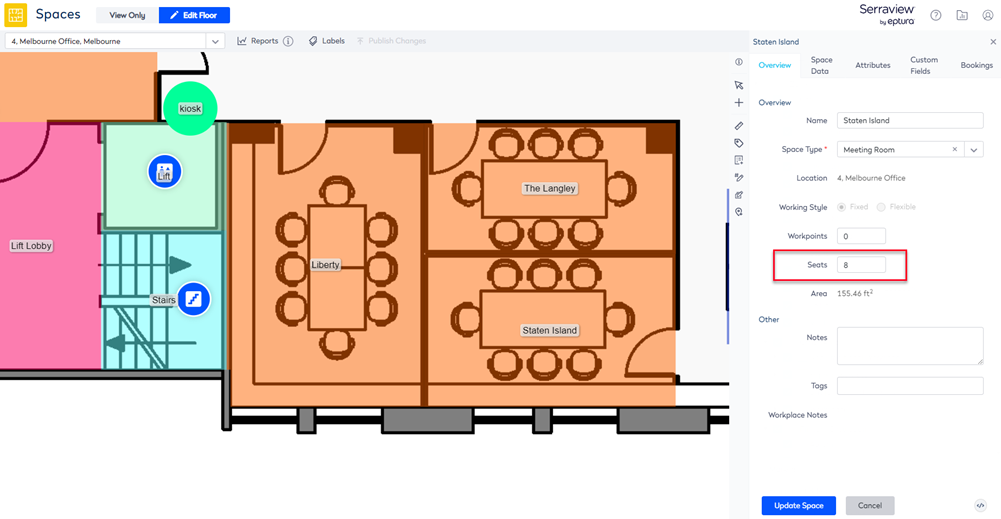
Step 3. Set up the Number of Seats
Remember that the spaces can be updated individually in the Spaces Module and the VBS Module.
When you have spaces that are meeting rooms you can include the number of seats. This number will display in Engage.
From the Spaces module, complete the following:
- Click the Overview tab.
- In the Seats field, enter the number of seats.
- Click the Update Space button.
Watch Engage in Action
Now, you have set up the configuration, here is what your employees will experience.