Archive or disable a Retention Status via the Configuration module
Level: System Administrator
Prerequisite
Before you archive or disable a retention status run the 22 Floorplan Block report to view the number of workpoints that contain the retention status. This allows you to consider if a retention status:
- needs to be disabled instead of being removed (archived).
- requires a planned removal (archived) and the Workplace Administrators are to be notified about the removal.
You can report on the Retention Status via the parameters of 22 Floorplan Block Report or 222 Floorplan Block (Capacity and Opportunity) Report.
From the VBS Module, complete the following:
- Select the building.
- From the Workpoint Color, select Occupancy.
- If required, select one or more teams on which to run your report. If you do not have anything selected, you will run the report on the whole building. If you have a floor expanded, you will run the report for the floor.
- Click the Quick Reports button.
- Select the 22 Floorplan Block Report. The report is launched.
From the Reports Module, complete the following:
- Search for 22 Floorplan Block Report.
- In the Parameters Panel, check the Highlight Occupancy check box. This will display the workpoints with a retention status in yellow.
- Check the Show People check box to display the labels with the name of the person or retention status.
- Launch the report.
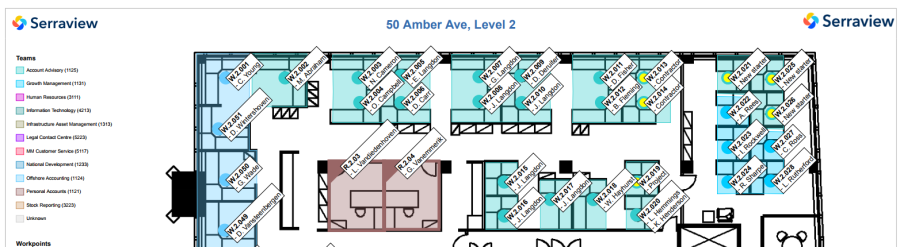
For example:
Archive or Unarchive a Retention Status
Archive a Retention Status
If you need to archive a retention status then it will be removed from all workpoints that held it.
- Navigate to Admin Settings > System Config > General > Retention Statuses.
- Search for the retention status.
- Check the Retention Status selection check box.
- Click the Archive icon. The following warning displays "Are you sure you want to delete this retention status?"
- Click the OK button. The retention status is deleted.
Unarchive a Retention Status
If needed you can unarchive a retention status and then this can be applied to workpoints.
- Click the Show: Archived icon. The Archived column displays and indicates if the retention status is archived (Yes) or unarchived (No).
- Search for the retention status.
- Check the Retention Status selection check box.
- Click the Unarchive button. The following warning displays "Are you sure you want to unarchive this retention status?"
- Click the OK button. The retention status is unarchived.
Disable a Retention Status
Instead of a deletion, you can disable the retention status.
- Navigate to Admin Settings > System Config > General > Retention Statuses.
- Search for the retention status.
- Click the Retention Status to be edited. The edit form displays.
- Uncheck the Enabled check box.
- Click the Update Retention Status button. The retention status is disabled.