
Custom Field View
Your System Administrator will be able to set up the Custom Field View for spaces.
Contents
This is best explained using an example, where the Department custom field is used in the Color By to show where the Front House staff and Back House staff spaces are on the floor plan.
Step 1. Create the custom field for the spaces
A custom field called Department has been set up so you can visualize what spaces your staff use.
The custom field for the space was created with the following:
- Entity = Space
- Name = Department
- Data Type = Entity - Single (This data type is where a user can choose one option from a drop-down list. Learn more about Custom Fields.)
- Value Entity = Reference Value
- Reference Set = Department (Learn more about Keywords.)
- Form Visibility = Visible On Space Form
Custom Field Example

Keyword Example
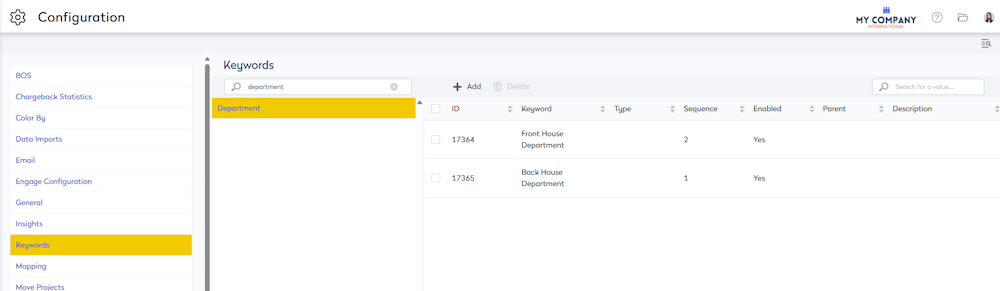
Step 2. Set up the Color By in the General Settings
The Color By setting is where the Space View list is found. The Space Views can have their sort order changed and new Space Views can be added.
- Navigate to Admin Settings > System Config > General > Color By.
- Click the + Add button and the Add Color By form displays.
- In the Sequence field, enter the sort order number.
- In the Name field, enter the name of the space view.
- In the Description field, enter a short description.
- From the Field Name field, select the custom field.
- Click the Submit button.
For example, this is the saved Color By called Color by Department.

The new Color By displays in the list as enabled.

Now this is set up you will be able to select it in the Space View drop-down in the Space module. However, before we look at the Space View, you will need to populate the custom field for the spaces.
Step 3. Bulk update the custom field for the spaces
You can use the Bulk Update tool to populate the custom fields for the spaces. Learn more on how to use this tool in Bulk Update Space.
Below, the spaces have been filtered for the building, floor, and space type. The spaces are selected then the custom field called Department is updated in bulk.

Step 4. View the custom view in the Spaces module
Now, you are ready to use the custom view.
- Navigate to the Spaces module.
- From the Space View drop-down, select the Color by Department.
From this space view you can visualize what spaces the front-of-house and the back-of-house staff use.

Step 5. Change the Custom View's color
If you find the colors are too similar, you can change the color in the keywords. In this example, we will navigate to the keyword called Department that is used in the custom field that was created in Step 1.
- Navigate to Admin Settings > System Config > General > Keywords.
- In the Search field, enter the keyword's name.
- Select the keyword's name.
- Select the keyword entry to display the edit form.

- De-select the Default Color check box.
- Click the Custom Color picker.
- Either select the color or enter the Hex color or RGB color.

- Click the Edit Keyword button to save.
Now you can return to the Space module and view the Custom Color By; for example this is the Color By Department.
