Allow Employees in a Team or Neighborhood to Reserve Desks
When you want your employees to reserve any desk in their allocated team and/or neighborhood blocking.
Team Example
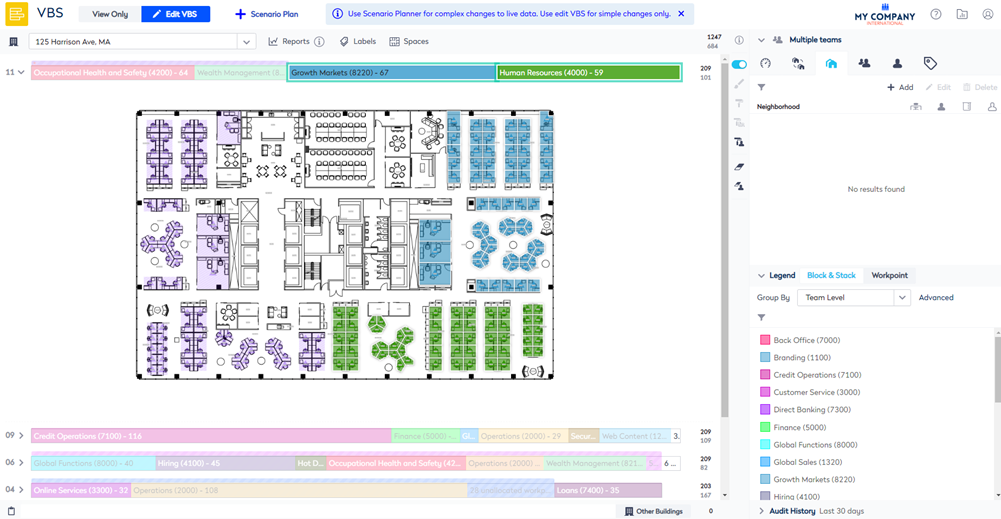
In the VBS you can see that the 11th Floor of the Harrison Office is allocated to different teams. In this example, you will set up the employees in the teams to be able to reserve their team's desks.
From the Spaces Module, complete the following:
- Navigate to Spaces.
- Use the Location Selector drop-down to navigate to the building and floor.
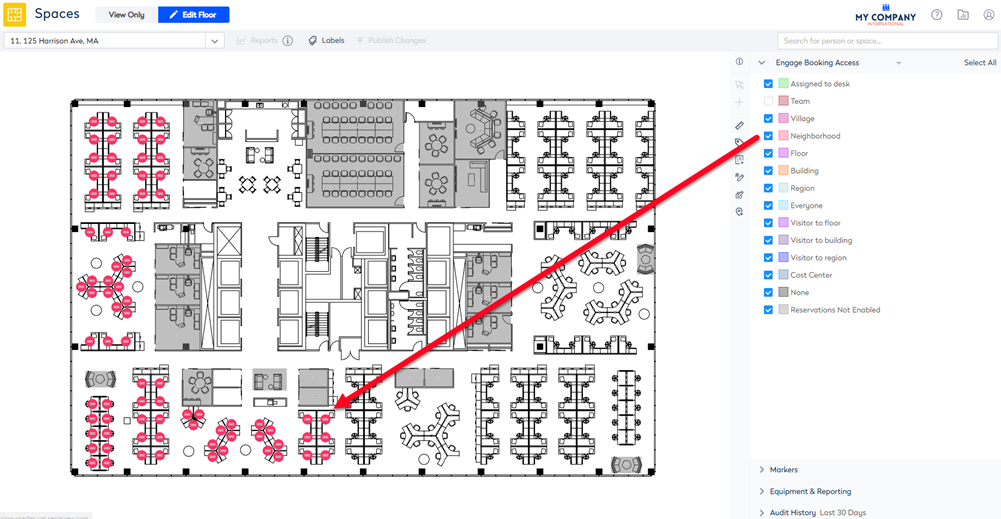
- From the Selector, select the Engage Booking Access view. The floorplan displays the booking access by color.
This view only displays spaces that are set to Interactable, if you do not see a specific space then check the Space Type's setting, refer to Set up the Space Types for Engage.
4. Click the Edit Floor icon.
5. Click the Bulk Update ![]() icon.
icon.
6. Click on the floorplan and drag the cursor across the points to select.
If you need to reposition the floorplan when selecting points, then use the panning mode. Either hold down the space bar or click the Planning Mode ![]() icon and then reposition the floorplan.
icon and then reposition the floorplan.
7. For the Reserving Enabled check box, click the Don't Update and change this to Overwrite.
8. Check the Reserving Enabled check box. When this is checked this will enable the Booking Access drop-down.
9. For the Booking Access drop-down, click the Don't Update and change this to Overwrite.
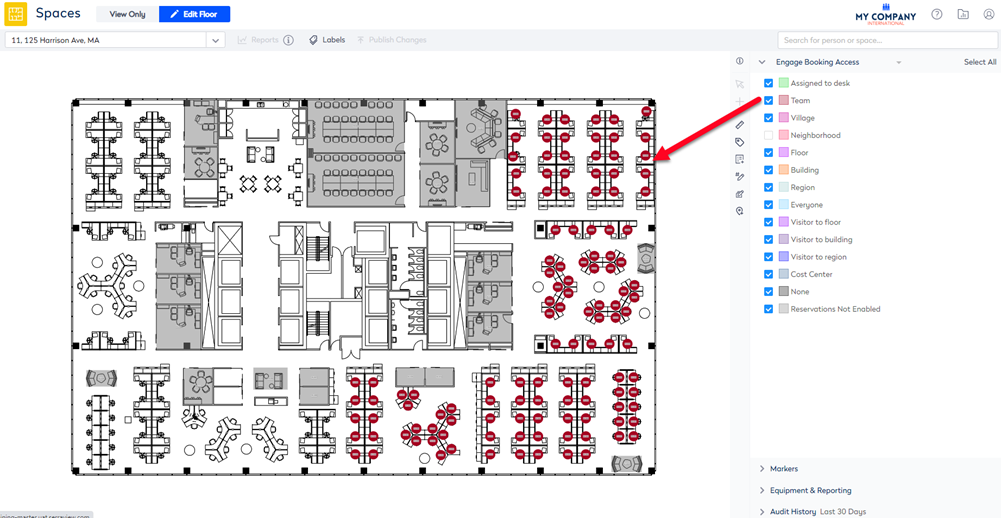
10. From the Booking Access drop-down, select Team.
11. Click the Update button.
12. Click the Publish Changes button.
13. Click the Cancel button to close the Bulk Update.
The spaces are updated to allow the employees in the teams to reserve the desks.
Neighborhood Example
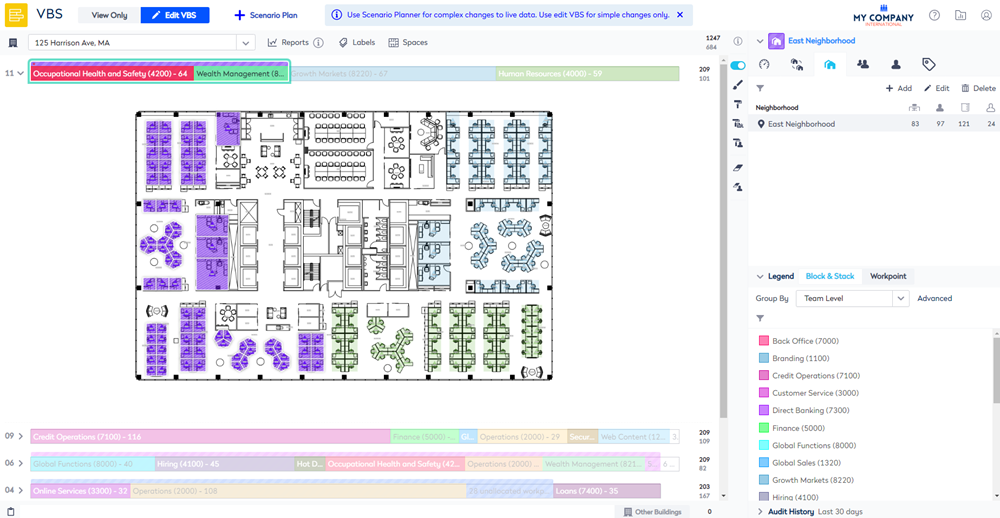
In the VBS you can see that the 11th Floor of the Hunting Office is allocated to a neighborhood. In this example, you will set up the employees in the neighborhood to be able to reserve their neighborhood's desks.
From the Spaces Module, complete the following:
- Navigate to Spaces.
- Use the Location Selector drop-down to navigate to the building and floor.
- From the Selector, select the Engage Booking Access view. The floorplan displays the booking access by color.
- Click the Edit Floor icon.
- Click the Bulk Update
 icon.
icon. - Click on the floorplan and drag the cursor across the points to select.
If you need to reposition the floorplan when selecting points, then use the panning mode. Either hold down the space bar or click the Planning Mode ![]() icon and then reposition the floorplan.
icon and then reposition the floorplan.
7. For the Reserving Enabled check box, click the Don't Update and change this to Overwrite.
8. Check the Reserving Enabled check box. When this is checked this will enable the Booking Access drop-down.
9. For the Booking Access drop-down, click the Don't Update and change this to Overwrite.
10. From the Booking Access drop-down, select Neighborhood. This allows all employees with access to Engage can reserve the desk.
11. Click the Update button.
12. Click the Publish Changes button. The spaces visually change to display that there booking access set to Neighborhood.
13. Click the Cancel button to close the Bulk Update.
The spaces are updated to allow the employees in the neighborhood to reserve the desks.