Configure Villages
In the Configuration module, you can set up the villages and then edit their name, color, and target ratio.
Add a Village
You can add your new village(s), complete the following:
- Navigate to Admin Settings > System Config > General > VBS.
- Click the Villages tab.
- Click the Add icon. The Add form displays.
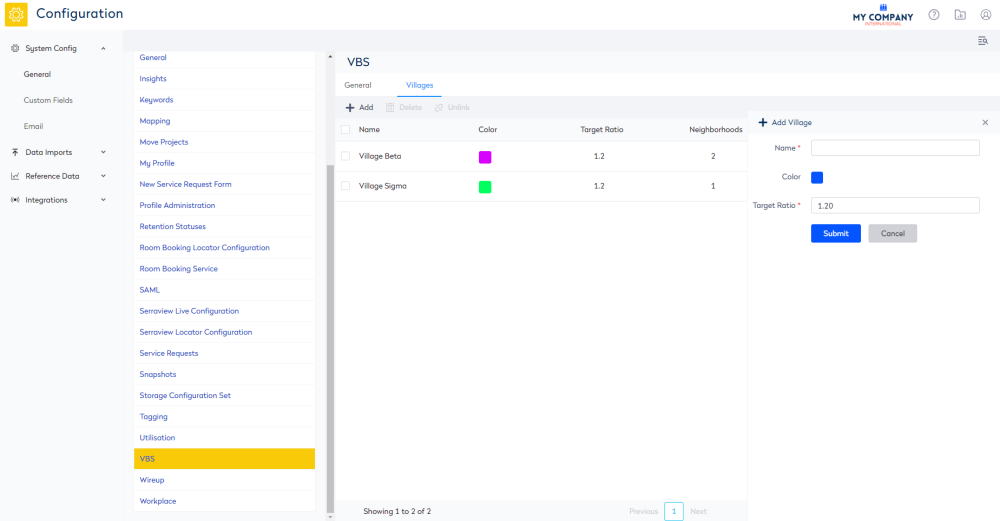
4. In the Name field, enter a unique village name.
5. Click the color picker  icon. The color section displays. You can either select a color, enter in the HEX code, or enter in the RGB (red, green, blue) numbers.

Any neighborhoods that are linked to this village will inherit the village's color.
6. In the Target Ratio field, enter the target ratio for the village.
Any neighborhoods that are linked to this village will inherit the village's target ratio.
7. Click the Submit button.
Edit a Village
You can edit an existing village, complete the following:
- Navigate to Admin Settings > System Config > General > VBS.
- Click the Villages tab.
- Click on the village you want to edit. The Update Village form displays.
- Edit the details.
- Click the Submit button.
Unlink and Delete a Village
Before you delete a village you must unlink the village from the neighborhoods.
- Navigate to Admin Settings > System Config > General > VBS.
- Click the Villages tab.
- Selec the village(s) you want to unlink and then delete.
- Click the Unlink icon. The message "This will remove all neighborhoods from the village" displays.
- Click the OK button. The villages will be unlinked from the neighborhoods.
- Click the Delete icon. The message "Are you sure you want to delete the selected village?" displays.
The village(s) are deleted.