Update or Archive Switches
Level: Administrator
When you are maintaining Wireup and need to update switches or archive old switches, you can use the 350 Switch Report to import the switches into the database.
Remember
- Import Format - The imports have a Trial Import and this will let you know what rows will be ignored, updated, or archived before you import into the database. This is letting you know if the import format is set up correctly.
- Import Switch Data - We recommend you test your Switch Import on your UAT environment first before your run it in PROD environment, because if your switch data is incorrect you can easily mess up the switches. This will only be a effective test if you UAT environment is up-to-date with your PROD environment.
If you don't have access to the Switch Import and/or unsure of how to set up the Switch Import file then send the file to the Serraview Support Team, use the File Upload's category Other and include a comment.
Step 1. Download the Switch Import Report
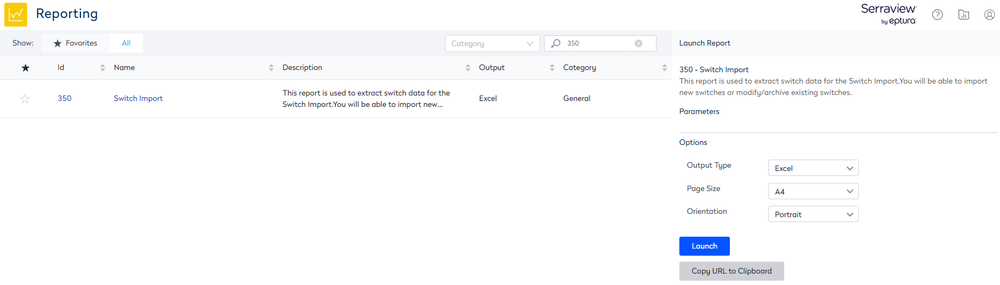
- Navigate to Insights > Reporting.
- Search for and open 350 Switch Report.
- Click the Launch button.
- Click the Report Queue
 icon.
icon. - Click the Switch Import to download the report.
Step 2. Open the Switch Import Report
- Open the Switch Import report in Microsoft Excel.
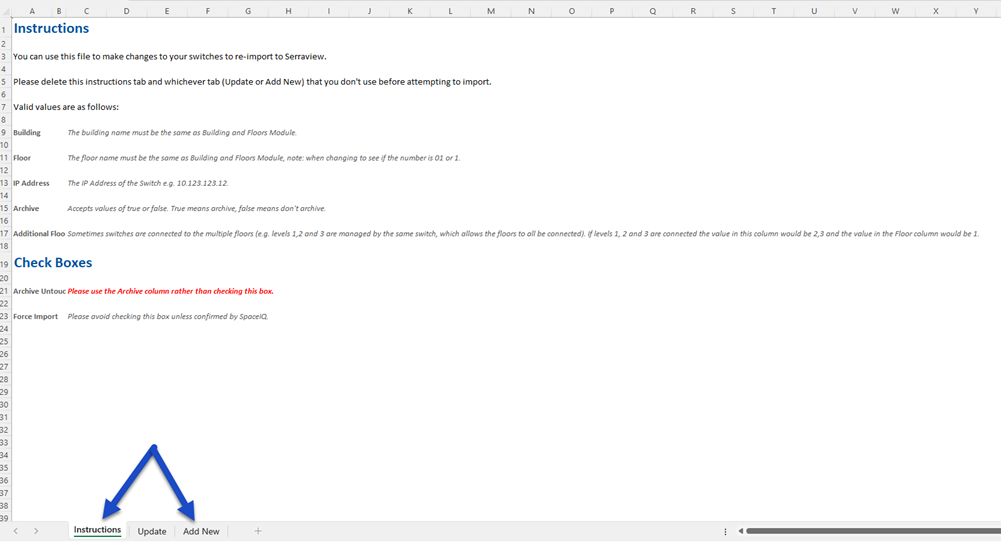
- Delete the Instructions tab.
- Delete the Add New tab.
Step 3. Complete the Update tab
- Complete the following columns:
- Building - The building name must be the same as Building and Floors Module.
- Floor - The floor name must be the same as Building and Floors Module. Beware of your floor number format as 01 is different to 1, see Import Troubleshooting.
- Additional Floors - Sometimes switches are connected to the multiple floors (e.g. levels 1,2 and 3 are managed by the same switch, which allows the floors to all be connected). If levels 1, 2 and 3 are connected the value in this column would be 2,3 and the value in the Floor column would be 1.
- IP Address - The IP Address of the Switch e.g. 10.123.123.12.
- Switch Name - This is the name of the switch.
- Archive - Accepts values of true or false. True means archive and false means don't archive.
- Remove the rows that don't have changes.

- Save the Switch Import file.
Step 3. Set up the Switch Import
- Navigate to Admin Settings > Data Imports > Data Imports.
- Click Switch Import. The Switch Import screen displays.
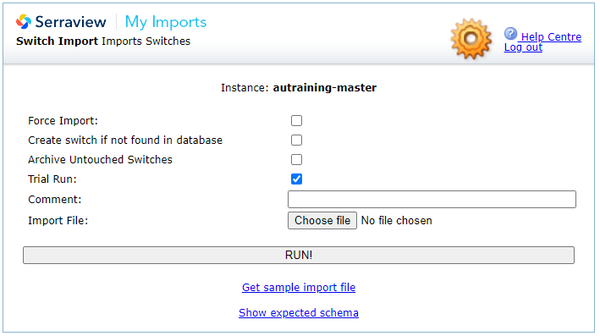
Do not use the Force Import check box unless instructed by Serraview Support.
Do not use the Archive Untouched Switches check box.
- Click the Import File's Choose file button.
- Navigate to the file and select it.
Trial Run
We recommend that you complete a trial run of the import before you uncheck the Trial Run check box and import in the data. In this example, you can see that 3 rows will be update in the database.
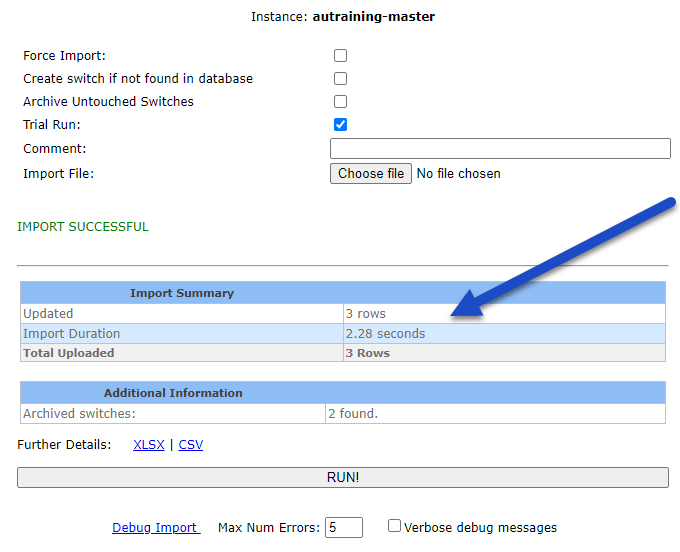
- Click the Run! button.
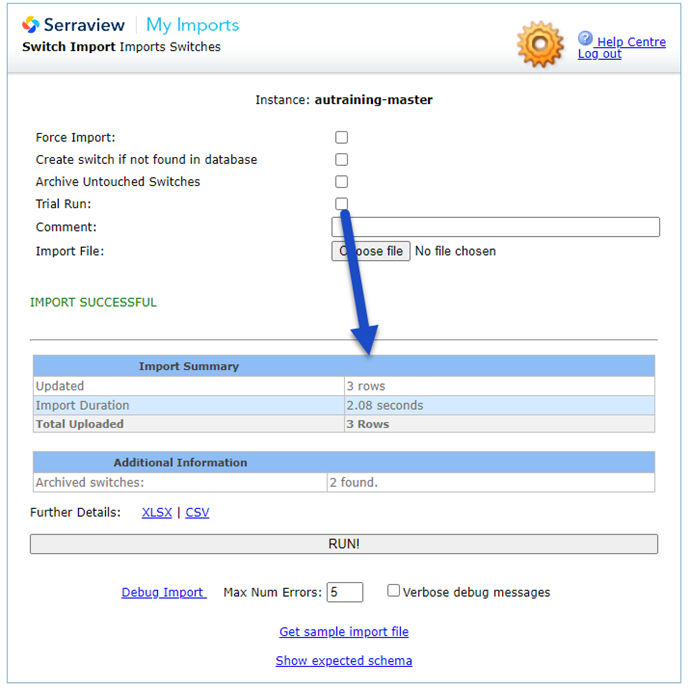
In this example the Trail Run check box is unchecked and 3 rows have been updated in the database.