Set up All Day Desk Reservations and Check-in Times
Level: System Administrator
You can configure the check-in times for employees to check into their reserved desks. This can be either set up as an all-day desk reservation or a time block reservation.
This article covers the All-Day Desk Reservations and remember that when your employee:
- makes a desk reservation on the same day within the check-in window, you will be checked-in automatically.
- cancels their desk reservation, then Engage will let other employees reserve the desk.
All Day Desk Reservation Example - Check-in Start Time 00:00 AM Midnight
In this example, the Engage users make a desk reservation where:
- All day desk reservation start time = 0:00 am (midnight)
- Check-in is from 2:00 pm to 11:00 pm (day before the reservation)
- Desk Check-in Open Window = 600 minutes (Check-in becomes available 10 hours before the reservation start time)
- Check-in Window Duration = 540 minutes (Check-in is open for 9 hours duration)

All day desk reservation start time“ is used to calculate the desk check-in start time. No matter what time is set for “All day desk reservation start time“, the time listed in the emails and reports will display as 12:00 AM. This is because the desk is being reserved for the entire day
All Day Desk Reservation Example - Check-in Start Time 09:00 AM
In this example, the Engage users make a desk reservation where:
- All day desk reservation start time = 9:00 am
- Check-in is from 7:00am to 3:00pm
- Desk Check-in Open Window = 120 minutes (Check-in becomes available 2 hours before the reservation start time)
- Check-in Window Duration = 480 minutes (Check-in is open for 8 hours duration)

If you are using the Auto-Cancellation of Desks, you need to make sure your Check-in Window Duration time is greater than the Desk Check-in Open Window time or this will result in your desk bookings being canceled. Learn about this setting in, Set up Auto-Cancellation of Desk Reservations.
This can be set globally for all your buildings or set for each building, see:
- Global Settings
- Building Settings
Global Settings
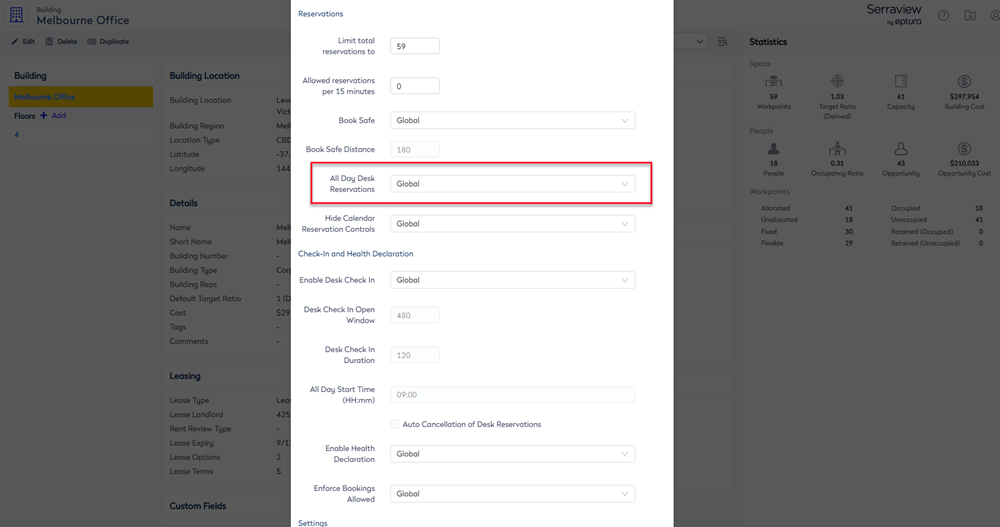
The default setting for all your buildings is global and all you need to do is complete the Engage Configuration below.
For example, the building's field is set to Global.
Step 1. Enable the All Day Desk Reservation
Complete the following:
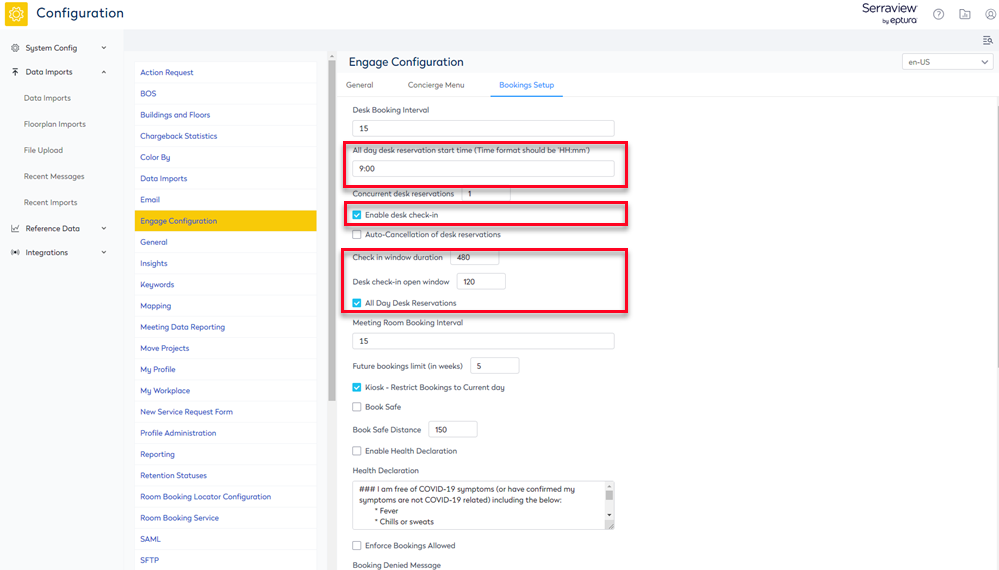
- Navigate to Admin Settings > System Config > General > Engage Configuration.
- Click the Bookings Setup tab.
- Check the All Day Desk Reservation check box.
Step 2. Set up the Desk Check-in
Then enable the desk check-in.
- In the All day desk reservation start time field, enter the time in the format HH:mm.
- Check the Enable desk check-in check box.
- In the Check in window duration field, enter the number of minutes. This is the time the check in window is active.
- In the Desk check-in open window field, enter the number of minutes. This is the time before the desk reservation start time the check-in will be open. Note, if you set this to 0 minutes then this will start the desk check-in straight away.
- Click the Update button.
Building Settings
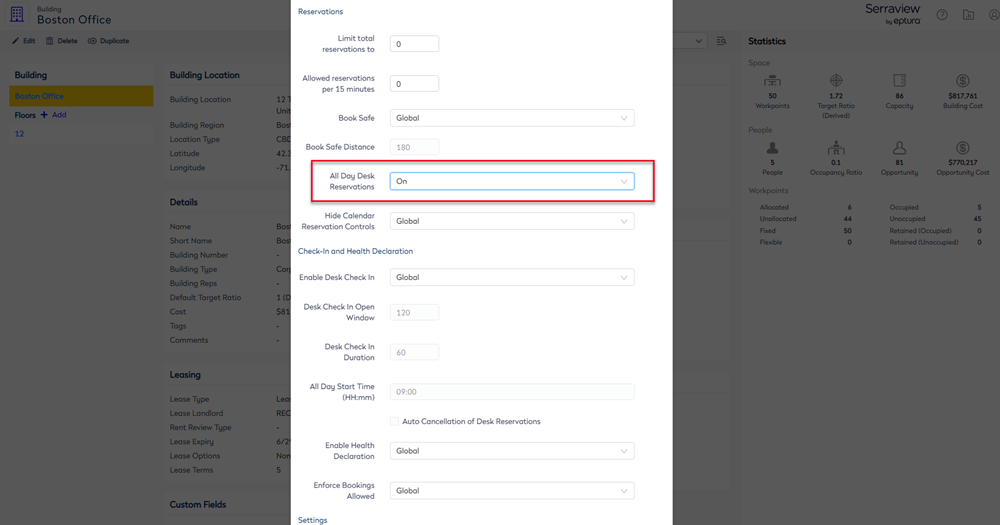
Step 1. Enable All Day Desk Reservation for a Building
Complete the following:
- Navigate to Resources > Buildings & Floors.
- Click on the building. The building details displays.
- Click the Edit button. The Update Building dialog displays.
- From the All Day Desk Reservations drop-down, select On.
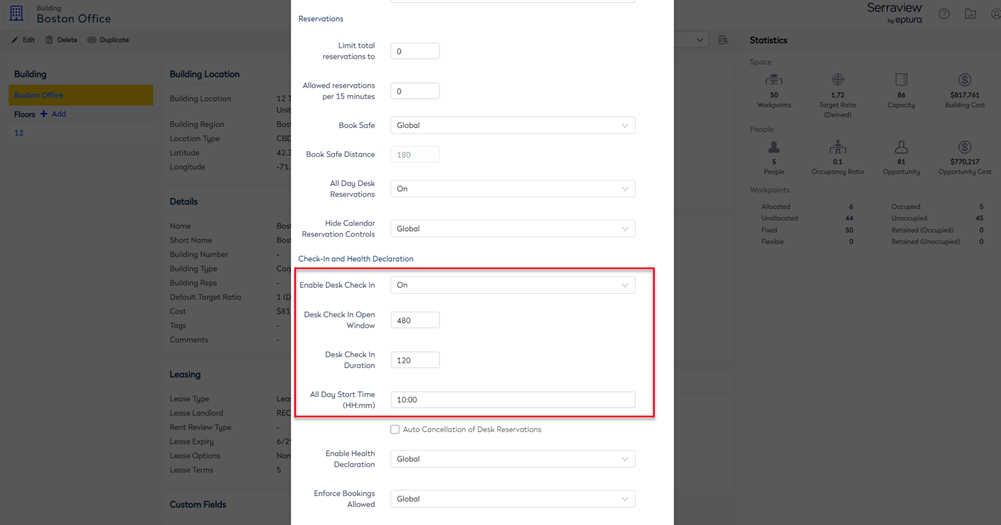
Step 2. Set up the Desk Check-in
Then enable the desk check-in, complete the following:
- In the All Day Start Time (HH:mm) field, enter the time in the format HH:mm.
- From the Enable desk check-in drop-down select On.
- In the Desk Check In Open Window field, enter the number of minutes. This is the time the check in window is active.
- In the Desk Check In Duration field, enter the number of minutes. This is the time before the desk reservation start time the check-in will be open. Note, if you set this to 0 minutes then this will start the desk check-in straight away.
- Click the Update Building button.