Set up Time Blocked Desk Reservation and Check-in Times
Level: System Administrator
You can configure the check-in times for employees to check into their reserved desk. This can be either set up as an all-day desk reservation or a time block reservation.
This article covers the Time Block Reservation and remember when your employee:
- makes a desk reservation on the same day, you will be checked-in automatically.
- cancels their desk reservation then Engage will let other employees reserve the desk.
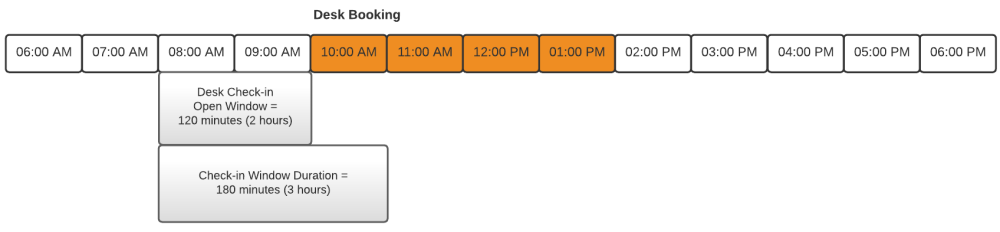
Time Block Reservation Example
In this example, the Engage user will make a desk reservation where:
- Check-in is from 8 AM to 11 AM
- Desk Check-in Open Window =120 minutes
- Check-in Window Duration = 180 minutes
If you are using the Auto-Cancellation of Desks you will need to be make sure your Check-in Window Duration time is greater than the Desk Check-in Open Window time or this will result in your desk bookings being canceled. Learn about this setting in, Set up Auto-Cancellation of Desk Reservations.
This can be set globally for all your buildings or set for each building, see:
- Global Settings
- Building Settings
Global Settings
Step 1. Disable All Day Desk Reservations
Complete the following:
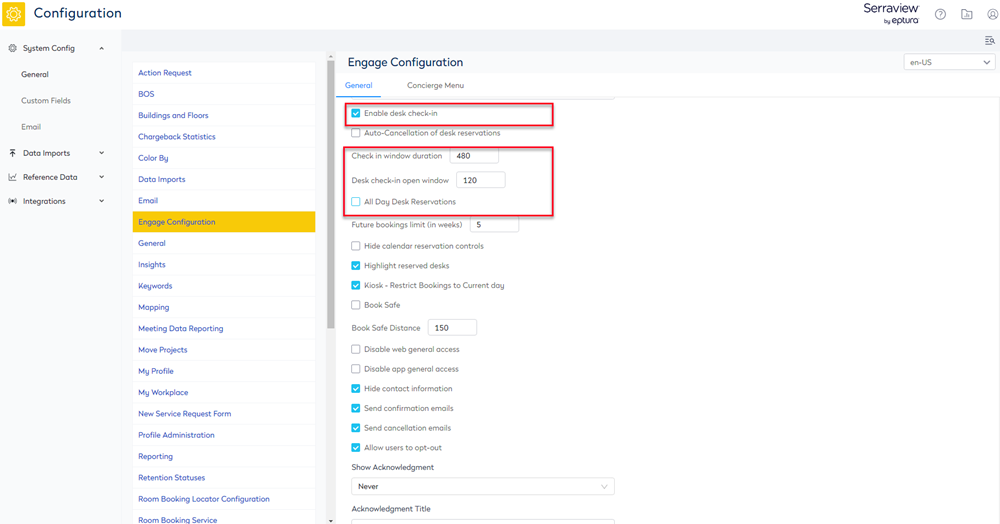
- Navigate to Admin Settings > System Config > General > Engage Configuration.
- Uncheck the All day desk reservation check box, if you prefer time block reservation which allows your employees to choose the desk booking such as All day or 1 hour, 2 hours,
Step 2. Set up the Desk Check-in
Then enable the desk check-in, complete the following:
- Check the Enable desk check-in check box.
- In the Check in window duration field, enter the number of minutes. This is the time the check in window is active.
- In the Desk check-in open window field, enter the number of minutes. This is the time before the desk reservation start time the check-in will be open.
- Click the Update button.
Building Settings
Step 1. Disable the All Day Desk Reservations for a Building
Complete the following:
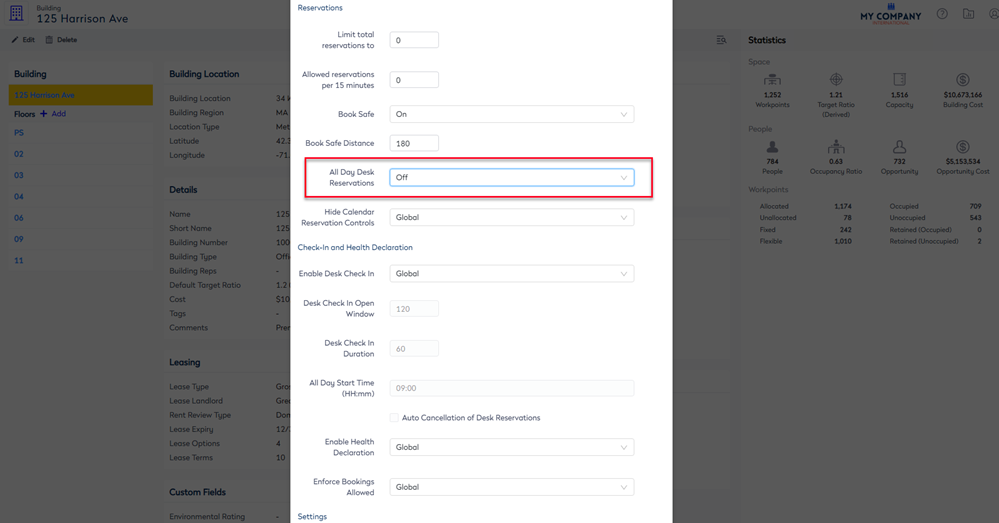
- Navigate to Resources > Buildings & Floors.
- Click on the building. The building details displays.
- Click the Edit button. The Update Building dialog displays.
- From the All Day Desk Reservations drop-down, select Off.
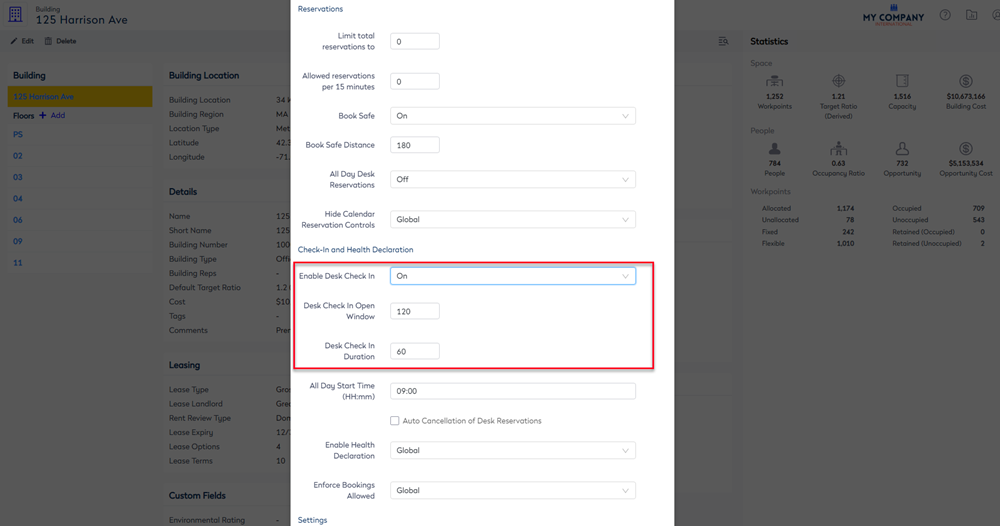
Step 2. Set up the Desk Check-in
Then enable the desk check-in, complete the following:
- From the Enable desk check-in drop-down select On.
- In the Check In Open Window field, enter the number of minutes. This is the time the check in window is active.
- In the Desk Check In Duration field, enter the number of minutes. This is the time before the desk reservation start time the check-in will be open. Note, if you set this to 0 minutes then this will start the desk check-in straight away.
- Click the Update Building button.