Add Switches
Level: Administrator
When you are completing the Wireup configuration, you can use the 350 Switch Report to import the switches into the database.
Step 1. Download the Switch Import Report
- Navigate to Insights > Reporting.
- Search for and open 350 Switch Report.
- Click the Launch button.
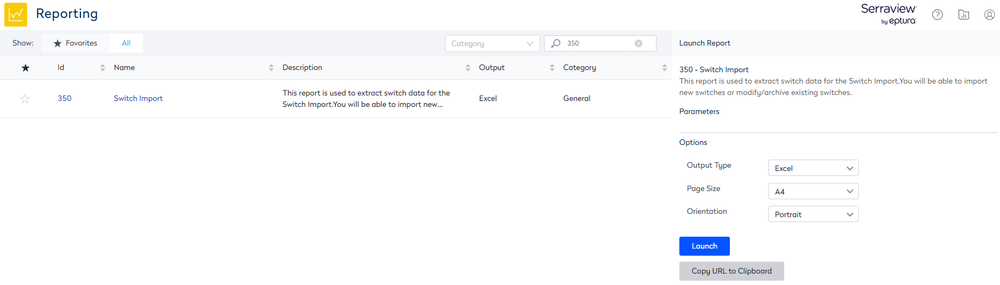
- Click the Report Queue
 icon.
icon. - Click the Switch Import to download the report.
Step 2. Open the Switch Import Report
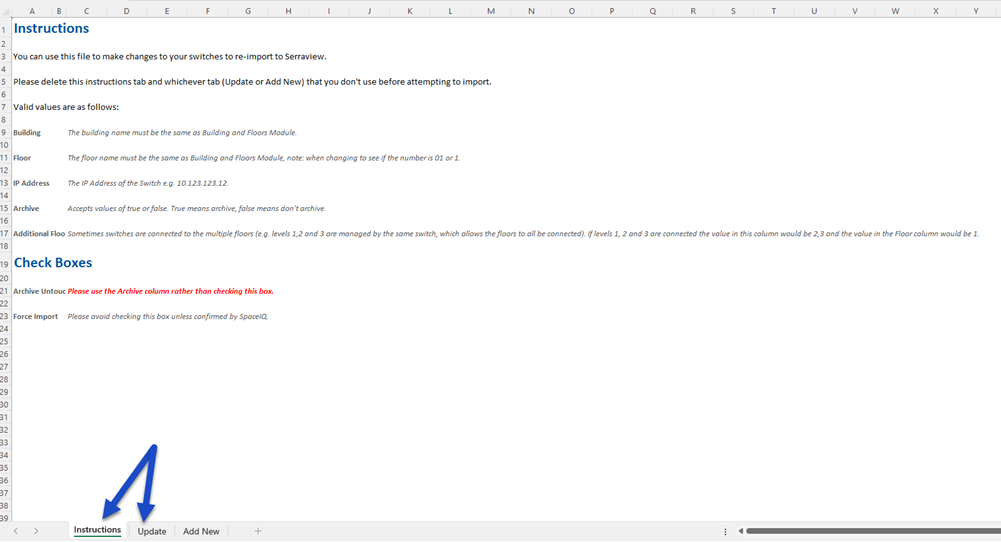
- Open the Switch Import report in Microsoft Excel.
- Delete the Instructions tab.
- Delete the Update tab.
Step 3. Complete the Add New tab
- Complete the following columns:
- Building - The building name must be the same as Building and Floors Module.
- Floor - The floor name must be the same as Building and Floors Module. Beware of your floor number format as 01 is different to 1, see Import Troubleshooting.
- IP Address - The IP Address of the Switch e.g. 10.123.123.12.
- Additional Floors - Sometimes switches are connected to the multiple floors (e.g. levels 1,2 and 3 are managed by the same switch, which allows the floors to all be connected). If levels 1, 2 and 3 are connected the value in this column would be 2,3 and the value in the Floor column would be 1.
- Switch Name - This is the name of the switch.
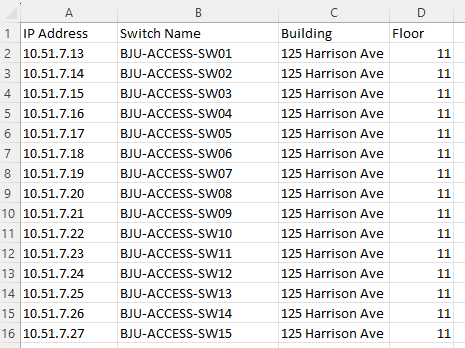
- Save the Switch Import file.
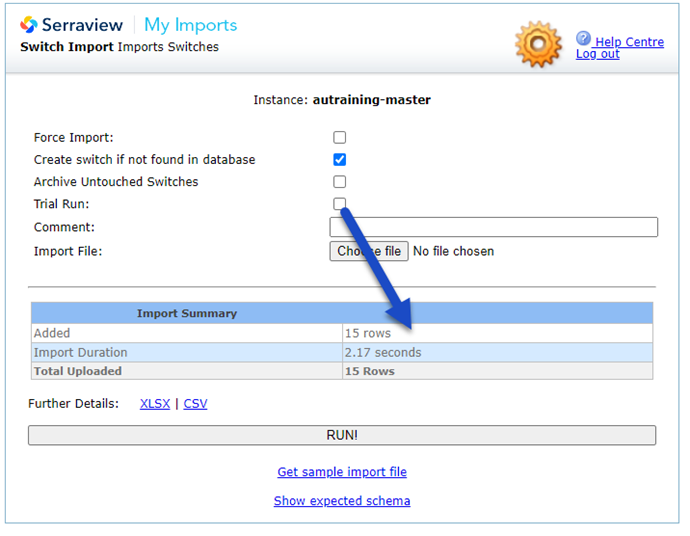
Step 3. Set up the Switch Import
- Navigate to Admin Settings > Data Imports > Data Imports.
- Click Switch Import. The Switch Import screen displays.
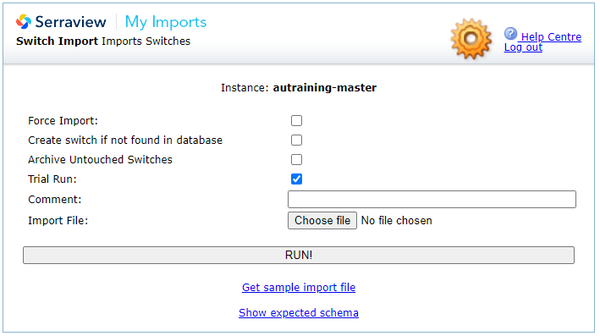
Do not use the Force Import check box unless instructed by Serraview Support.
- Check the Create switch if not found in database check box.
- Click the Import File's Choose file button.
- Navigate to the file and select it.
- Click the Run! button.
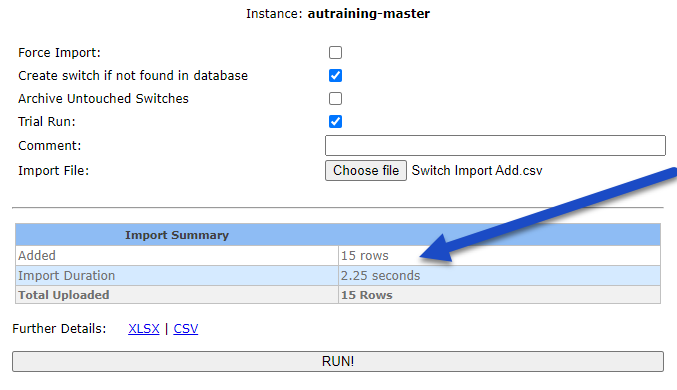
In this example the Trail Run check box is unchecked and 15 rows have been added to the database.