Add Serraview Polyline
If you are using Serraview’s Floorplan Importer, new spaces must be created in your CAD file and then uploaded. Do not use the Spaces module to create them. If you are unsure if you are using Floorplan Importer, then check with your System Administrator.
Prerequisites
Understand your Space Hierarchy
Before you add Serraview polylines to the floorplan, you must understand the parent and children space types relationship in your Space Hierarchy, refer to Toggle Space Types to see what space types are on your floorplan.
The Serraview polylines that can be added on the floorplan are:
- a rectangle or a polygon shape. The polygon shape is useful for drawing irregular shapes.
- a point.
Move around the Floorplan
As you add new Serraview Polylines to the floorplan you can remain in the Add Polyline mode. If you want to move around the floorplan, then click the Panning Mode  icon to toggle the Panning Mode ON
  . When the Panning Mode is ON this will change the click-drag mouse behavior from drawing to panning.
When you are ready to add a Serraview Polyline, click the Panning Mode icon to toggle it OFF .
Add Serraview Polyline Examples
Example - Add a Desk: Standard space type on a Workspace parent space type
Step 1. Add a shape as a Square or Rectangle
You can draw a shape as a simple square or rectangle. In Serraview, Workspaces represent the outside edges of your desk area and is used to color in your workstations in the Visual, Block and Stack.
From the Spaces module, complete the following:
- Click the Edit Floor icon.
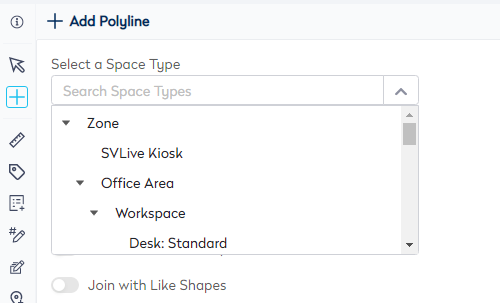
- Click the Add Polyline
 icon. The Add Polyline panel displays.
 - From the Select a Space Type selector, either browse to a space type or search for a space type. For example, Workspace.
- The shape defaults to Rectangle.
- Optional - Overwrite Other Shapes.
- Optional - Join with Like Shapes.
- On the floorplan, draw the rectangle shape.
- Click the Publish Changes icon.
Step 2. Add a Point (Workpoint)
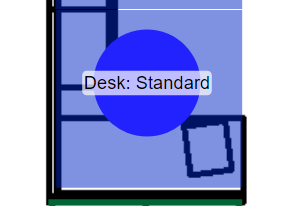
After you have drawn your workspace, you are ready to add your workpoints to the floorplan. The workpoints are used to indicate the desks on the floorplan and they display as dots, each representing one workstation. They are most commonly placed on the chair at each desk.
It is important to remember when drawing workpoints that they must be placed on a parent workspace. You can tell the type of workspace required for each space by looking at the Space Hierarchy in the Space Types drop-down.
For example, the Workspace space type has been drawn onto the floorplan.
Then the Desk: Standard space type can be drawn onto the Workspace (parent space type).
If you add a Desk: Standard space type to the floorplan with no Workspace (parent space type), then Serraview displays the message "Desk Standard must be mapped in a Workspace" and the change will be discarded.

From the Spaces module, complete the following:
- Click the Edit Floor icon.
- Click the Add Polyline icon. The Add Polyline panel displays.
- From the Select a Space Type selector, either browse to a space type or search for a space type. For example, Desk: Standard.
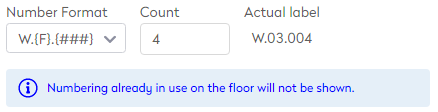
- From the Number Format drop-down, select the number format.
- In the Count field, either use the next available workpoint number or enter the workpoint number or use the spin button to increase or decrease the number. For example, the work point number 2 will display in the format W.03.002.

Serraview will displays the Count as the next available number or you can change the Count number. If the number is already in use then the information message displays.
While it is recommended to have a limited number of numbering formats within your buildings to maintain consistency across the portfolio, your Serraview Administrator can create a new numbering format if required.
The Number Format templates can be updated in the Space Type Hierarchy's Name Templates, refer to Add, Edit, or Delete the Space Types.
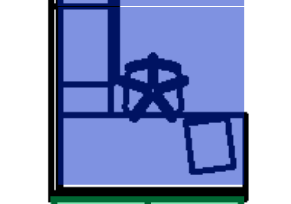
6. On the floorplan, click the point onto the parent space type. For example, the Desk: Standard's point is placed onto the Workspace's polygon.
7. Click the Publish Changes icon.
Reference: Add desk, Add workpoint
Example - Add a Desk: Snowflake space type on a Workspace parent space type
Step 1. Add a Shape as Custom Shape
If you have desks that are irregular shapes then you can draw custom shapes.
From the Spaces module, complete the following:
- Click the Edit Floor icon.
- Click the Add Polyline icon. The Add Polyline panel displays.
- From the Select a Space Type selector, either browse to a space type or search for a space type. For example, Snowflake.
- From the shapes option button, select Custom Shape.
- Optional - Overwrite Other Shapes.
- Optional - Join with Like Shapes.
- On the floorplan, draw the custom shape.
- Click the Publish Changes icon.
Remember for the shape to be complete the first and last points need to be joined.
Step 2. Add a Point (Workpoint)
Now you can add your workpoints to the floorplan, refer to the above for the instructions. In the example, below the Desk: Snowflake space type is used.