Connect using Insights Direct Connect from Tableau to Snowflake
Prerequisites
- You must have purchased a license for Insights Direct Connect.
- Download and install Tableau.
After you have established your Direct Connect account, our Support team will provide you with:
- Connection String and Warehouse Name.
- Website link to set up your credentials to Snowflake. Before you complete the connection to Snowflake, make sure you follow the link and set up your credentials.
Snowflake Direct Connect
After you have completed the prerequisites, you can set up the connection to Snowflake.
- Open Tableau.
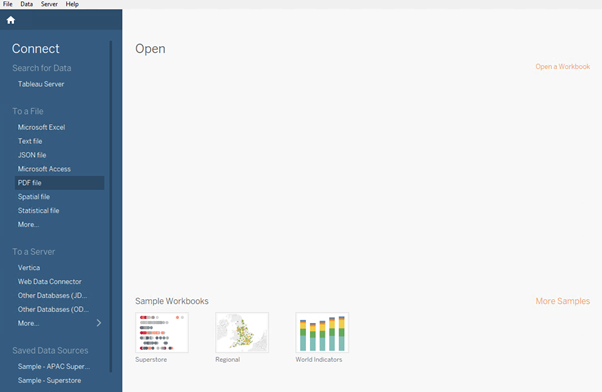
2. From the left menu under the heading To a Server, click More…. The menu expands.

3. Click Snowflake. The Snowflake dialog displays.
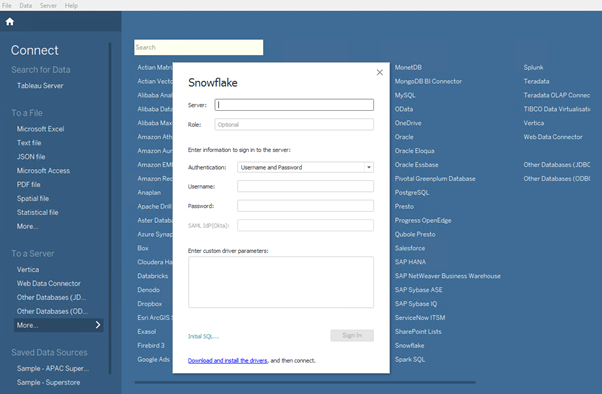
4. In the Server field, enter the server URL. Details are provided by the Serraview team.
5. In the Username field, enter the user name. The username and password are provided by Serraview team.
6. In the Password field, enter the password.
7. Click the Sign In button. The Data Source screen displays.
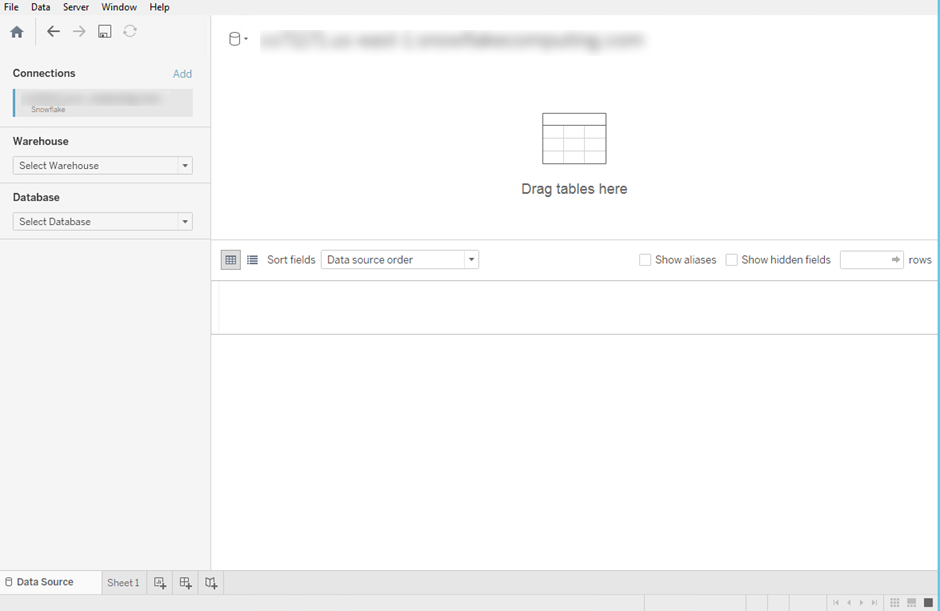
8. From the Warehouse drop-down, select the warehouse.
9. From the Database drop-down, select the database. The schema drop-down displays.
10. From the Schema drop-down, select the schema. The tables display.
Now you can start to build your visuals and always remember to save your work.