Space Details Form
Watch the Video - Update the Space Details
You can edit the space details and the Edit Space form can be access via the Spaces module or the VBS.
From the VBS complete the following.
- On the stack, select the floor.
- Click the toggle
 icon to display the floorplan.
 - On the floorplan, double click a space. The Update Space form displays.
The following are the details of the Update Space form. An example is the space Desk: Standard and the following tabs display.
Overview Tab
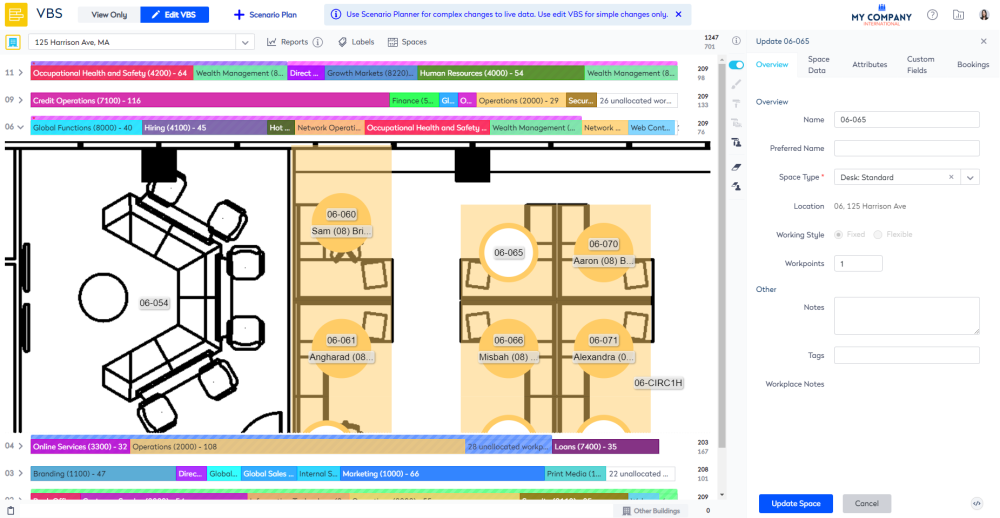
The Overview tab gives you the ability to:
| Field | Description |
|---|---|
|
Name |
Name of the space. For example: 9.048; M.9.02. |
| Preferred Name |
The preferred name of a space, so that user friendly names, such as North Boardroom, can be shown in the user interface instead of their architectural names, such as M.04.12. The preferred names are used in your office's physical signage and known to employees. |
| Space Type |
The type of space. For example: Desk: Standard; Meeting Room. VBS will only display spaces on the floorplan where the space has the Charge Rule set and the Allow Org Unit Allocations check box is checked. Therefore, we recommended you update the space type in the Spaces Module, see Update Space Details via the Spaces Module. |
| Location | The location of the neighborhood and this is not editable. |
|
Working Style |
This option button is only enabled when a workpoint belongs to a fixed team. Change the working style to either select Fixed or Flexible. Learn more in Change a Team's Working Style. |
| Workpoints | Update the number of workpoints. |
| Seats | Update the number of seats within the space. This can be used for offices, meeting rooms, shared spaces. This value is used to filter spaces in Locator. |
| Area | The area of the space. |
| Notes | Enter any comments. |
| Tags |
You can update tag individually or you can use the tag painter in the Spaces module, see Tag Spaces. Either a custom tag against a or delete a tag. The default tags are managed in configuration, see Tagging. |
Space Data Tab
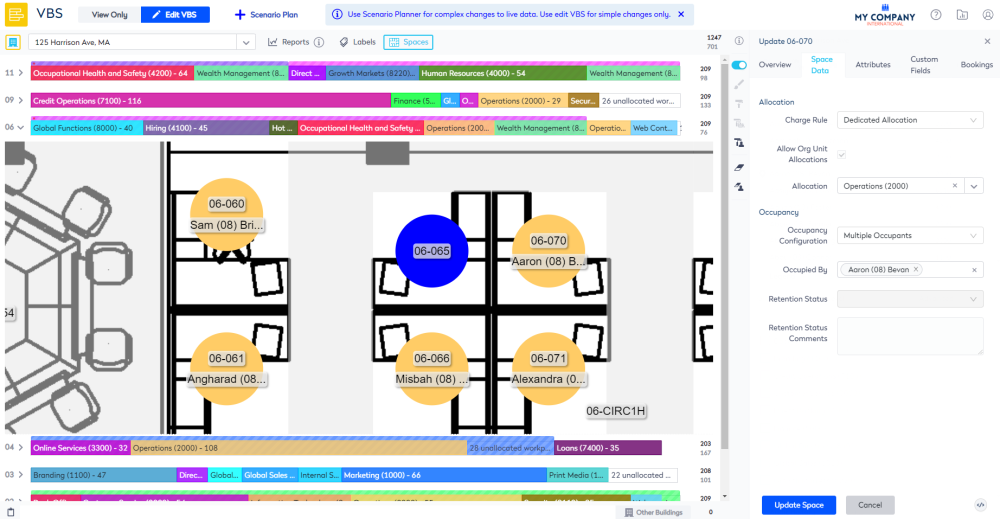
The Space Data tab gives you the ability to:
| Field | Description |
|---|---|
| Charge Rule |
The charge rule, which controls whether or not the space can be allocated to a team. For information on how to bulk update charge rules, see the following: |
| Allow Org Unit Allocations |
Check to Allow Org Unit Allocations. VBS will only display spaces on the floorplan where the space has the Charge Rule set and the Allow Org Unit Allocations check box is checked. |
| Occupancy Configuration |
This displays the occupancy configuration of the space either:
|
| Occupied By |
The name of the occupant. |
| Retention Status |
The retention status applied to the space. For more information, see Manage Retention Status in VBS. Remember a space must be assigned to a team before a retention status can be applied. |
| Retention Status Comments | Any comments about the retention status. |
Attributes Tab

The Attributes tab gives you the ability to:
| Field | Description |
|---|---|
| Attributes |
Add, edit, or remove the space's attributes, see Add or Remove the Space's Attributes. Locator If you are using Location, see Change a space’s capacity, attribute or name. |
| Show Availability in Locator |
Check Show Show Availability in Locator check box for the space to display in Locator. Locator If you are using Location, see Change a space’s capacity, attribute or name. |
| Reserving Enabled |
Check Reserving Enabled check box for the space to be reserved through Engage or Locator. Engage If you are using Engage see Configure Desk Reservations and Configure Space Reservations. Locator If you are using Locator, see Configure Locator Space Reservations. |
| Booking Access |
Set the Booking Access to configure who is allowed to reserve the space. Engage If you are using Engage see Configure Desk Reservations and Configure Space Reservations. |
|
Reservable From Reservable To |
Engage You will be able to specify a Reserve From date or the Reserve To date for when a desk is available to be reserved. This is useful when you need to take a desk offline for maintenance. Learn more in Limit a Space's Reservation by Date. |
|
In the Email field, enter the resource calendar's email address for spaces such as meeting rooms. Engage If you have the Calendar integration set up then this field will need to be populated with the resource calendar's email address, see Set up Space Reservations with Calendar Integration. If you are not using a Calendar integration then this field needs to be blank. For more details, see Set up Space Reservations without Calendar Integration. Locator If using Locator this field will let users to view the space's availability in Locator. This field can be updated in bulk via the Workpoint Import, see Workpoint Import and Locator. |
|
| Image |
Engage The Image area is used to set up the Space Photos for Engage, see Add Photography for Employees and Spaces. |
| Data Points |
Displays the data point / switch port that the space is connected to if it is used by Locator. |
Custom Fields Tab
The Custom Fields tab displays any custom fields that have been set up against the space to record additional data relevant to your business.
If this tab is blank it means that no custom fields are available. For more information, see Custom Fields.

Bookings Tab
If you are using Engage then the Bookings Tab displays. Your System Administrator has the ability to cancel desk reservations.
For more information, see Cancel a Reservation as an Admin.

Save the Space Form
After you have completed your updates, save the form.
- Click the Update Space button.