Manage Snapshots
The Serraview reports let you analyze current Serraview data and the snapshots let you analyze historical data. Snapshots can be created automatically or manually, and if you want to use snapshots, then contact your System Administrator.
Snapshot can be created:
- at set frequency, e.g. monthly.
- at a set time. We recommend running this outside of business hours.
- with a snapshot name that can include today's date or a timestamp.
Serraview has a limit of 150 total snapshots and this equates to:
- 12.5 years' worth of monthly snapshots
- 6.25 years' worth of bi-monthly snapshots
- 2.9 years' worth of weekly snapshots
If your portfolio has 150 snapshots and a new one is created, Serraview will automatically delete the oldest deactivated snapshot. If there are no deactivated snapshots, the Serraview will delete the oldest active snapshot instead.
If you want to maintain older historical data and your portfolio is approaching the limit, then we recommend you deactivate the recent snapshots. This way, you can preserve the information most important to you. See below to learn how to deactivate snapshots.
If you frequently use Snapshots to run specific reports against monthly historical data, then we recommend you use the Automated Reports instead. That way, the reports will already be waiting for you in the Document Library.
Automate a Snapshot
Pre-requisite Knowledge
- Understanding of basic JSON
If you need help with setting up the automated snapshot's JSON code, then contact the Serraview Support team. In the request you will need to specify the following:
- frequency
- time
- name
Automation
You can automate the snapshot.
- Navigate to Admin Settings > System Config.
- Select General > General.
- In the Automated Snapshot Schema field, enter the JSON code.
Remember to validate the JSON code before you paste it into the field, use the JSON Validator https://jsonlint.com/ and below we have Schema Examples and JSON Code descriptions for the Automated Snapshots.
5. Click the Update button.
Automated Snapshot Schema Examples - JSON Code
The automated snapshots are created using the JSON (JavaScript Object Notation) format.
Monthly Example
This snapshot is created in the middle of the month and at the last day of the month e.g. "days": "15,-1", at the time of 23:30 and with the name Monthly with today's date.
{
	"snapshots": [
		{
			"frequency": "monthly",
			"days": "15,-1",
			"time": "23:30",
			"snapshotName": "Monthly [[today]]",
			"periodEnding": "[[today]]"
		}
	]
}
The JSON's parameters are:
|
Parameter |
Description |
|---|---|
|
snapshots |
Defines an array of snapshot objects. |
|
frequency |
Defines the frequency. The option is monthly. If the frequency parameter is not defined, it defaults to weekly, and then the days parameter is mandatory. When it is set to monthly, use the digit to represent the day of the month. A negative will count from the end of the month e.g. -1 means the last day of the month. |
|
days |
Defines the days. If frequency parameter is not provided then the days parameter is required to specify which days the snapshot must be created. The days parameter's values are:
|
|
time |
Defines the time. Use the 24 hours format, for example, 23:30. Do not use a time from 1:30 to 03:30 as this is reserved for nightly tasks that start at 1:30 AEST/AEDT, instead use 00:45 or 03:45. |
|
snapshotName |
Optional - Defines the snapshot's name. Name parameter's value is not provided, the default snapshot name is Snapshot . You can use the following values:
Timestamp supports the following:
If \ (forward-slash) is used then an extra \ is required to be placed in front as the escape character (this is part of the code syntax). For example |
|
periodEnding |
Optional - Defines the snapshot period ending. Use the format yyyy-MM-dd HH:00:00 |
Create a Snapshot Manually
From Serraview, complete the following:
- Navigate to Admin Settings > System Config.
- Select General > Snapshots. The Snapshots screen displays.
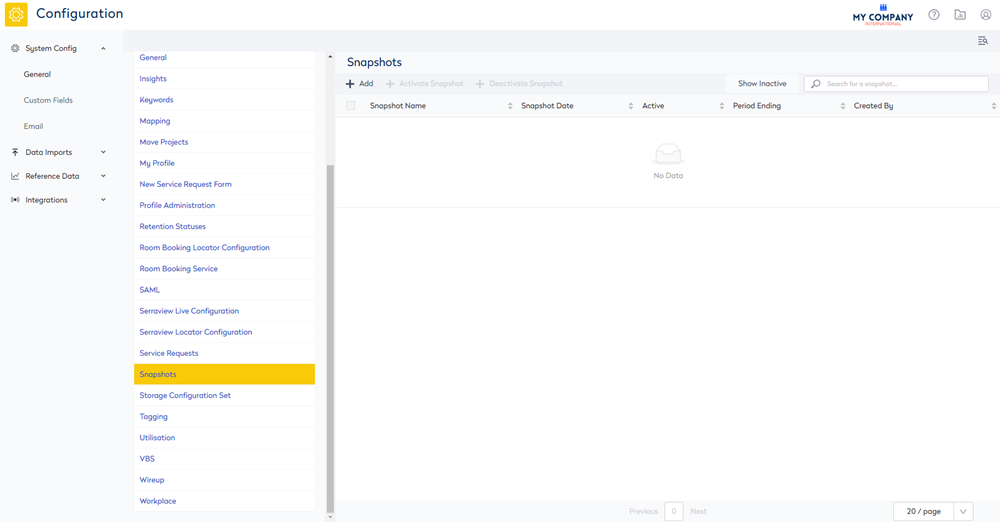
3. Click the + Add icon. The Create Snapshot form displays.
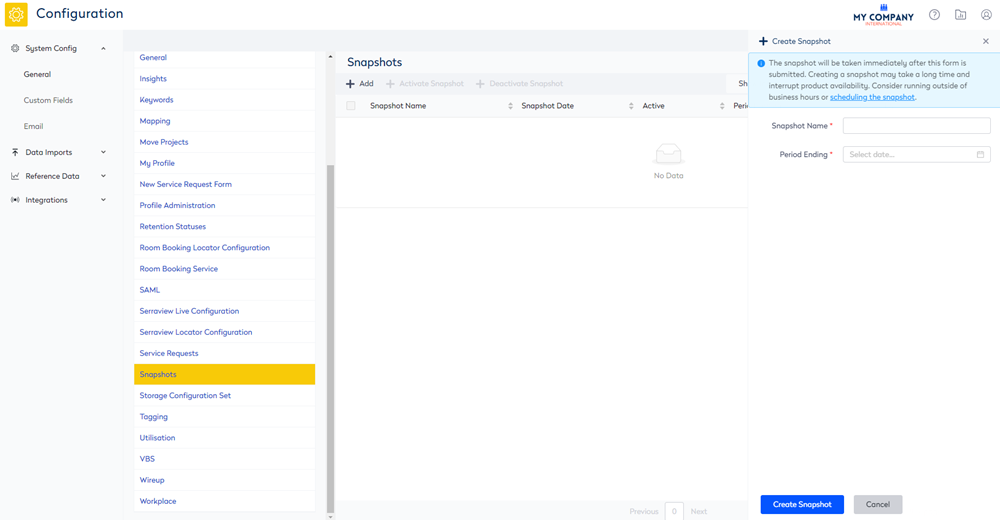
4. In the Snapshot Name field, enter the name.
5. From the Period Ending calendar picker, select the date for the snapshots' period ending.
6. Click the Create Snapshot button.
When completed, the Snapshot success displays.
Deactivate an out-of-date Snapshot
You can deactivate out-of-date snapshots.
From Serraview, complete the following:
- Navigate to Admin Settings > System Config.
- Select General > Snapshots. The Snapshots screen displays.
- From the list, tick the Snapshot you want to deactivate. Note that you can select multiple snapshots.
- Click the + Deactivate Snapshot icon.
The Snapshot is deactivated and hidden from the list.
Show Inactive Snapshots
To display the inactive Snapshots, click the Show Inactive button.
Activate an out-of-date Snapshot
If you need an out-of-date (deactivated) Snapshot to be made active again.
From Serraview complete the following:
- Navigate to Admin Settings > System Config.
- Select General > Snapshots. The Snapshots screen displays.
- Click the Show Inactivate button.
- From the list, check the snapshot(s) you want to activate. Note that you can select multiple snapshots.
- Click the + Activate Snapshot button.
The Snapshot is activated and displays in the list.