Assign an anchor desk in a Flexible Team or Neighborhood
There may be a need for a person to have a fixed position within a Flexible Team or Neighborhood. For example, manager placed in a fixed position so staff can locate them easily. A fixed desk within a Flexible Team is referred to as an anchor desk.
You can create an anchor desk within a Flexible Team's allocated space via:
- drag and drop from the People tab
- the Space Form
If you need to remove the occupant from the workpoint then this can be completed via:
- Erase Occupant tool
- the Space Form
Contents
- Assign a Person using drag and drop from the People tab
- Flexible Team Example
- Neighborhood Example
- Assign a Person via the Space Form
- Flexible Team Example
- Remove a Person from the Workpoint using the Erase Occupant tool
- Flexible Team Example
- Remove a Person from the Workpoint via the Space Form
- Flexible Team Example
- Remove a Person from the Workpoint and change allocation to Neighborhood
- Neighborhood Example
Assign a Person using drag and drop from the People tab
Flexible Team Example
From the VBS, complete the following:
- Navigate to the floor.
- Click the toggle
 icon to display the floorplan.
 - Zoom into the floorplan to the team's allocation.
- From the left-panel, click the People
 tab. This displays the occupants of the selected team(s).
 - If you need to filter the list, click the filter
 icon and enter in the name of the person.
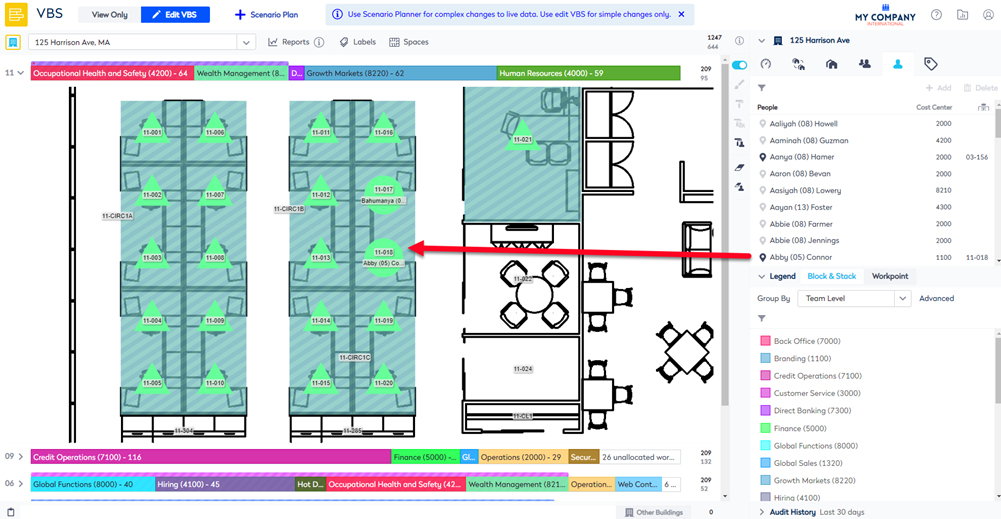
 - Click and drag the person to the workpoint on the floorplan. The message "This will set the space settings from "Do not allow occupants" to Single Occupant".
- Click the Proceed button. The workstation will be changed to a fixed seat and the person will become the occupant.
Neighborhood Example
From the VBS, complete the following:
- Navigate to the floor.
- Click the toggle icon to display the floorplan.
- Zoom into the floorplan to the neighborhood's allocation.
- On the stack select the team.
- From the left-panel, click the People tab. This displays the occupants of the selected team(s).
- If you need to filter the list, click the filter icon and enter in the name of the person.
- Click and drag the person to the workpoint on the floorplan. The message "This will set the space settings from "Do not allow occupants" to Single Occupant".
- Click the Proceed button. The workstation will be changed to a fixed seat and the person will become the occupant.

Assign a Person via the Space Form
Flexible Team Example
From the VBS, complete the following:
- Navigate to the floor.
- Click the toggle icon to display the floorplan.
- Zoom into the floorplan to the flexible team's allocation.
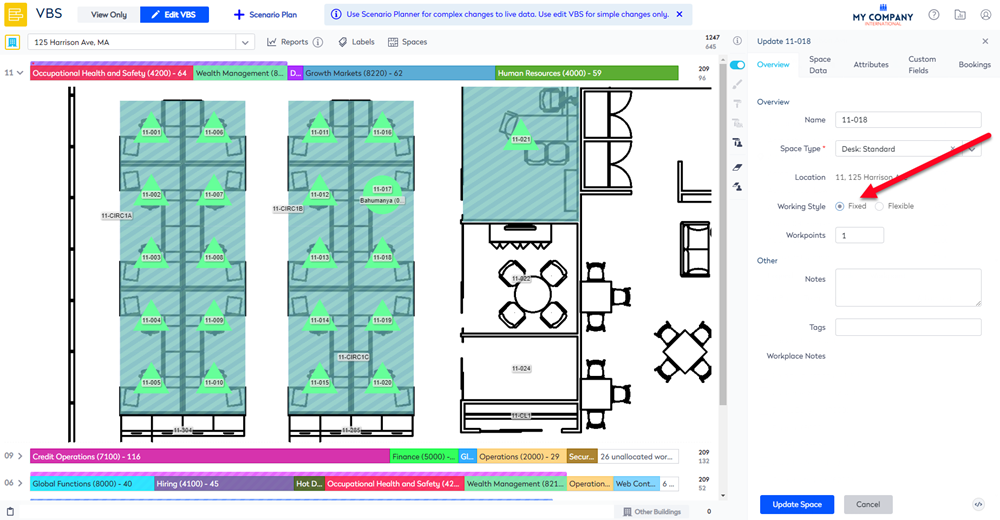
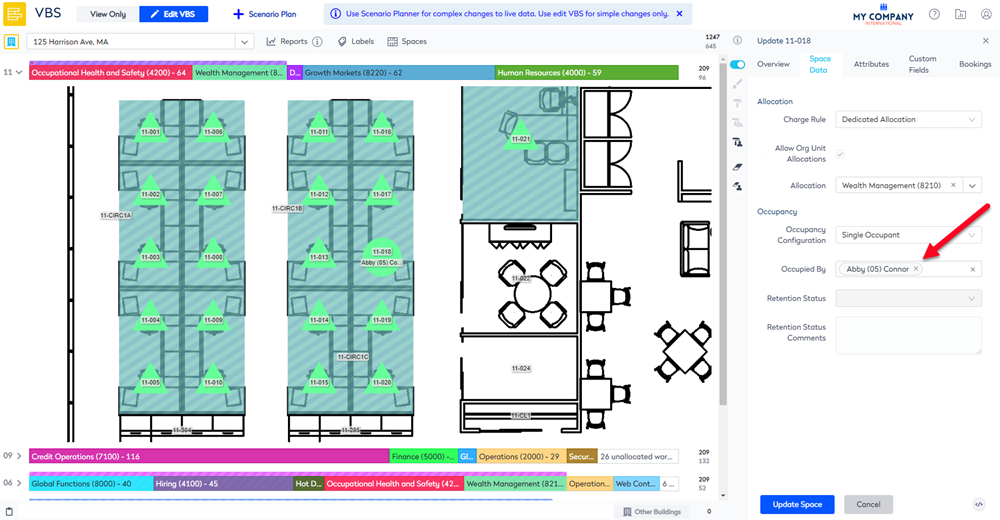
- Double click the workpoint. The Update Space form displays.
- From the Overview tab, change the Working Style option button to Fixed.
- Click the Space Data Tab.
- From the Occupancy Configuration drop-down, select either Single Occupant or Multiple Occupants.
- In the Occupied By field, enter in the occupant name(s).
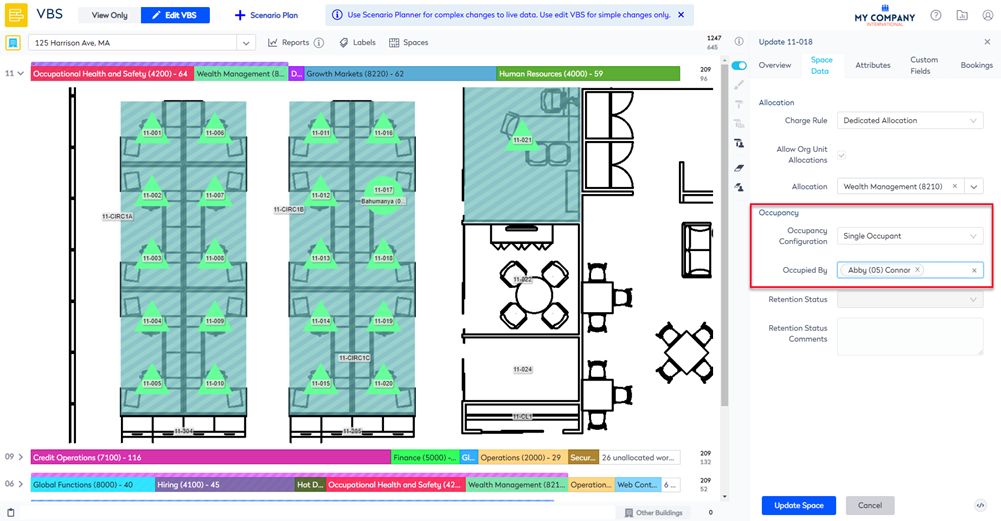
- Click the Update Space button. The workstation will be changed to a fixed seat and the person will become the occupant.
Remove a Person from the Workpoint using the Erase Occupant tool
Flexible Team Example
From the VBS complete the following.
- Navigate to the floor.
- For the floor, click the toggle
 icon to display the floorplan.
 - From the VBS Blocking Toolbar, click the Erase Occupant
 icon.
icon. - Erase the occupant. The workpoint changes back to a Flexible workpoint.
Remove a Person from the Workpoint via the Space Form
Flexible Team Example
From the VBS complete the following.
- Navigate to the floor.
- Click the toggle icon to display the floorplan.
- On the floorplan, double click a space. The Update Space form displays.
- Click the Space Data tab.
- Click the X icon next to the occupant's name.
- Click the Update Space button. The workpoint changes back to a Flexible workpoint.
Remove a Person from the Workpoint and change allocation to Neighborhood
Neighborhood Example
If you need to change the Fixed wokpoint to a Flexible workpoint inside a neighborhood.
From the VBS complete the following.
- Navigate to the floor.
- Click the toggle icon to display the floorplan.
- Use the Erase Occupant tool to remove the person.
- Use the the Erase Allocation
 tool to erase the allocation.
 - Select the neighborhood or team.
- Use the Paint
 tool to paint the neighborhood on the workpoint.