# 7 - Set up Parking
If you want your employees, to be able to book a parking space from Engage then this can be configured. This article will include the following examples:
- Configure the Parking Spaces for Building Access
- Configure the Parking Spaces for Assigned People and a Neighborhood
Prerequisite
Make sure the floorplan for the parking spaces is uploaded as a floor to your building. This can be a simple drawing that includes the basic boxes that represent the parking layout.
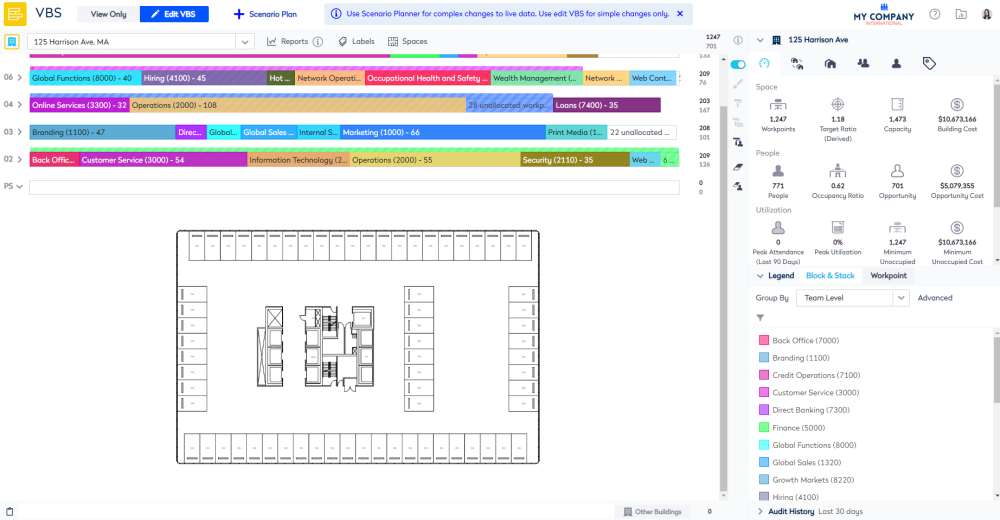
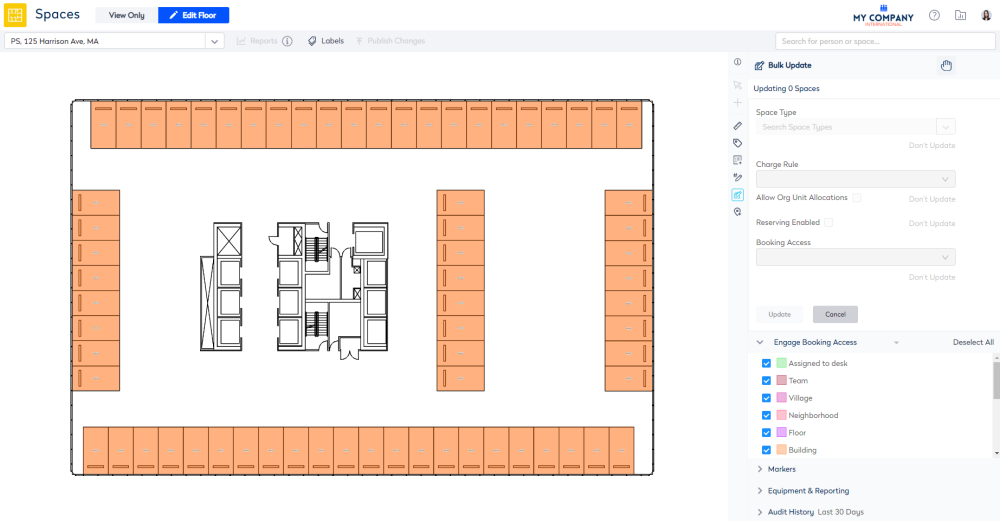
Below is an example of the parking space (PS) floor found in the Block and Stack (VBS) module.
Configure the Parking Spaces for Building Access
Let's walkthrough the set up using the example of setting up Parking Spaces for everyone in the building to have the ability to reserve a parking space.
Step 1. Set up the Space Type for Engage
You need to set up the Parking Space's space type for Engage to be Interactable so that employee can interact with it.
- Navigate to Admin Settings > Reference Data > Space Types.
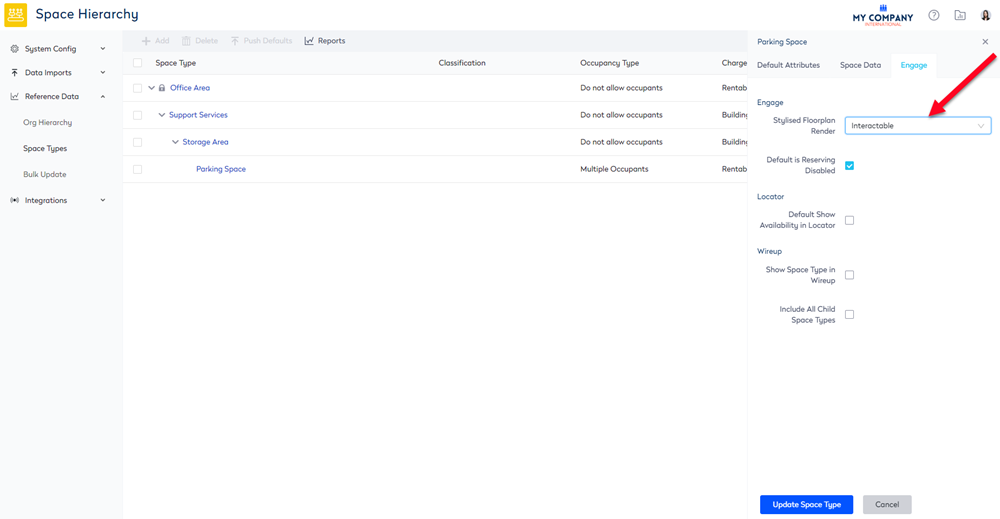
- From the Stylized Floorplan Render drop-down, select Interactable to make the space interactive. Learn more in Set up the Space Types for Engage.
- Uncheck the Default is Reserving Disabled check box.
- Click the Update Space Type button.
In this example, the space type for the Parking Space has been changed to be Interactable.
Step 2. Set up the Desk Reservations for Engage
Next, you will need to update the Engage Booking Access view in the Spaces module so that your employees can reserve the parking space.
The Engage Booking Access can be set to either:
- Everyone - When you want all employees in your business to reserve a parking space.
- Region - When your business has a campus, for example, a University that has several buildings or a company with several buildings within a city, you will be able to allow those employee to reserve a parking space.
- Building - When you have a building and you want only those employees who belong to the building to reserve a parking space.
- Neighborhood - If you want employees of a neighborhood then you will need to allocate the neighborhood to the parking space floor. This will involve the creation of a Parking Space Neighborhood and then you need to allocate the neighborhood to the spaces. Note: This will mean those employees belong to multiple teams in reporting.
- Assign to desk - If you want an employee to reserve a particular parking space, then you will need to assign the person to the parking space. This will involve the creation of a Parking Space team, allocate the team to the spaces, and then assign the employee to the parking space. Note: This will mean those employees belong to multiple teams in reporting.
The Neighborhood and Assign to desk are explained below in Configure the Parking Spaces for Assigned People and a Neighborhood.
From the Spaces Module, complete the following:
- Navigate to Spaces.
- Use the Location Selector drop-down to navigate to the building and floor.
- Click the Edit Floor icon.
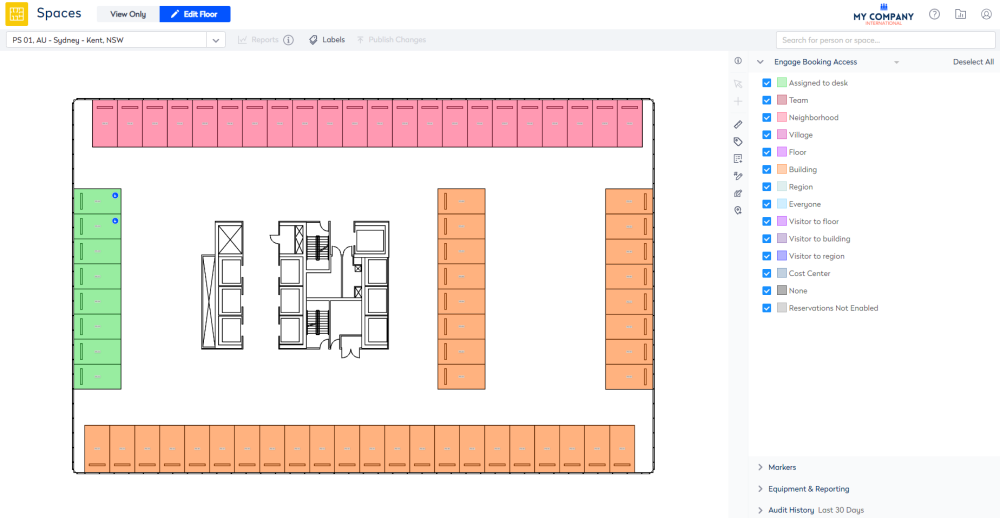
- From the Selector, select the Engage Booking Access view. The floorplan displays the booking access by color.
In this example, the parking spaces display with no booking access.

- Click the Bulk Update
 icon.
icon. - Click on the floorplan and drag the cursor across the points to select.
If you need to reposition the floorplan when selecting points, then use the panning mode. Either hold down the space bar or click the Planning Mode ![]() icon and then reposition the floorplan.
icon and then reposition the floorplan.
- For the Reserving Enabled check box, click the Don't Update and change this to Overwrite.
- Check the Reserving Enabled check box. When this is checked this will enable the Booking Access drop-down.
- For the Booking Access drop-down, click the Don't Update and change this to Overwrite.
- From the Booking Access drop-down, select Building.
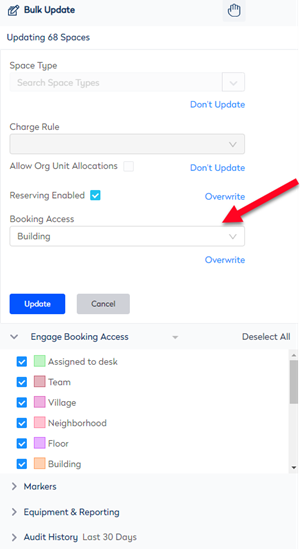
- Click the Update button.
- Click the Publish Changes button.
- Click the Cancel button to close the Bulk Update.
Now, the parking spaces can be booked by anyone who belongs to the building.
Remember the same desk reservation rules can be applied to the parking space. To learn more see the section called Additional Configuration for Desk Reservations in the article #5 - Set up Desk Reservations.
Configure the Parking Spaces for Assigned People and a Neighborhood
In this walkthrough we will set up Parking Spaces for the following:
- people who come to the office at different times, such as Facilities team and Sales team.
- people who require a designated parking space, such as CEO, Managers, or a person who requires Accessibility Parking.
Step 1. Set up the Space Type for Engage
In the Space Hierarchy, you will need to update the default settings for the Parking Space.
- Navigate to Admin Settings > Reference Data > Space Types.
- Search for Parking Space, space type.
- Click the Parking Space to display the Parking Space form.
- From the Default Attributes tab, uncheck the Can have workpoints checkbox.
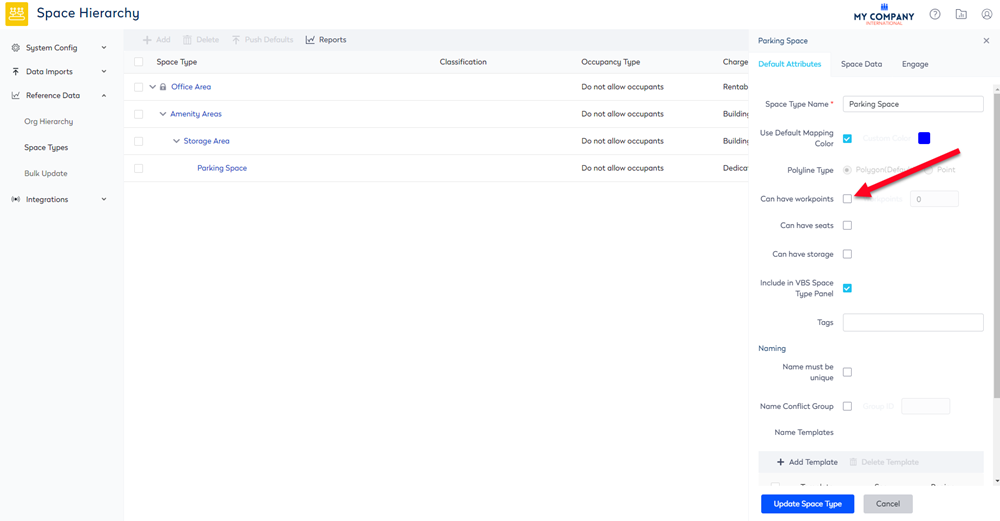
- Click the Space Data tab.
- From the Default Charge Rule drop-down, select Dedicated Allocation.
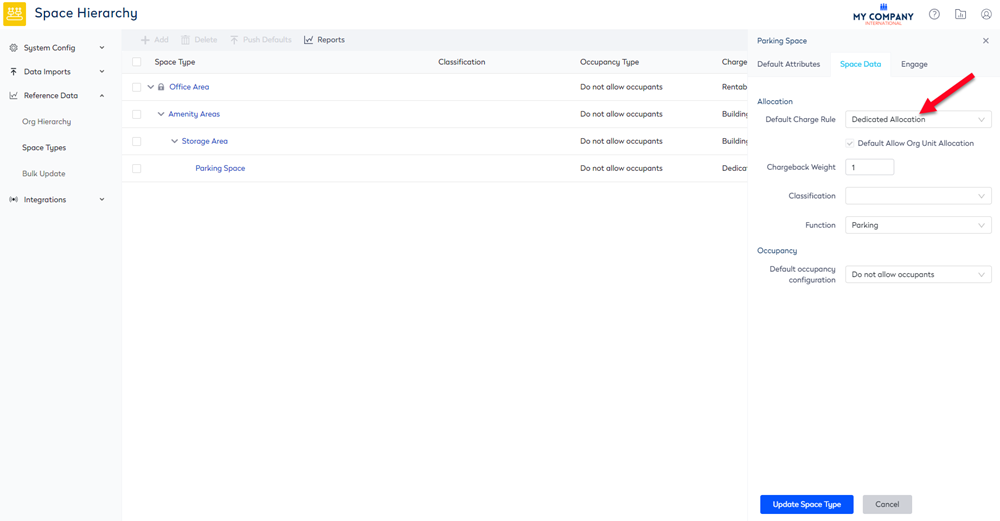
- Click the Engage tab.
- From the Stylized Floorplan Render drop-down, select Interactable to make the space interactive so that employees can interact with it.
- Uncheck the Default is Reserving Disabled check box.
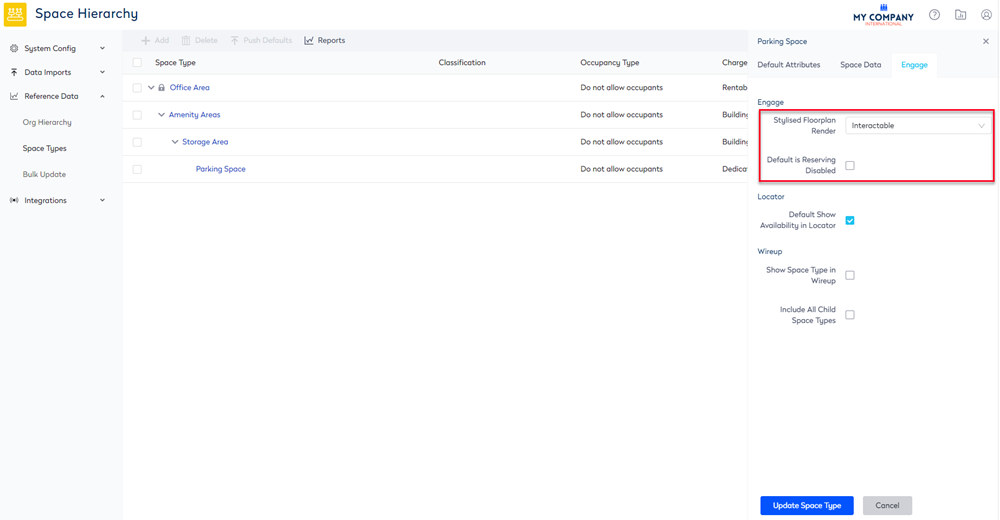
- Click the Update Space Type button.
- Make sure you select the space type called Parking Space and then click the Push Defaults button.

The Update Spaces to Default dialog displays.
- Check the Select All checkbox.
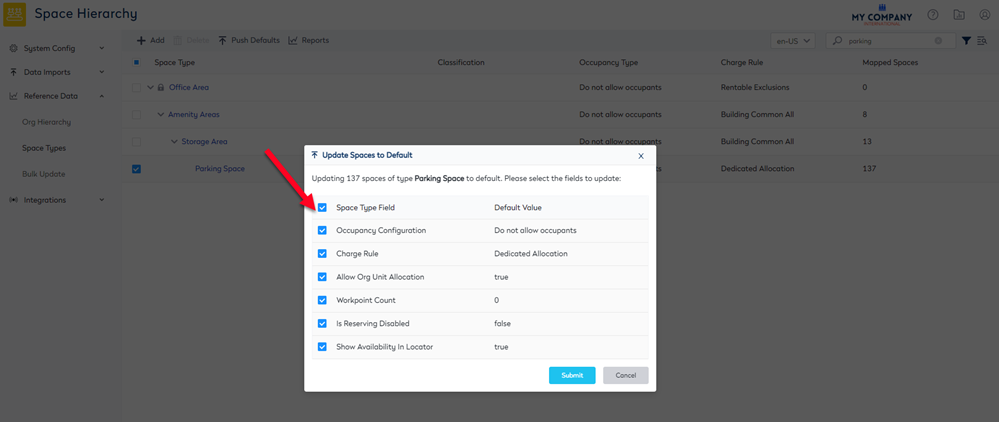
- Click the Submit button. The spaces are automatically updated.
If you want to learn more about the Space Type Hierarchy, see Add, Edit, or Delete the Space Types.
Step 2. Set up the Desk Reservations for Engage
Next, you will need to update the Engage Booking Access view in the Spaces module so that your employees can reserve the parking space.
The Engage Booking Access can be set to either:
- Neighborhood - If you want employees of a neighborhood then you will need to allocate the neighborhood to the parking space floor. This will involve the creation of a Parking Space Neighborhood and then you need to allocate the neighborhood to the spaces. Note: This will mean those employees belong to multiple teams in reporting.
- Assign to desk - If you want an employee to reserve a particular parking space, then you will need to assign the person to the parking space. This will involve the creation of a Parking Space team, allocate the team to the spaces, and then assign the employee to the parking space. Note: This will mean those employees belong to multiple teams in reporting.
The following articles explain how to complete the set up:
- Allow Employees in a Team or Neighborhood to Reserve Desks
- Allow Employees to Reserve their Assigned Desk
In our example below the Parking Space floor now has the Engage Booking Access defined as:
- Neighborhood parking spaces for the Facilities team and Sales team.
- Assigned to desk parking spaces for the CEO and Managers.
- Assigned to desk parking space which has been designated as Accessibility Parking.
- Building parking spaces.
Step 3. Set up Accessibility Parking Spaces
If you have employees that require Accessibility parking spaces then you can make sure they are found in Engage.
Step 3.1 Add Markers to the Floorplan
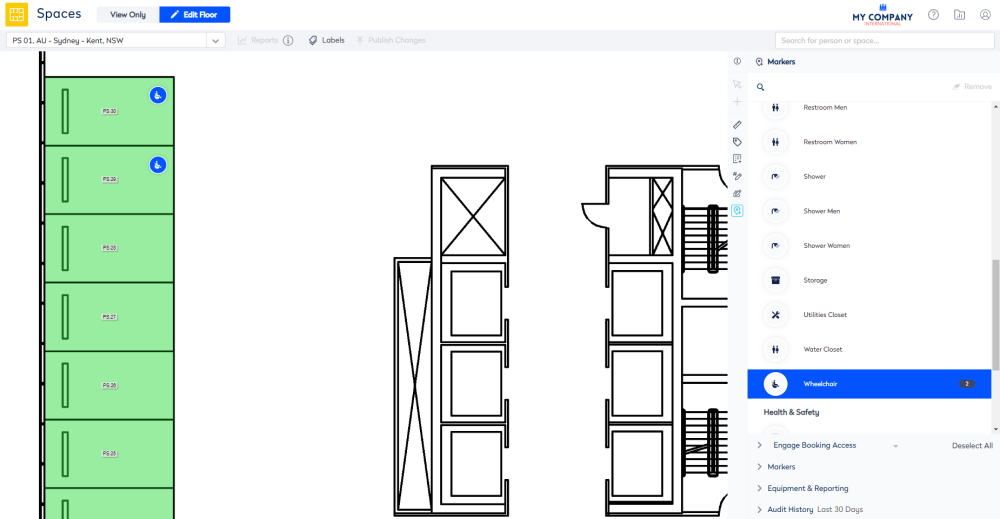
You can add markers to the floorplan and these will display in Engage's floorplan.
- Use the marker tool to add the Wheelchair marker to the floorplan. Learn how to do this in Add, Move, or Remove Markers.
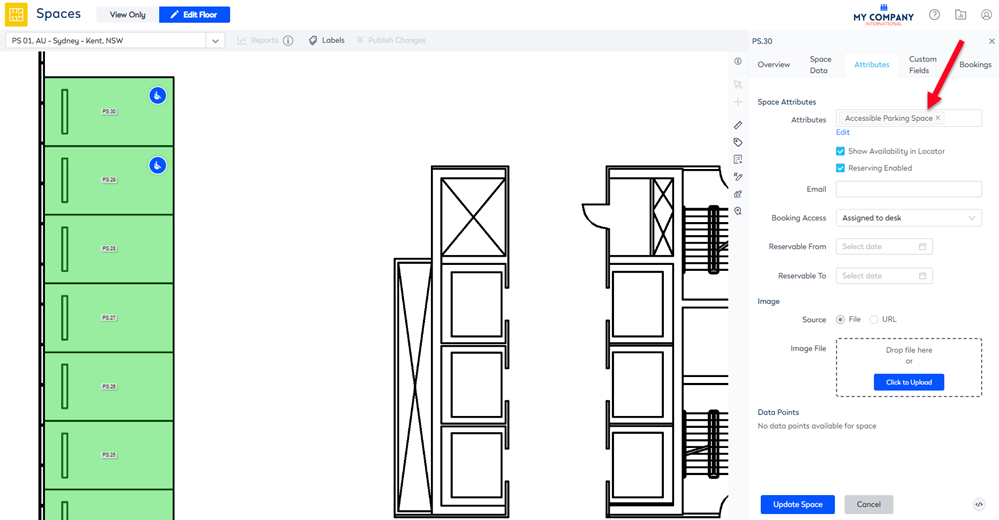
Step 3.2 Update the Attributes
When you add the attribute to the space, this will let employees filter for equipment.
- Double click the Space. The Edit Space form displays.
- From the Attributes drop-down, select Accessible Parking Space. If you don't have this in the main list then see Add or Remove the Space's Attributes.
Step 4. Allocate and Assign Parking Spaces in the Block and Stack (VBS)
Now, you are ready to set up the Neighborhood and assign the parking spaces to employees.
Step 4.1 Create the Neighborhood
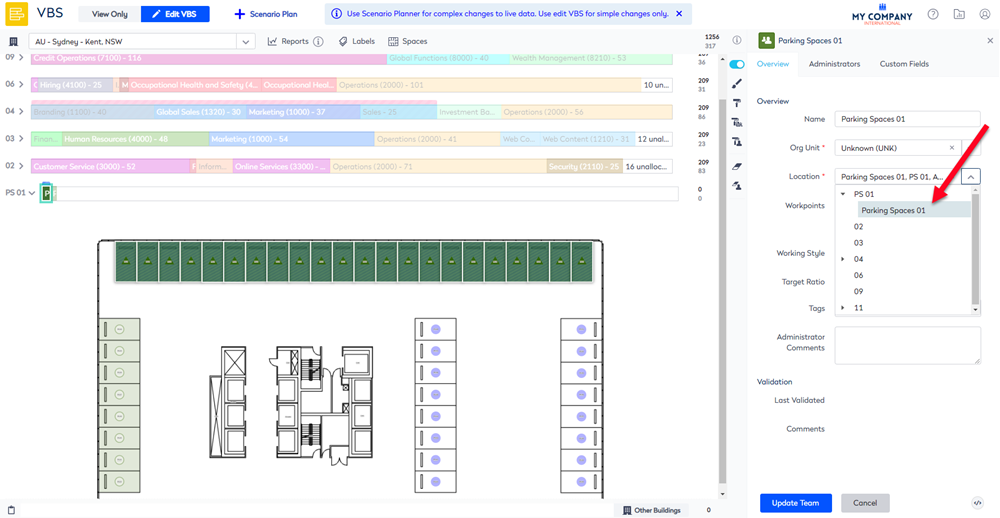
- For the PS 01 floor create the neighborhood called Parking Spaces 01. Learn more in Add Neighborhoods' Allocation Manually.
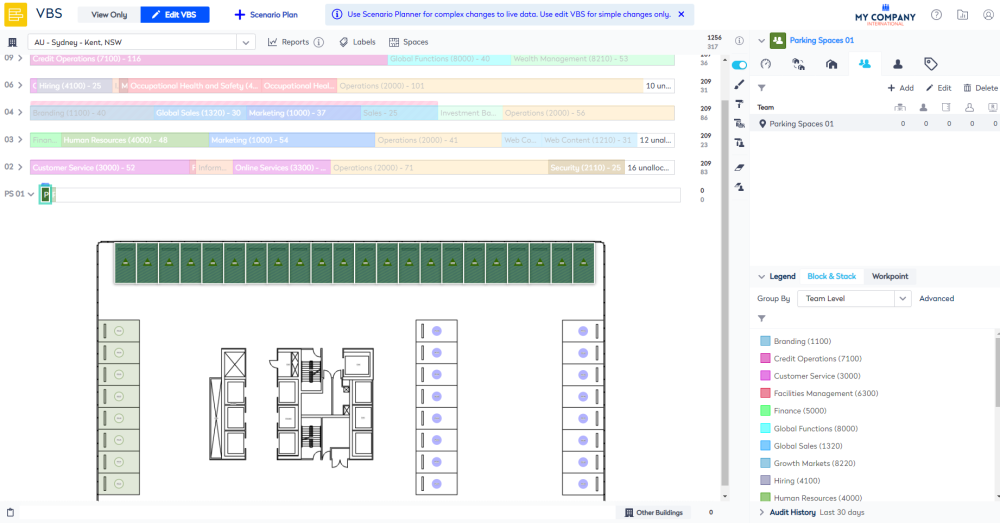
- Create a Team called Parking Spaces 01 and add it to the neighborhood. Learn more in Add the Flexible Team to a Neighborhood.
Remember when you have a small neighborhood it can be easier to select the neighborhood from the Space form.
- Paint the neighborhood and team on to the block.
- Add the people to the team. Learn more in Add, Move, or Remove People in the Fixed or Flexible Teams.
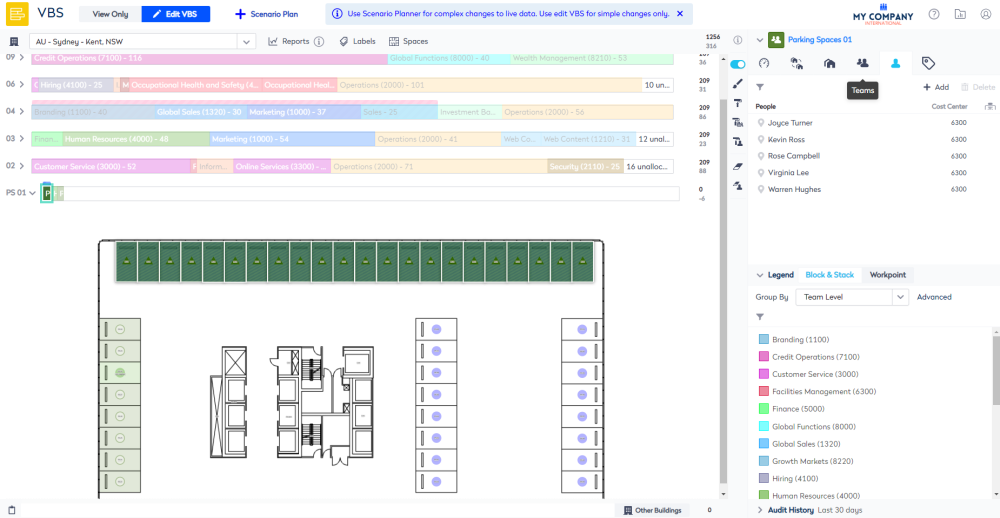
Remember this will mean those employees belong to multiple teams in reporting.
Step 4.2 Assign People to a Parking Space
You can assign a person to parking space. Learn more about how to assign a person to a space, see Add (or remove) a Person to a Workpoint.
- Double click the space to display the Edit Space form.
- Click the Space Data tab.
- From the Occupancy Configuration drop-down, select Single Occupant.
- In the Occupied By field, enter the person's name and as you complete the selection remember to uncheck the Remove from Previous Location(s) checkbox.
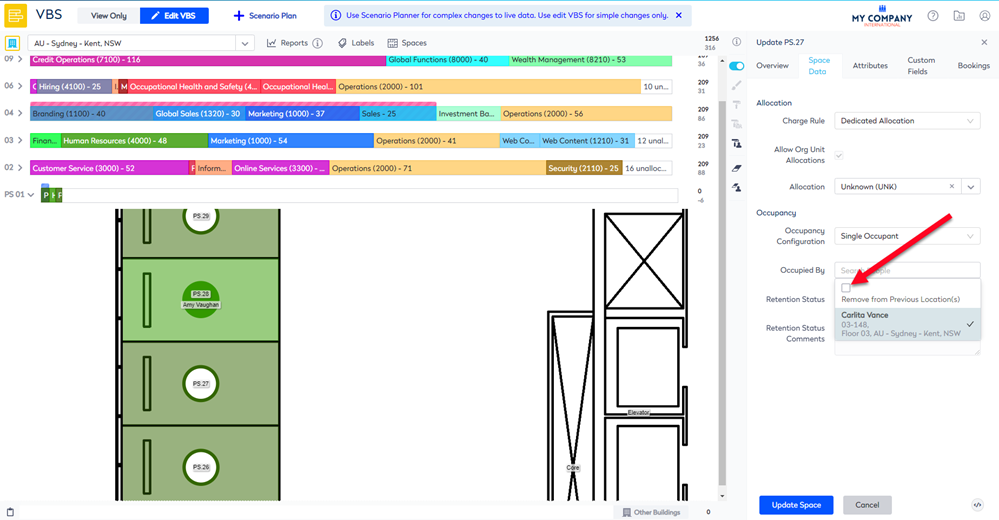
- Click the Update Space button.
The person is assigned to the space.
Remember this will mean those employees belong to multiple teams in reporting.
Now, the parking spaces can be booked by the employees.