#5 - Set up Desk Reservations
If you want your employees to be able to book a desk from Engage, then this can be configured.
- Step 1. Set up the Space Types for Engage
- Step 2. Set up the Desk Reservations for Engage
- Step 3. Desk Reservations & Check-in Times
- Additional Configuration for Desk Reservations
Step 1. Set up the Space Types for Engage
First, you need to set up the space type for Engage. You will need to configure whether the spaces are Hidden, Visible, or Interactable on the floorplan and this is based on their Space Type.
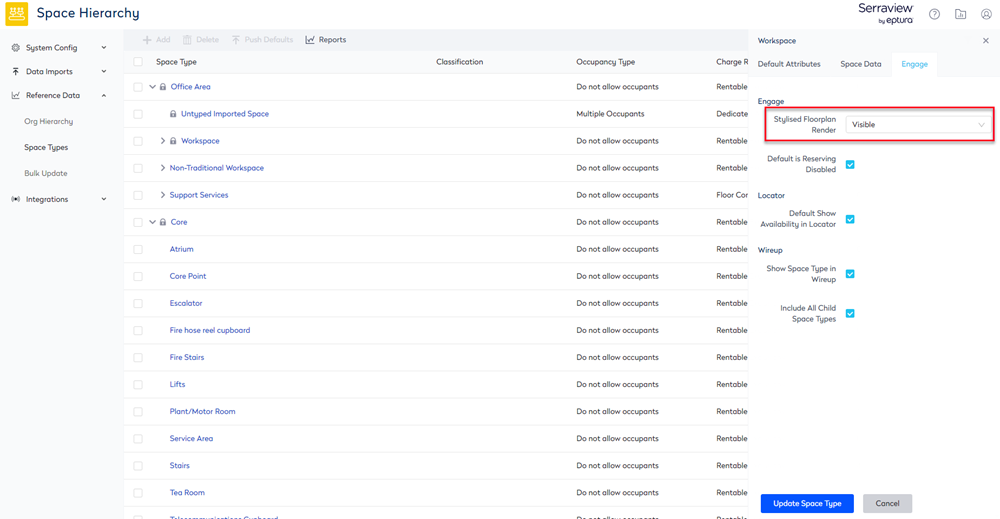
The following options can be applied to each Space Type:
- Hide the space type all together - these spaces appear as "negative space" and indicate to the user that they should be able to walk through that space. All circulation space types (corridors, ground floor atriums, elevator lobbies, etc) should be hidden.
- Show (visible) the space type but do not let the user interact with the space - you normally want to make all non-occupiable spaces visible. They are shown in light-grey and indicate that there's a space there, but there's nothing interesting for the user to interact with
- Make the space interactive - all desks and meeting spaces that you want users to interact with via Engage should be interactive. You might want to make some spaces like kitchens or storage spaces interactive if they are important for your users to find out more about.
For more information, see to Set up the Space Types for Engage.
Step 2. Set up the Desk Reservations for Engage
Now, you have your employees in their teams and some will be assigned to desks or maybe neighborhoods; you can set up which desks are reservable and by whom.
The Engage Booking Access view in the Spaces module will allow you to visualize the booking access applied to spaces. This will give you a quick and visible way to allocate the booking access required for your business.
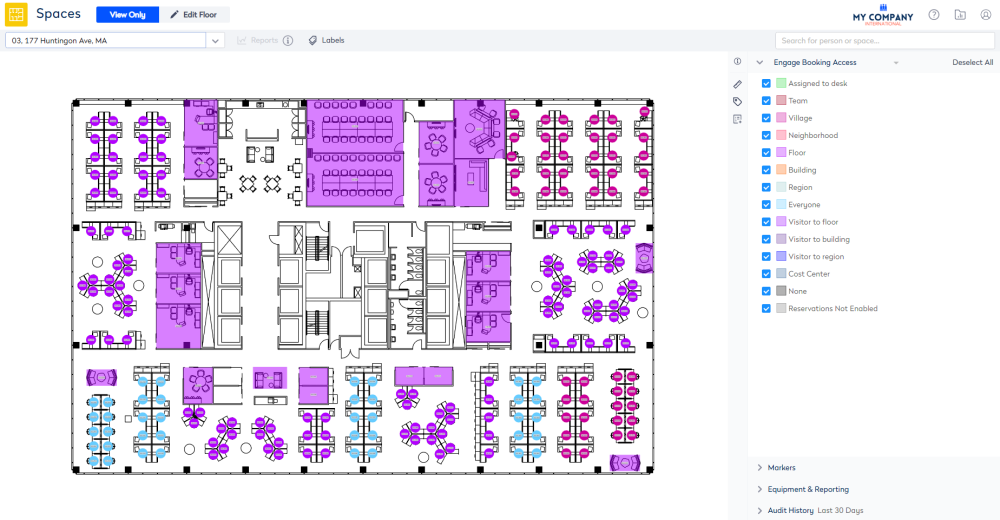
The settings can be updated in bulk in the Space module for Regions, Buildings, Floors, Teams, Neighborhoods, an Employee's assigned desk, etc.
For more details, see Set up Desk Reservation Permissions and ...
- Allow Employees in a Region to Reserve Desks
- Allow Employees in a Building or Floor to Reserve Desks
- Allow Employees on a Floor to Reserve Desks
- Allow Employees in a Cost Center to Reserve Desks
- Allow Employees in a Team or Neighborhood to Reserve Desks
- Allow Employees to Reserve their Assigned Desk
- Allow all Employees to Reserve Desks
- Allow Visitors to your Region to Reserve Desks
- Allow Visitors to your Building to Reserve Desks
- Allow Visitors to your Floor to Reserve Desks
- Allow Employees with an Employee Grade to Reserve Desk
- Update Reservation Permission for a Space
- Update Reservation Permission for an Office
- Deny an Employee to Reserve a Space with the "Reservation - Bypass booking rule"
Step 3. Desk Reservations & Check-in Times
If your business wants employees to make desk reservations as:
- All-day Desk Reservations - then see Set up All Day Desk Reservations and Check-in Times.
- Time Block Reservations - this allows your employees to choose the desk booking, such as All day or 1 hour, 2 hours, 3 hours, or 4 hours; then see Set up Time Blocked Desk Reservation & Check-in Times.
If you want your employees to check-in to their desks, then in the Engage Configuration, your System Administrator can update the desk check-in window settings. Also, if you have different desk reservation requirements for your buildings, your System Administrator can set this up.
Auto-Cancellation of Desk Reservations
When auto-cancel is enabled, it will cancel the desk booking if an employee does not check into the desk by the required time. Their desk booking is cancelled and freed up for someone else to use. For details, see Set up Auto-Cancellation of Desk Reservations. If you have different Auto-Cancellation of Desk Reservation requirements for your buildings, your System Administrator can set this up.
Additional Configuration for Desk Reservations
Below lists the additional configuration.
Limit Concurrent Bookings
- Your System Administrator can set the number of desk reservations an employee can make that overlap. For more details, see Limit Concurrent Bookings for Desks.
Limit Future Desk Bookings
- Your System Administrator will be able to limit in weeks, how far into the future an employee can make a desk reservation. For more details, see Limit Future Desk Bookings.
Available Desk Visibility
- When your business has employees with assigned desks, these will not be able to be reserved. Now, employees can visually differentiate reserved desks from assigned ones on the floorplan. Your System Administrator can update Serraview's Configuration setting. Also, if you want, you can change the color of the available desks. For more details, see Set up the visibility of reserved desks on the floorplan.
Desk Reservation on Behalf of Another Person
- If you have employees that make desk reservations on behalf of another person, then your System Administrator can give employees permission to complete this task, see Set up a Person to book on behalf of another and Reserve a desk on behalf of another person.
Desk Reservation or Check-in via QR Code
- Your System Administrator can set up QR Codes on your organization’s desks so that employees can quickly make a desk reservation or check-in to their desk reservation, see Set up the QR Codes for Desk Check-in and Reservation.
Desk Reservation Confirmation Emails
- If your business wants to send out Confirmation Emails when an employee books a desk. Note that the confirmation email is sent to the person whom the booking is for. For more details, see Set up Engage to send out Confirmation Emails.