Eptura Knowledge Center

Troubleshoot SVLive User Device and Server Connectivity

Serraview Presence Service (SPS) and Switch Scanner require multiple connection paths to be tested, before deploying the system to a whole Floor or Building for the next level of validation. These checks validate the Network Environment is configured to allow all necessary traffic from SVLive apps.

In Scope

  • End-to-End connectivity and data flow

Out of Scope

  • Installation
  • Data accuracy
  • Performance optimization

SPS to Cloud Validation

In scope

  • A single user device
  • SPS
  • SVLive Cloud
  • Proxy / Firewall

Out of Scope

  • Switch scanning

Prerequisites

  • SPS installed
  • Proxy and/or firewall rules applied
  • SVLive apps added to AV/Malware Allowed List

Checklist

Area

Check to complete

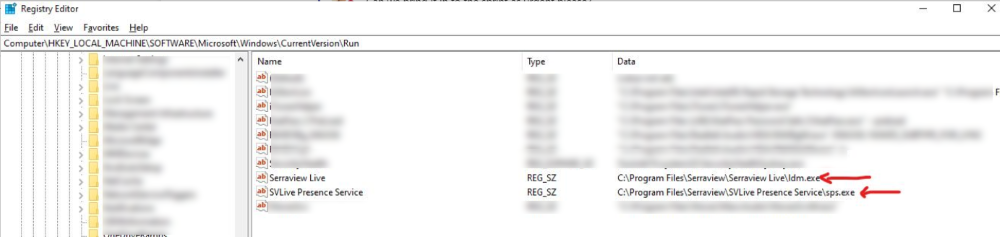
SPS launches on logon

  • Check the registry path.

image2022-7-21_14-29-31.png

SPS is running

  • In the Task Manager, check the Details tab to see if the Serraview Presence Service is running as a User Profile and not SYSTEM.

Check your Public IP

  • Check if this IP is in the Allowed List, that is configured at the SVLive endpoint.
  • Take a screenshot of the result and provide this to SVLive Technical Support.

Browser test

  • Check the browser output when you attempt to connect to the SVLive cloud endpoint.
  • Take a screenshot of the result and provide this to SVLive Technical Support.

Inspect Event Logs

  • Check Windows Event Viewer.
  • Look for Errors logged by SPS.
  • Apply a filter to logs by SPS only.
  • Are errors or warnings present? Export the SPS Event Viewer logs in the Event Viewer format.
  • Take a screenshot of the result and provide this to SVLive Technical Support.

Inspect Proxy Logs

Ensure network rules are applied, see SVLive2 Network Access and Ports.

  • Open the Proxy Logs
  • Filter logs down to the IP Address of the User Device running SPS for this test
  • User Device with SPS to then perform a Log Out and Log In
  • Expected Behaviour:
    • SPS outbound request to SVLive cloud endpoint to fetch config (JSON)
    • SPS outbound traffic to SVLive cloud endpoint to post Activity Messages
  • If Proxy Logs show BLOCKED or DENIED requests:

    • Review all the Network Rules are applied accurately.
    • Understand why the traffic is being BLOCKED.
    • Discuss with SVLive Technical Support.

Check Antivirus/Malware controls

  • Check the User Device Antivirus/Malware control logs.
  • If SPS is impacted, then add SPS to the Allowed list within the Antivirus/Malware control software.

Switch Scanner to Switches Validation

In scope

  • Switch Scanner
  • Access level switches

Out of scope

  • User Devices
  • SPS
  • SVLive Cloud

Prerequisites

  • Switch Scanner installed
  • SVLive apps added to AV/Malware Allowed List on the server hosting the Switch Scanner

Checklist

Area

Check to complete

Switch Scanner is running

Check that the Switch Scanner service is running on the VM server.

Validate Switch IPs imported to Serraview

Validate Switch Scanner installation config

  • Check appsettings.json in the Switch Scanner installation folder is configured for your network correctly

Validate Switch-side config

These two steps are critical to validate that the Switches are configured correctly.

Step 1. Authentication

  • Run the provided SNMP Walk PowerShell script against a relevant switch, using the same SNMP auth credentials verified in the Switch Scanner installation config, see appsettings.json
  • If the script Fails to Authenticate:
    • Double-check each character in the Auth Credentials used in Installation, against what is configured on the targeted Switch.

Step 2. Expected Scan Results

  • Run the provided Switch Scan Diagnostic Tool against a relevant switch.
  • Save output to file.
    • To be provided to SVLive Technical Support.

Inspect Event Logs

  • Check Windows Event Viewer.
  • Look for Errors logged by Switch Scanner.
  • Apply a filter to logs by Switch Scanner only.
  • Are errors or warnings present? Export the Switch Scanner Event Viewer logs in the Event Viewer format:
    • To be provided to SVLive Tech Support.

Check CPU & Memory

  • Check in the Task Manager.

  • If you are concerned about anything then take a screenshot and provide this to SVLive Technical Support.

Switch Scanner to Cloud Validation

In scope

  • Switch Scanner
  • SVLive Cloud
  • Proxy / Firewall

Out of scope

  • SPS
  • User Devices

Prerequisites

  • Switch Scanner installed
  • Proxy and/or firewall rules applied
  • SVLive apps added to AV/Malware Allowed List on server hosting Switch Scanner

Checklist

Area

Check to complete

Switch Scanner is running as a service

  • Check the Services tab in Task Manager for SVLive Switch Scanner.
  • Troubleshooting:
    • Try restarting the service.
    • Try restarting the server.

Browser test

  • Check the browser output when you attempt to connect to the SVLive cloud endpoint.
  • Take a screenshot of the result and provide this to SVLive Technical Support.

Inspect Event Logs

  • Check Windows Event Viewer.
  • Look for Errors logged by the Switch Scanner.
  • Apply a filter to logs by Switch Scanner only.
  • Are errors or warnings present? Export the Switch Scanner Event Viewer logs in the Event Viewer format.
    • To be provided to SVLive Technical Support

Inspect Proxy Logs

Ensure network rules are applied, see SVLive2 Network Access and Ports.

  • Open the Proxy Logs.
  • Filter logs down to the IP Address of the Server running Switch Scanner for this test.
  • If the Proxy Logs show BLOCKED or DENIED requests:
    • Review all the Network Rules that are applied accurately.
    • Understand why the traffic is being BLOCKED.
    • Discuss with SVLive Technical Support.

Check Antivirus/Malware controls

  • Check the User Device Antivirus/Malware control logs.

  • If SPS is impacted, then add SPS to the Allowed list within the Antivirus/Malware control software.

SVLive Cloud to Locator Validation

In scope

  • User device
  • SPS
  • Switch Scanner
  • Proxy / Firewall
  • SVLive Cloud
  • Locator

Out of scope

  • Accuracy of Location
  • Accuracy of User name
  • Time to appear in Locator

Prerequisites

  • It is important that all previous Validation checks are passed.
  • User device for testing.

Checklist

Area

Check to complete

Check on Wi-Fi connection

  • Ensure the user device is connected to the corporate Wi-Fi network that has been mapped to the floorplan in Serraview, during the SVLive Onboarding and Setup.

  • Load Serraview Locator in a browser on the user device.

  • Navigate to the building and floor where the user device is located

  • Expected Behaviour:

    • Blue Dot, showing the User Device User Name, within around 5 meters.

Check on Wired connection

  • Ensure the user device is connected to the corporate wired network port that has been mapped to the floorplan in Serraview, during SVLive Onboarding and Wireup.

  • Load Serraview Locator in a browser on the user device.

  • Navigate to the building and floor where the user device is located.

  • Expected Behaviour:

    • Blue Dot, showing the User Device User Name, at a desk.