Decommission a Building
When your organization no longer occupies a building and needs to formally remove it from Serraview, follow this process for decommissioning.
Process
- Step 1. Clear out the Building
- Step 2. Archive or Delete Move Plans
- Step 3. Hide the Building
- Step 4. Delete the Building
Step 1. Clear out the Building
You will need to clear out the building to make sure all occupants are moved to their new locations. The easiest way to complete this is at the team level via the following methods:
- Method 1 - Using the Block & Stack (VBS) or the Scenario Planner
- Method 2 - Using the Imports
Method 1 - Using the Block & Stack (VBS) or Scenario Planner
You can complete the following in the Block and Stack (VBS) but it is important to know that you are working on the Live Data; therefore if you are working on a building with a large number of occupants, then we recommend you use the Scenario Planner to plan out the moves, arrange the physical moves, and afterwards then publish into the Live Data (VBS).
- Move Teams
- When you move the teams from the building to another building, using the VBS then afterwards, you will need to block the team on to their new floor.
- When you move the teams using a Scenario Plan, then you will complete the blocking in the move plan, then after the team has moved you will publish this into the Live Data (VBS).
- Learn more in Move Teams between Buildings and if you are using the Scenario Planner, make sure you have the impacted buildings in the move plan.
- Delete Teams
- If you have any empty teams that your organization no longer needs, then these can be cleaned up and deleted.
- Learn more in Delete Teams from the Block and Stack.
- Move Fixed Occupants
- If you have fixed occupants, using the VBS or a Scenario Plan, then you will need to re-assign them to workpoints.
- Learn more in Add (or remove) a Person to a Workpoint.
Method 2 - Using the Imports
Set up the following imports and then import the files into Serraview this will clear the occupants from the building.
- Occupancy Import
- Remember, this import can be set up from the Occupancy Import Reports.
- When you set up the Occupancy Import, make sure to set the column for Clear Desk Occupants? to true.
- Learn more in the Occupancy Import.
- Workpoint Import
- Remember, this import can be set up from the Workpoint Import Reports.
- When you set up the Workpoint Import, make sure to include the Cost Centre and Hood columns, and leave these columns blank.
- Learn more in the Workpoint Import.
- Team Import
- When you set up the Team Import, add a new column with the header _delete and set the value to true.
- Learn more in the Team Import.
We recommend that after you have completed the imports, check the building in the Block and Stack (VBS) to make sure that all the occupants have been moved.
Step 2. Archive or Delete Move Plans
This must be completed before the building is hidden, as it will no longer be available in the Move Plans unless shown.
If you have any Move Plans in the Scenario Planner module of the BOS module that include the building, then these need to be either archived or deleted.
Learn more in the following:
Step 3. Hide the Building
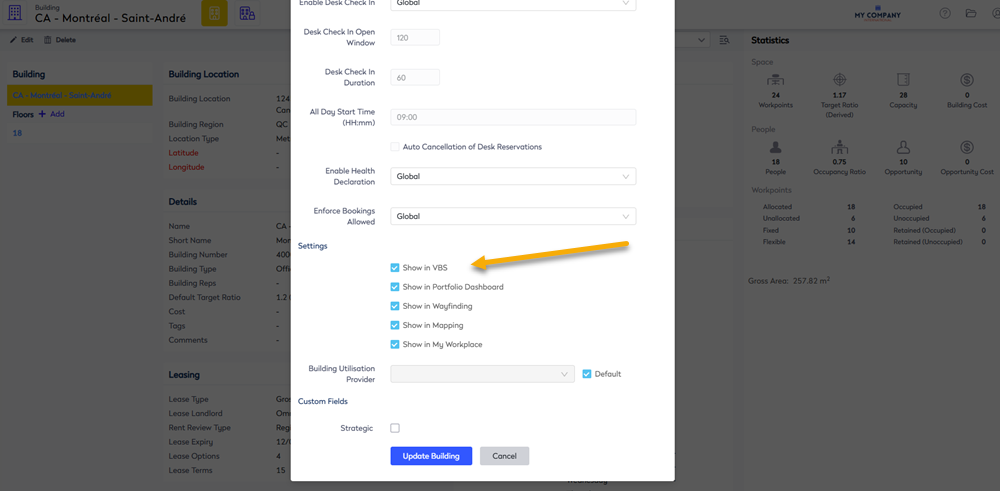
You can hide the building so that only the System Administrators with access to the Buildings & Floors module can see the hidden building. You will need to hide the building from the following:
- Block & Stack (VBS) - This controls the visibility in the VBS, Scenario Plans, and BOS Move Plans.
- Portfolio Dashboard - This controls the visibility in the Portfolio Dashboard.
- Wayfinding - This controls the visibility in Serraivew's Engage.
- Mapping - This controls the visibility in the Space module.
- Workplace - This controls the visibility in the Workplace Portal and Workplace Admin.
Learn more in Show or hide a Building or Floor in VBS.

Step 4. Delete the Building
If you really want to delete the building, then we recommend that you read this article to understand the impacts - Before you delete that Building, Floor, or Zone, read this article!
