Set up Auto-Cancellation of Desk Reservations
Serraview Engage
Level: System Administrator
When auto-cancel is set, this will cancel the desk booking if an employee does not check-in to the desk by the required check-in time. Then their desk booking will be cancelled and freed up for someone else to use. The required check-in time will depend on what time you have set up for your desk reservations. Below details a few examples to explain this ....
All Day Desk Reservation Example - Check-in Start Time 00:00 AM Midnight
In this example, the Engage users will make a desk reservation where:
- All day desk reservation start time = 00:00 AM Midnight
- Desk Check-in Open Window = 600 minutes (10 hours)
- Check-in Window Duration = 540 minutes (9 hours)
The auto cancellation occurs between 11:00 PM to 11:10 PM.

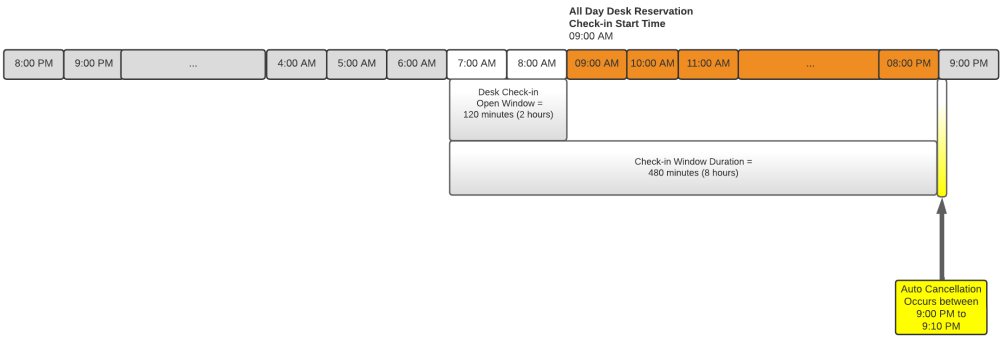
All Day Desk Reservation Example - Check-in Start Time 09:00 AM
In this example, the Engage users will make a desk reservation where:
- All day desk reservation start time = 9:00 AM
- Check-in Window Duration = 480 minutes (8 hours)
- Desk Check-in Open Window = 120 minutes (2 hours)
The auto cancellation occurs between 9:00 PM to 9:10 PM.
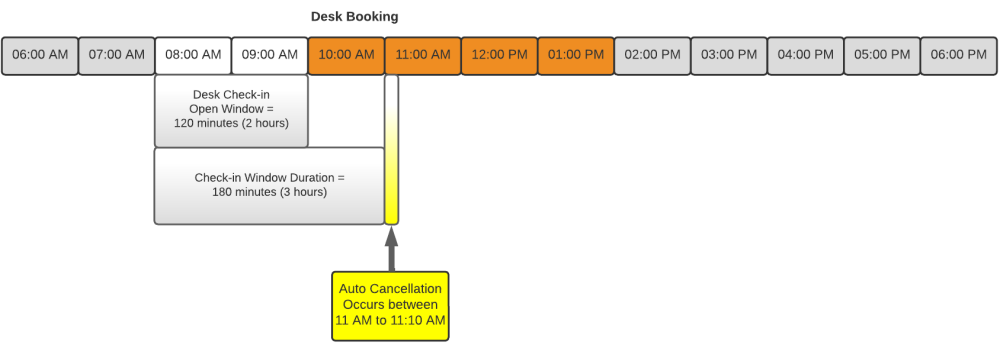
Time Block Reservation Example
In this example, the Engage users will make a desk reservations where:
- Desk Check-in Open Window = 120 minutes (2 hours)
- Check-in Window Duration = 180 minutes (3 hours)
The auto cancellation occurs between 11:00 AM to 11:10 AM.
Notes:
- Desk check-in times - If you want to adjust the desk check-in times, then see Set up Desk Reservations & Check-in Times.
- Desk check-in emails - These emails obey the “Enable desk check-in” settings at the time the reservation was made. So if check-in is enabled, then the emails will not be sent out for any reservations made prior to that change. Users will still be able to check-in via Engage, regardless of whether or not an email was sent. For this reason, we recommend that you avoid using the Auto-Cancellation until check-ins have been enabled for the length of time your future booking limit is set. For example, if your future bookings limit is 2 weeks, then do not apply the Auto-Cancellation until at least 2 weeks after check-ins are enabled.
Auto Cancellation
- Global Settings
- Building Settings
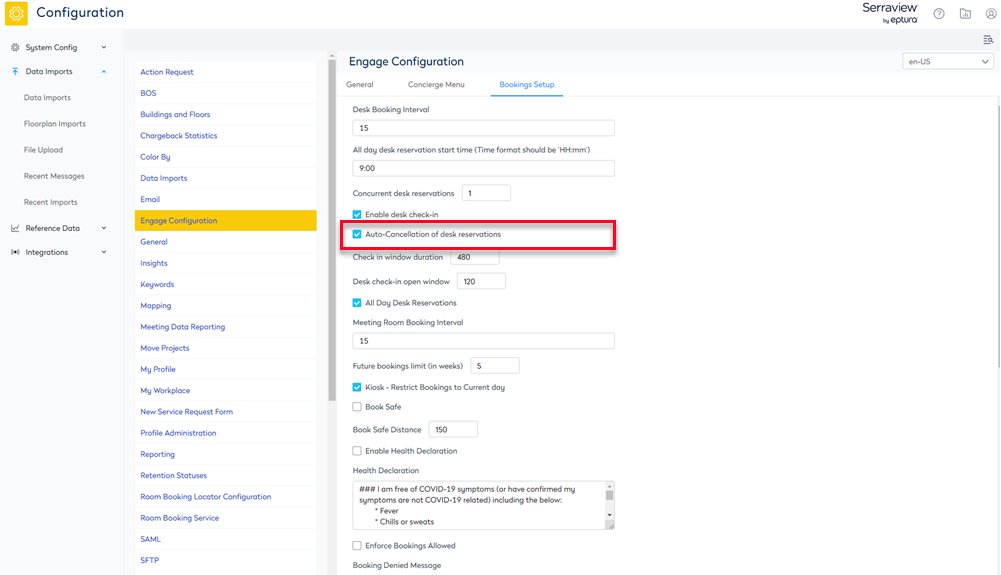
Global Settings
Set up Auto Cancellation of Desk Reservations in Engage Configuration
Complete the following:
- Navigate to Admin Settings > System Config > General > Engage Configuration.
- Click the Bookings Setup tab.
- Check the Auto-Cancellation of desk reservations check box.
- Click the Update button.
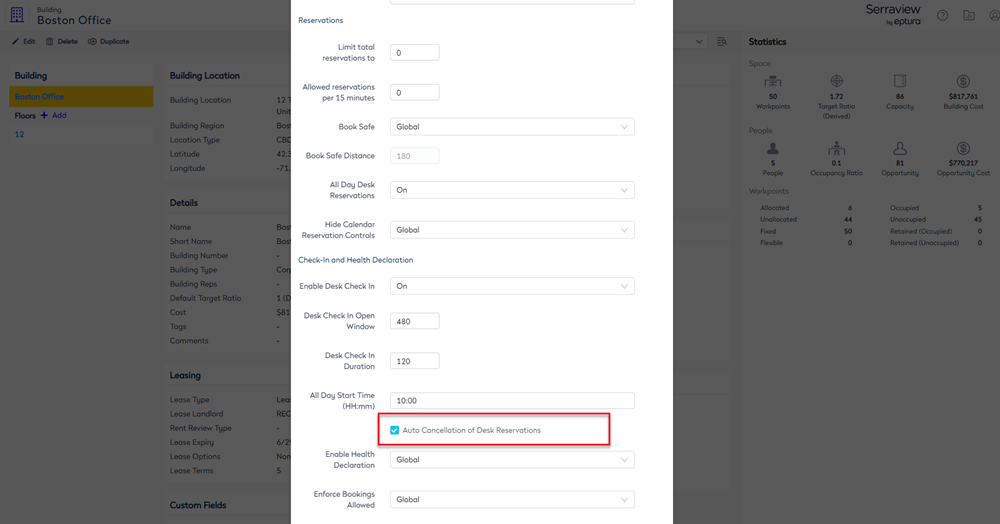
Building Settings
Set up Auto Cancellation of Desk Reservations for a Building
Complete the following:
- Navigate to Resources > Buildings & Floors.
- Click on the building. The building details displays.
- Click the Edit button. The Update Building dialog displays.
- Check the Auto Cancellation of Desk Reservations check box.
- Click the Update Building button.