Install SVLive Agent Version 3.5.4
Overview
This article covers the installation of the SVLive Agent Version, the steps involved are:
Step 1. Uninstall Previous Version
- Make sure you have uninstalled the previous SVLive Agent version. See either Uninstall SVLive Agent Version 3.4.0 or Uninstall SVLive Agent Version 3.5.1 and above.
- Restart the device.
Step 2. Installation for Windows 11 (24h2) - SVLive Version
System Requirements
- Windows 10/11 (x64)
- Administrator rights required
Use the SVLive Agent Installer found in the SPS MSIX 3.5.4.zip below, and this is designed to enable location services specifically for the SPS (Serraview Presence Service) application. This ensures the following:
- Seamless installation using an exe installer
- Pre-user registration on shared device
- Controlled and auditable access to location services
- Compliance with Windows 11 24H2 requirements
Installation Options
The Installation Options are:
- Option 1 - Using the Installation Wizard
- Option 2 - (Slient Installation) Install EXE with Command Line.
Option 1 - Using the Installation Wizard
- Download and then unzip the SPS MSIX 3.5.4.zip file.
- Double click the SVLiveAgent-Installer.exe and the installation wizard displays.
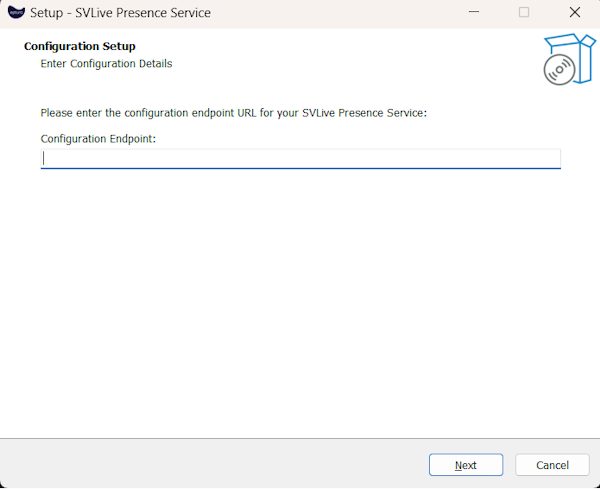
- In the Configuration Endpoint field, enter the configuration endpoint URL for your SVLive Presence Service.
- Click the Next button.
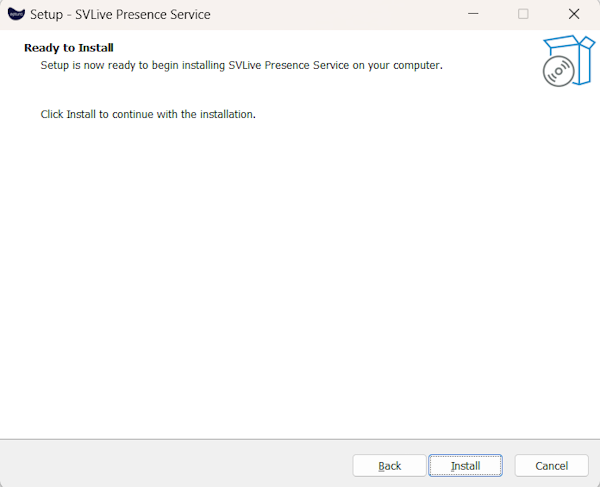
- Click the Install button and the installation starts.

- When the installation is finished, you will see the prompt and then click the Finish button.
- Open the Task Manager and check that the SVLive Presence Service is running.

Option 2 - (Silent Installation) Install EXE with Command Line
System restart is required after bulk installation for the application to launch automatically when users sign in.
The SVLive Presence Service can be easily installed on a single computer by executing the following command where:
- Open powershell in Administrator mode
- Goto path where SVLiveAgent-Installer.exe
.\SVLiveAgent-Installer.exe /VERYSILENT /CONFIG="config-api-url" /LOGPATH="log-path"
Bulk Install with System Center Configuration Manager (SCCM)
The same basic command displayed above can be used when installing SVLive Presence Service using SCCM.
.\SVLiveAgent-Installer.exe /VERYSILENT /CONFIG="config-api-url" /LOGPATH="log-path"
| Parameter | Required | Description |
|---|---|---|
|
|
Yes |
Runs the installer in completely silent mode with no user interface. |
|
|
Yes |
Specifies the configuration API endpoint URL. |
|
|
No |
Specifies the directory path where installation logs will be saved. |
Configuration URL Formats
- Log Files - If installation issues occur, check the installation logs at the path specified by the
/LOGPATHparameter. If no log path was specified, logs may be found in the default Windows temp directory. - Administrator Privileges - The installer requires Administrator privileges to install the service and configure system-level settings.
The configuration file at: %ProgramData%\Serraview\SVLive Presence Service\sps.ini
Policy Configuration Overview
This provides step-by-step instructions for your IT administrators to configure the Group Policy settings that allow the SVLive Presence Service application to access device location services. This configuration is required for the application to function properly in your organization.
Contents
- Required Registry Changes
- Group Policy Settings Modified
- Application Details
- Prerequisites
- Configuration Instructions
- Method 1 - Microsoft Intune
- Method 2 - SCCM Configuration Items
- Method 3 - Group Policy Management Console
Required Registry Changes
The following registry modifications will be implemented by the policies described in this document:
Registry Location: HKEY_LOCAL_MACHINE\SOFTWARE\Policies\Microsoft\Windows\AppPrivacy
| Registry Value | Type | Data | Purpose |
|---|---|---|---|
|
LetAppsAccessLocation |
REG_DWORD |
1 |
Enables location access for Windows apps (1=Allow, 0=Deny) |
|
LetAppsAccessLocation_ForceAllowTheseApps |
REG_MULTI_SZ | SVLivePresenceService_4g4swh7twsk8w | Forces location access permission for SVLive Presence Service |
Group Policy Settings Modified
Policy Path: Computer Configuration > Policies > Administrative Templates > Windows Components > App Privacy
Policy Name: "Let Windows apps access location"
Configuration Applied:
- Policy State: Enabled
- Default for all apps: User configurable (or Force Allow, depending on organization preference)
- Force allow these specific Windows apps to access location: SVLivePresenceService_4g4swh7twsk8w
Expected System Behavior
After policy application:
- SVLive Presence Service will have automatic location access permission
- Users will not be prompted for location permission by this application
- Other applications will follow standard Windows privacy controls
- Location access for SVLive will persist across application updates
Application Details
| Property | Value |
|---|---|
|
Application Name |
SVLive Presence Service |
|
Package Family Name |
SVLivePresenceService_4g4swh7twsk8w |
|
Version |
3.5.4 |
Prerequisites
For Traditional Group Policy:
- Active Directory Domain Services environment
- Group Policy Management Console (GPMC) access
- Domain Administrator or equivalent privileges
For SCCM/Intune (Microsoft Endpoint Manager):
- Microsoft Endpoint Manager admin center access
- Intune Administrator or equivalent privileges
- Windows 10/11 client machines enrolled in Intune/SCCM
- Device compliance and configuration profile permissions
Configuration Instructions
- Method 1 - Microsoft Intune
- Method 2 - SCCM Configuration Items
- Method 3 - Group Policy Management Console
Method 1 - Microsoft Intune
Step 1. Access Endpoint Manager Admin Center
- Navigate to Microsoft Endpoint Manager admin center
- Sign in with Intune Administrator credentials
- Go to Devices > Configuration profiles
Step 2. Create Device Configuration Profile
- Click "+ Create profile"
- Platform: Windows 10 and later
- Profile type: Settings catalog
- Name: SVLive Presence Service - Location Privacy Policy
- Description: Allows SVLive Presence Service to access device location
Step 3. Configure Privacy Settings
- Click "Add settings"
- Search for: Privacy
- Expand: Privacy > App Privacy
- Select: "Let Windows Apps Access Location"
Step 4. Configure Location Access
- Let Windows Apps Access Location: Force allow
- Let Windows Apps Access Location Force Allow These Apps: SVLivePresenceService_4g4swh7twsk8w
Step 5: Assign and Deploy
- Click "Next" until you reach "Assignments"
- Assign to: Select appropriate device groups or all devices
- Review settings and click "Create"
- Monitor deployment status in "Devices" > "Monitor" > "Device configuration"
Method 2 - SCCM Configuration Items
Step 1. Create Configuration Item
- Open Configuration Manager Console
- Navigate to: Assets and Compliance > Compliance Settings > Configuration Items
- Right-click and select "Create Configuration Item"
- Name: SVLive Location Access Policy
- Type: Windows Desktops and Servers
Step 2. Configure Registry Settings
- Add new setting of type "Registry Value"
- Registry Hive: HKEY_LOCAL_MACHINE
- Key: SOFTWARE\Policies\Microsoft\Windows\AppPrivacy
- Value name: LetAppsAccessLocation
- Data type: Integer
- Value: 1
Step 3. Add App-Specific Setting
- Add another registry setting:
- Registry Hive: HKEY_LOCAL_MACHINE
- Key: SOFTWARE\Policies\Microsoft\Windows\AppPrivacy
- Value name: LetAppsAccessLocation_ForceAllowTheseApps
- Data type: String
- Value: SVLivePresenceService_4g4swh7twsk8w
Step 4. Create Compliance Rules
- Add compliance rules for both registry values
- Rule: Value equals expected setting
- Remediate: Enable automatic remediation
Step 5. Deploy Configuration Baseline
- Create Configuration Baseline containing the Configuration Item
- Deploy to appropriate device collections
- Monitor compliance in Monitoring workspace
Method 3 - Group Policy Management Console
Step 1. Open Group Policy Management
- On your Domain Controller or management workstation, open Group Policy Management Console
- Navigate to your domain structure
- Locate the Organizational Unit (OU) containing the computers/users that will use SVLive Presence Service
Step 2. Create or Edit Group Policy Object
Option A - Create New GPO:
- Right-click on the target OU
- Select "Create a GPO in this domain, and Link it here"
- Name: SVLive Presence Service - Location Access Policy
Option B - Edit Existing GPO:
- Right-click on existing GPO
- Select "Edit"
Step 3. Navigate to App Privacy Settings
- In the Group Policy Management Editor, navigate to: Computer Configuration > Policies > Administrative Templates > Windows Components > App Privacy
- Locate the policy: "Let Windows apps access location"
Step 4. Configure Location Access Policy
- Double-click on "Let Windows apps access location"
- Select "Enabled"
- Configure Options:
- Default for all apps: Choose one option:
- Force Allow - Always allow location access for all apps
- Force Deny - Always deny location access for all apps
- Add SVLive Presence Service to Allowed Apps:
- In the "Force allow these specific Windows apps to access location" field
- Enter: SVLivePresenceService_4g4swh7twsk8w
- If multiple apps, separate with semicolons
- Click "OK" to save the policy
Step 5. Apply and Test
- Link the GPO to appropriate OUs if not already linked
- Run Group Policy update on test machines:
gpupdate /force - Verify policy application:
gpresult /r
Registry Settings Reference
Location: HKEY_LOCAL_MACHINE\SOFTWARE\Policies\Microsoft\Windows\AppPrivacy
| Value Name | Type | Data | Description |
|---|---|---|---|
|
LetAppsAccessLocation |
REG_DWORD |
1 |
Enable location access (1=Allow, 0=Deny) |
|
LetAppsAccessLocation_ForceAllowTheseApps |
REG_MULTI_SZ |
SVLivePresenceService_4g4swh7twsk8w |
Force allow location for specific apps |
Step 3. Restart the Device
To complete the installation you must restart the device.