Publish 2D Enterprise Graphics
Archibus Smart Client Extension for Revit
Publish 2D Enterprise Graphics
This command publishes as enterprise graphics all assets as well as the architectural background graphics for the current Revit level. Generate enterprise graphics in order to view your model in Web Central. For general information on enterprise graphics, see Publishing Drawings as Enterprise Graphics

The Publish 2D command iterates through the levels of the Revit model, publishing the elements found on each Revit level that has Archibus asset symbols associated with that level. To do this, the command publishes a separate enterprise graphics file for each type (for example, Jacques – Floor 1 -- rm.json.zlib, Jacques – Floor 1 -- eq.json.zlib, etc.).
Archibus uses the Level name in the "Drawing Name" field to relate Archibus assets and Revit levels. With this approach, Archibus can merge information from Revit models for new buildings in a consistent way with the information from the CAD-scanned drawings that you might have for existing buildings.
Operation
Publishing supports the following. Note that Annotation is not supported:
-
All building geometry
-
Rooms
-
Spaces
-
Areas
Note that the command:
- Includes elements from linked drawings if these elements are visible in the associated Revit level.
- Generates line weights according to the Revit element setting.
-
Generates line colors using this order of precedence:
- Visibility/Graphic Overrides (if any)
- View Template (if any) or Category Color
Procedure
You can either publish all levels at once, or first navigate to the specific level that you want to publish.
Note
: When working in the SaaS environment, you must first set the
EnableClouldPublishing
value to 1 in the afm_activity_params table. Use the
System / Archibus Administrator - Application Configuration / Configure Application Parameters
task to make this change.
- Navigate to the Level that is to be published.
- Select an asset on the Level.
-
From the Ribbon, select
Archibus / Enterprise Graphics / Publish 2D
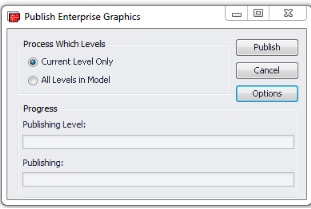
and choose Current Level Only. Or, choose to publish all levels, in which case you can skip steps 1 and 2.
-
If you first need to control the drawing publishing process, click Options to access the below Preferences form and set options. For information on the Preferences form, see
Publish Enterprise Graphics Options
. Also see
Configure Application Parameters for Drawing Publishing,
for information on setting options globally.

See also
- If you want to display your enterprise graphics in the Archibus Web Central 3D Navigator, use the Publish 3D command to publish a 3D view.
- For general information on enterprise graphics, see Using Revit Enterprise Graphics on the Web and Publishing Enterprise Graphics from Revit