Exchange: Create Room Mailboxes
Archibus Extension for Microsoft Exchange
Exchange: Create Room Mailboxes
This article describes how to create the room mailboxes.
Step 1. Create room mailboxes
1.1 Exchange PowerShell
Create new room mailbox
New-Mailbox -Name hq-17-127 -Room
Set calendar processing to autoupdate
Get-User hq-17-127 | Set-CalendarProcessing -AutomateProcessing AutoUpdate
1.2 Exchange admin center in on-premise Exchange
See instructions at Create and manage room mailboxes .
Link for local Exchange: https://<ServerFQDN>/ecp then navigate to Resources > Rooms and Equipment.
Don’t configure any advanced options or set delegates, just disable “Accept or decline booking requests automatically“. If you can’t disable it without adding a delegate, consider disabling it via PowerShell.
1.3 Exchange admin center in Exchange Online
Specifically on Office 365, the admin center can look a little different. See example in Room and equipment mailboxes - Microsoft 365 admin .
Direct link: https://admin.microsoft.com/Adminportal/Home#/ResourceMailbox
After creating a mailbox, disable “Auto-accept meeting requests“ via the booking options.
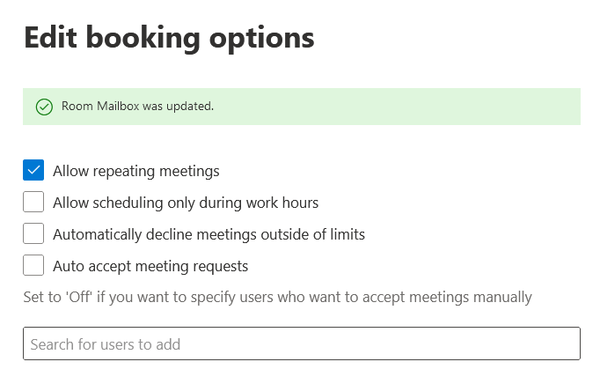
Disable “Auto-accept meeting requests”
Then use powershell to change the calendar processing to AutoUpdate
Get-User hq-17-127 | Set-CalendarProcessing -AutomateProcessing AutoUpdate
Step 2. Assign permissions
After creating the room mailboxes, if you previously restricted the impersonation scope of Archibus' service account or app registration, expand the scope so Archibus can impersonate the rooms.