Assign Rooms to Teams or Change Assignments Using a Form
Archibus SaaS / Space / Space Manager / Space Console
Space / Space Inventory / Space Manager / Space Console (non-transactional)
Space / Occupancy / Manager / Space Console (non-transactional)
Assign Rooms to Teams or Change Assignments Using a Form
When editing or creating teams using the Space Console, you can assign to rooms the teams by working with the Rooms tab of the Add Team or Edit Team forms. This method is handy if you want to:
- search for rooms of a particular size or having specific properties
- assign the team to areas within multiple floors, but you don't want to load the various floor plans
- see the full list of available rooms on all floors
You can also assign rooms to teams using the floor plan. Use this method if you want to:
- see the location of the rooms you are assigning
- work with one or two floors at a time
- assign rooms to teams regardless of current capacity. That is to say, when working with the floor plan, you can assign teams to any room. When working with the forms, the list of Available Rooms is limited to those that have capacity.
For information on assigning rooms to teams using floor plans, see:
- Assign Rooms to Teams Using the Floor Plan
- Change or Cancel a Team's Room Assignments Using the Floor Plan
Procedure
- Load the Space Console, set to Occupancy mode, activate the team space features.
- In the Advanced Search, set the As of Date and any other filters you require.
- Move to the Teams tab and select a team to edit. Or, choose to create a new team by selecting Add New.
- The system presents the Edit Team (or Add Team) form, which takes over the workspace so that the Space Console is no longer visible. You can resize this form if necessary.
-
In the Edit Team form, move to the Rooms tab. (Or, if creating a new team, create the team properties and then move to the Rooms tab.)

- Use the form's filter to search for rooms. The From Date in the filter is set to the As of Date you chose in Step 2. You can adjust this if necessary and also set the ending date (the To Date). If you change the Start Date, the system updates the As of Date to match and updates the displayed statistics accordingly.
- Process the filter, and the Rooms Assigned to Teams panel shows the rooms assigned to the team during the specified date range. The Available Rooms panel presents a list of all rooms that belong to an Occupiable room category and that are not on any team during the filter date range. If you clear the date fields in the filter, then the list displays all rooms that are not assigned to any team.
- If the Available Rooms list is too large to find the rooms you need, you can filter it using the Smart Search console. You can also use the gear-shaped icon to access the Select Fields command and display additional fields. You can then search on these fields as well.
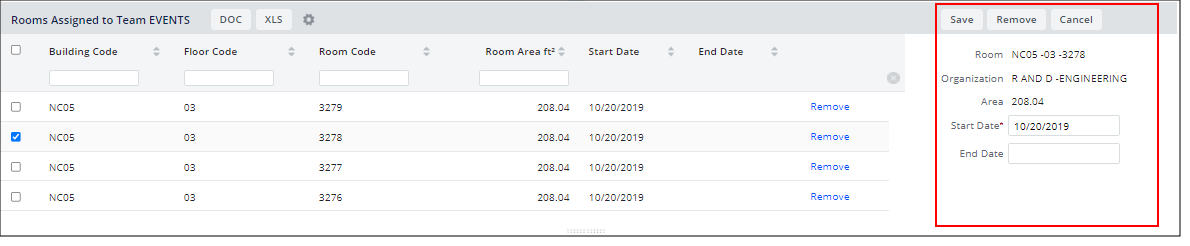
- When you have found the rooms you want to assign to the team for the specified date range, select their checkboxes and click Add Selected. Or, select an individual room and choose its Add button.
- The system displays these rooms in the Rooms Assigned to Team panel.
-
Once a room is listed in the Rooms Assigned to Teams panel, you can change the time frame if needed. Select the room's check box, and the system displays the Start Date and End Date fields to the right. You can then edit these if necessary. You can change the assignments of multiple rooms at once by selecting multiple rooms and then completing the form.
Tip: When assigning space to teams using forms, you may want to review the team's target employee-to-seat ratio so that you know approximately how many seats you require for this team. In the Rooms tab, you can use the Fields command (located on the gear-shaped icon) to display each room's capacity. You can then determine if your desired rooms will accommodate this team.