Configure Web Central for the Archibus Extensions for Esri
Archibus Geospatial Extensions for Esri
Configure Web Central for the Archibus Extensions for Esri
The system administrator performs the following steps to configure Web Central for the Geospatial Extensions for Esri.
Step 1: Verify that Web Central is licensed for the Extensions for Esri

Step 2: Configure the Application Parameters
The system administrator configures publishing, asset, and authentication application parameters. In this example, the administrator is setting the application parameters using Smart Client by loading the
afm_activity_params
(Application Parameters) table and completing the Paramater Value field, as shown below.
Alternatively, the administrator could run the
System / Archibus Administrator - Application Configuration / Configure Application Parameters
task and select
AbCommonResources
as the application.
Configure ArcGIS publishing application parameters.

Configure ArcGIS authentication application parameters.

Configure ArcGIS asset application parameters for each asset type that will be published.
The system administrator should configure the following sevem application parameters for each asset type that will be published. Parameter codes use the following naming convention:
Arcgis<assettype>ParameterCode
. For example, the parameter codes for room (rm) assets are:
ArcgisRm%
.

Step 3: Configure Web Central for ArcGIS Authentication
The system administrator configures Web Central for authentication by making the required edits to the
extensionsarcgis.properties
file.
Update the WEB-INF\config\context\applications\extensionsarcgis.properties file with the username and password or appId and AppSecret (depending on your configured method of authentication) with the credentials required to access the shared ArcGIS feature services.

Step 4: Configure the Archibus ArcGIS Import and Export Connectors for Each Asset Type that Will be Published
The Archibus ArcGIS Connectors import and export asset metadata to and from Web Central.
-
The ArcGIS Import Connectors import object IDs from ArcGIS to Archibus.
-
The ArcGIS Export Connectors export metadata from Archibus for ArcGIS.
The system administrator configures the ArcGIS Import and Export Connectors as required using the System / System Administrator / Configure Connectors task.
In most cases, the ArcGIS Import/Export Connector Properties should not require modification.
The ArcGIS Import Connector Fields requires the Archibus key fields for the asset (e.g. for rm : bl_id, fl_id, and rm_id ), as well as the ArcGIS object ID fields ( OBJECTID and/or GlobalID ) for the feature layer.

The ArcGIS Export Connector Fields requires the ArcGIS object ID fields ( OBJECTID and/or GlobalID ) for the feature layer. Additionally, asset fields can be added as required; however, the destination fields must exist in the ArcGIS feature layer schema.

Step 5: Configure Web Central for Extensions for Esri Publishing
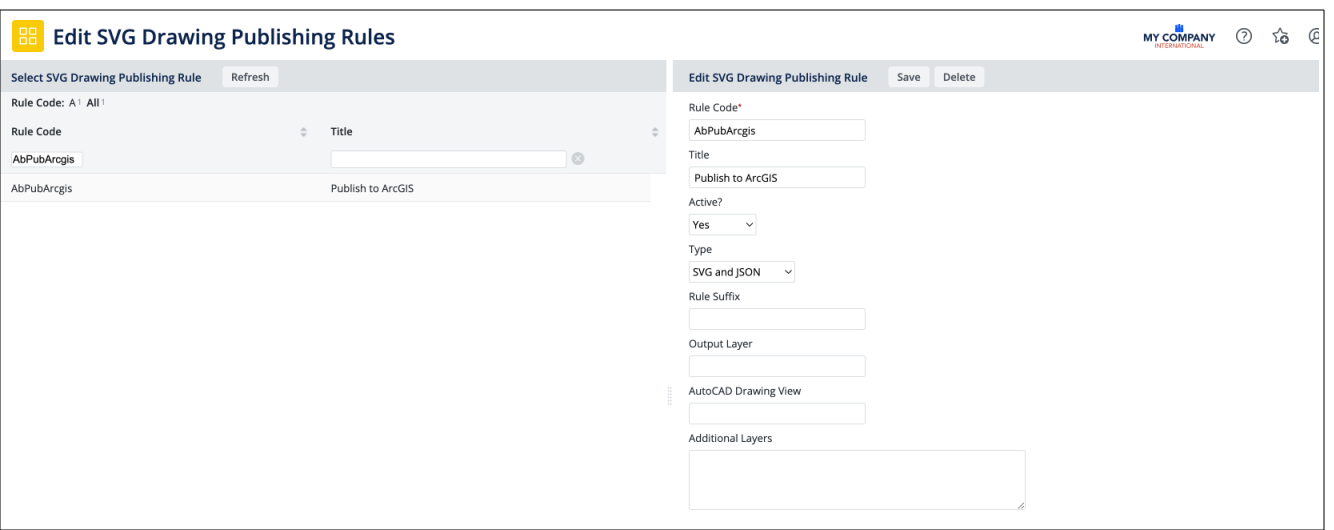
The system administrator configures Web Central for the Extensions for Esr by configuring the drawing publishing rule and configuring the enterprise graphics directory. Run the System / Mobile Apps Manager / Edit SVG Drawing Publishing Rules task.
Extensions for Esri publishing requires one active drawing publishing rule of type SVG and JSON . When publishing enterprise graphics from the Smart Client Extensions, this publishing rule kicks off the Extensions for Esri publishing workflow.
The Extensions for Esri publishing process writes temporary GeoJSON files to the \enterprise-graphics\geo directory. The system administrator must verify that this directory exists, and create it if necessary.
This completes configuration of the Archibus Extensions for Esri.