Create an Internal Gross Building Area Plan and Area Boundaries (External Chargeback)
Archibus Smart Client Extension for Revit
Create an Internal Gross Building Area Plan and Area Boundaries (External Chargeback)
The following section will step you through the process of creating an Internal Gross Building Area (measured to the inside face of exterior walls). This is the first step in preparing your Revit model if you intend to perform chargeback to external entities, such as insurance carriers, government grants, and tenants. After you have created area boundaries, you create a room inventory or a suite inventory. See Standards for Area Accuracy.
If you are performing lease and real estate business functions, you typically do not need a space inventory at a room level of detail, since you are not performing the day-to-day operational functions around the room. You may, however, need a suite-level inventory. In this case, see Preparing a Suite Level Inventory.
Step 1: Creating an Internal Gross Building Area Scheme and Plan
To automatically measure to the inside face of a wall, instead of generating a Gross Building Area Plan, you will need to generate an Area Plan that is based on the Rentable Area Scheme.
To generate this new Area Scheme:
-
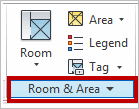
From the Ribbon, select Home, click on the drop-down arrow next to Room & Area, and select “Area and Volume Computations” from the list.

- Click on the Area Schemes tab of the dialog box that appears, and then the “New” button in the upper right corner to create a new Area Scheme.
- Rename this Scheme “Internal Gross.”
-
Create a new Area Plan:
-
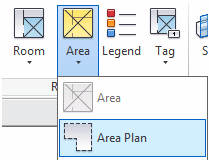
From the Ribbon, select Home/Area Plan. Area Plans will appear in their own “Area Plans (Gross Building)” section of the Revit Project Browser.

- In the New Area Plan dialog, select the newly created Internal Gross Area Scheme from the top drop-down list, and then select the level that you want this Area Plan to be associated to.
-
Step 2: Create Area Boundaries
When working in these types of Area Plans, a number of additional Area Types become available. Areas can be classified as SERV (service areas or building common areas), VERT (vertical penetrations), and more. For the purposes of generating areas measured to the inside face of walls, any area type other than Exterior Area or Store Area may be used. For a detailed breakdown of how these area types associate with each other, see How Different Area Types Are Measured Depending on their Bordering Types .
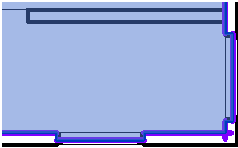
The process outlined here will result in a single Area inside the building with a BOMA-style area measurement; its perimeter will be defined by the inside face of the exterior walls and to the face of any glazing areas within the exterior walls.
Note : There appears to be some issues with this glazing area calculation. The version of Revit as of the time of this writing may show some inconsistent results in how it interacts with exterior glazing. If more specific building perimeters are required, you can manually define your own Area Boundary Lines instead of using the automatically generated ones.
To manually draw Area Boundary Lines:
-
Delete any unnecessary automatically-generated Area Boundary Lines to ensure that you are starting with a clean slate.

-
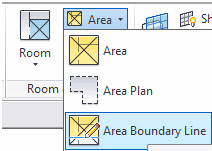
From the Ribbon, select Home/Room & Area panel, click on the Area button, and then finally the Area Boundary Line command.

-
At this point a new Ribbon tab will become active that includes some drawing tools. Using the various shape creation tools (line, arc, rectangle, etc.), trace out the perimeter of the Gross Building Area as needed. This will provide the greatest amount of control over exactly where the Area Boundary Lines need to be.

Next Step
The next step is to prepare a room inventory or a suite inventory that defines the areas that external chargeback uses in its calculations.
For detailed instructions, see:
