Hiding and Displaying Data in the Space Console
Archibus SaaS / Foundations / Space and Moves / Space Console
Archibus SaaS / Space / Space Manager / Space Console
Space / Space Inventory / Space Manager / Space Console (non-transactional)
Space / Occupancy / Manager / Space Console (non-transactional)
Hiding and Displaying Data in the Space Console
The Space Console displays key pieces of information about your floors, rooms, organizations, room categories, and employees.
You might find that you wish to hide some of this information or display additional information that is hidden by default. For example, in the Floors list you may wish to see each floor's usable area rather than its room count. Similarly, you may wish to avoid horizontally scrolling the frames and so hide a field that is not vital to your day-to-day work.
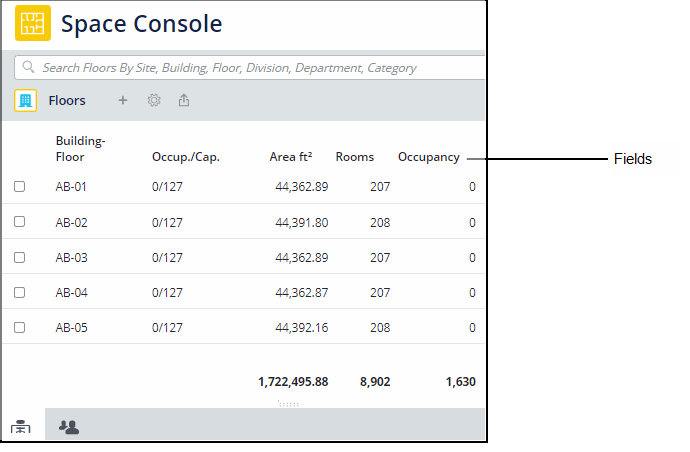
Changing the group of fields and their display order can be very important when exporting your data to Excel or Word. For example, if you want to export this data to Excel and then merge it with existing spreadsheet, it is important that the appropriate fields display and that they display in the correct order so that you can later merge the two files.
To control the data that displays in the Space Console, you use the Select Fields command. With this command, you can:
- hide and display fields of data.
- change the order in which the fields appear

To access the Select Fields form, click the Gear icon and click Select Fields from the fly-out menu. The Gear icon is available on each tab, as well as in the Floors list.

Note that the field visibility and field order changes you make stay in effect, even if you sign out of Archibus.
Note: The Space Console's tabs present a pencil-shaped Edit icon that you can use to access a form to change an item's value. Similarly, some tabs present an Assign button so that you can assign this value to a room in the drawing. The Select Fields form includes the Edit icon and the Assign button so that you can change their placement on the grid.
Note : The Organization and Room Categories tabs are tree views that contain two different levels of data. In the Select Fields form, you can select different fields to appear in each level of the tree view. However, this may result in a poorly organized view that is difficult to read.
Note: The field listed by Select Fields can include user-defined and promoted fields your site might have set. These fields behave like any other fields. For information, see User-Defined and Promoted Fields in the Space Console.
Note : The Select Fields command controls the fields displayed in the grid; it does not control the fields that are presented by the Space Console's Edit forms (which are accessed by the pencil-shaped icon).
Hide and Display Data
- Load the Space Console.
- In the frame whose data you wish to hide or display, click the Gear icon.
- From the drop-down menu, click Select Fields.
- The system displays the Select Fields form, listing the tables in this frame and their hidden fields (the Available list) and fields that appear on the Space Console (the Visible list).
- If you are working with the Organizations or Room Categories tabs, you first must select the table: Division or Department, or Room Category or Room Type. You do this by indicating Level 0/Level 1, such that Level 0 is Divisions or Room Categories and Level 1 is Departments or Room Types.
- For the selected table, select a field and use the Show and Hide buttons to move it between the Available and Visible lists.
- When satisfied with your list, choose the Update button. Archibus updates the display of the fields on the Space Console. This change remains in effect for your all future sessions of Archibus, until you change it back.
Change the Field Display Order
Archibus displays the fields left to right in the frame according to the top-to-bottom order of the list in the Visible Fields section of the Select Fields form.
- Load the Space Console.
- In the frame whose data you wish to hide or display, click the Gear icon.
- From the drop-down menu, click Select Fields.
- The system displays the Select Fields form, listing the tables in this frame and their hidden fields (the Available list) and fields that appear on the Space Console (the Visible list).
- If you are working with the Organizations or Room Categories tabs, you first must select the table: Division or Department, or Room Category or Room Type. You do this by indicating Level 0/Level 1, such that Level 0 is Divisions or Room Categories and Level 1 is Departments or Room Types.
- In the Visible Fields list, select the field you want to reposition.
- Use the Up and Down buttons to position the field.
- When satisfied with your list, choose the Update button. Archibus updates the display of the fields on the Space Console. This change remains in effect for your all future sessions of Archibus, until you change it back.
Next steps
Once you have adjusted the display of data, you may wish to export it. See Exporting Space and Occupancy Data to Excel and Word .