Displaying Views in the Smart Client Grid
Displaying Views in the Smart Client Grid
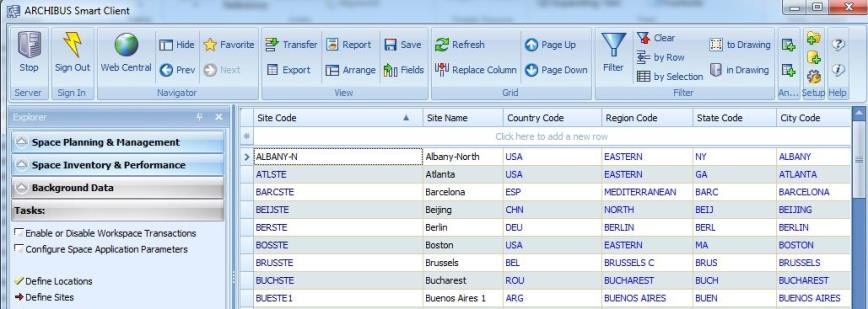
In addition to displaying in its embedded browser the same Web views as Web Central, Smart Client has a grid for displaying views that are designed for bulk data updates and analysis.
Views displayed in the Smart Client grid are AXVW files and have the same format as views displayed in Web Central or the Smart Client embedded browser. However, Smart Client grid views use only the
<dataSource>
element and its content; they do not use elements such as
<layout>
,
<panel>
,
<message>
,
<js>
, and
<css>
.
You can have the Smart Client present any AXVW file as a grid view; however, the grid will ignore view components in the AXVW that it cannot process.
You tell Smart Client whether to display an AXVW file in its Web browser control or in its grid when you define the Navigator task that loads the view. The Task Type field of the Archibus Tasks table
(afm_ptasks.task_type
) can be set as follows:
- WEB URL -- Displays the view file in Smart Client's Web browser.
- GRID -- Displays the view file in Smart Client's grid; ignores the view elements it cannot process.
- GRIDCAD -- Same as GRID above, but additionally changes the Explorer tab from Navigator to Drawings.
Any view with a
dataSource
can be seen in the Smart Client grid by just changing its afm_ptasks.task_type value. Thus, an AXVW with a
dataSource
and a form panel, normally seen in Web Central as a form view, can be shown in the Smart Client grid without editing the AXVW; instead, you simply change its
task_type
.
Additionally, there is a restriction that master-detail views (parent-child views) can have only two child levels. Thus, the Smart Client grid can show rooms per floor per building, but not rooms per floor per building per site.
Creating a Smart Client Grid View from an Existing Grid View
To create a Smart Client grid view from an existing grid view:
- From the Explorer panel, select the Views tab.
- Double-click the main table.
- Change the default fields that are shown in the grid using the Ribbon's View/Fields command.
- Add Standard or Child tables as needed. When you select the first table, the table list in the Explorer pane is restricted to show only tables that are related to the first table as a child table or a standard table. The Usage column indicates which of these relationships the table has to the selected table.
-
From the Ribbon, save the view by selecting the View/Save command, or the Navigator/Favorite command (to save as a Favorite).
The Save View Definition dialog appears.
- Change the name in the File Name field to an entry that does not end in “-gd-dflt.axvw”, to avoid modifying the default view.
-
Save the view by doing one of the following:
- Save to Favorites Selecting this checkbox saves a copy of the .axvw to the schema\per-site\ area. This selection preserves the current view:
- If you save the view without selecting Save to Favorites or Overwrite Original, the view is saved to \schema\per-site\ab-products\system-administration.
Note : Do not select the 'Overwrite Original' checkbox unless you are changing the default view. See Adding Default Smart Client Views.
-
Click Save in the Save View Definition dialog.
The written view will have a grid panel element for testing in Web Central, but this is not necessary for viewing in Smart Client.
Adding Default Smart Client Views
When working from the Views tab, when you select a table, the application loads a set of fields into the grid. The fields that are shown are determined by the default view for that table. Archibus ships a set of default views in \schema\ab-products\common\views\default.
A default view has the suffix "-gd-dflt" before the extension. For example, the activity type table default view must have the view name "ab-activitytype-gd-dflt.axvw". If you add this constraint to your steps (such as saving the view with a file name of "ab-activitytype-gd-dflt.axvw"), you will see that the system has automatically modified the afm_tbls record. The next time you open this table from the Views tab, you will see your created default view.
The following describes how the application determines which fields are shown.
- When you select a table name from the Views tab, the Smart Client uses the Table Name (for example, "bl" for the Buildings table) to load a view from the server that has a file name that uses the form ab- [tableName]-gd-dflt.axvw (for example, ab-bl-gd-dflt.axvw for the Buildings table.)
- If a view with that name cannot be loaded from the server, a view is created on the client using the primary keys, foreign keys, and Description fields.
- The loaded or created view is rendered in the grid.
You can customize these default views so that the view shows the fields you prefer, and you can add additional default views. For example, you might want to add additional views to add default fields for tables you have added to the database, or to create a default view that has the fields you want for an existing table.
How To Add Default Views
To add a new default view:
- From the Explorer panel, select the Views tab.
- Select the table for which you want to create a default view by double-clicking the table in the list. If needed, use the filter row to restrict the list.
- Add, remove, and reorder fields as you would like them to appear by default using the View/Fields command.
-
From the Ribbon, select the View/Save command.
The Save View Definition dialog appears.
-
In the File Name field, enter the name using the following format:
ab- [tableName]-gd-dflt.axvw
Note: You should not save a view using this naming format unless you want that view to become the default view for the table named within the file name. Any AXVW that the server can find with the format ab-[tableName]-gd-dflt.axvw will be used to determine the columns when adding the table [tableName] to the grid from the Views tab.
Note: The view does not have to reside in \schema\ab-products\common\views\default to be used as the default view.
- Ensure that the 'Overwrite Original' checkbox is selected.
- In the Save View Definition dialog, click Save.