Configure the Identity Provider (IdP): Microsoft Azure
OnSite Deployment
This is an outline of the key steps and requirements for registering the OnSite app with Microsoft Azure. We recommend you consult with your IT department for steps specific to your organization.
Contents
Step 1. Register the new Azure app integration
- Sign in to Azure portal.
- Go to App registrations.
- Click New registration.

- Fill in a name for your application.
- Click the Register button and after registration finishes, you will be automatically redirected to the app registration's Overview screen.
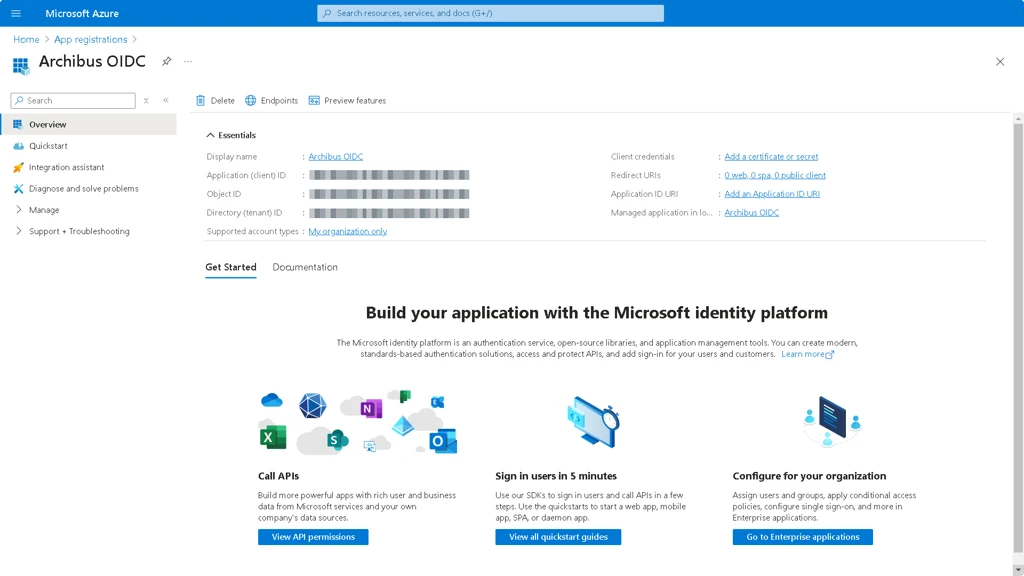
- Write down the values for the Application (client) ID.
- Click the Endpoints button and the Endpoints form displays.

- Write down the values for the following:
- OAuth 2.0 authorization endpoint (v2)
- OAuth 2.0 token endpoint (v2)
- OpenID Connect metadata document
Step 2. Set up the Redirect/Callback URIs
- From the left-left expand Manage and select Authentication.

- Click the Add a platform button and the Configure platforms form displays.

- Click the Mobile and desktop applications tile.

- Fill in Custom redirect URIs field to com.archibus.onsite.auth://callback
- Click the Configure buttonand the Configure Desktop + devices form displays.

- Fill in Custom redirect URIs field com.archibus.onsite.auth://callback
- Click the Configure button.
Make sure the callback redirect URI is filled in as indicated.

- Under Mobile and desktop applications Redirect URIs add: com.archibus.onsite.auth://logout
If you are using the Web version of Postman, also add: https://oauth.pstmn.io/v1/browser-callback
- Click the Save button to complete the configuration.
Step 3. Validate the application
- Open a browser and navigate to https://web.postman.co
- Go to Workspaces and select My Workspace.
- Create a new (blank) collection and name it appropriately.
- Select Authorization tab.
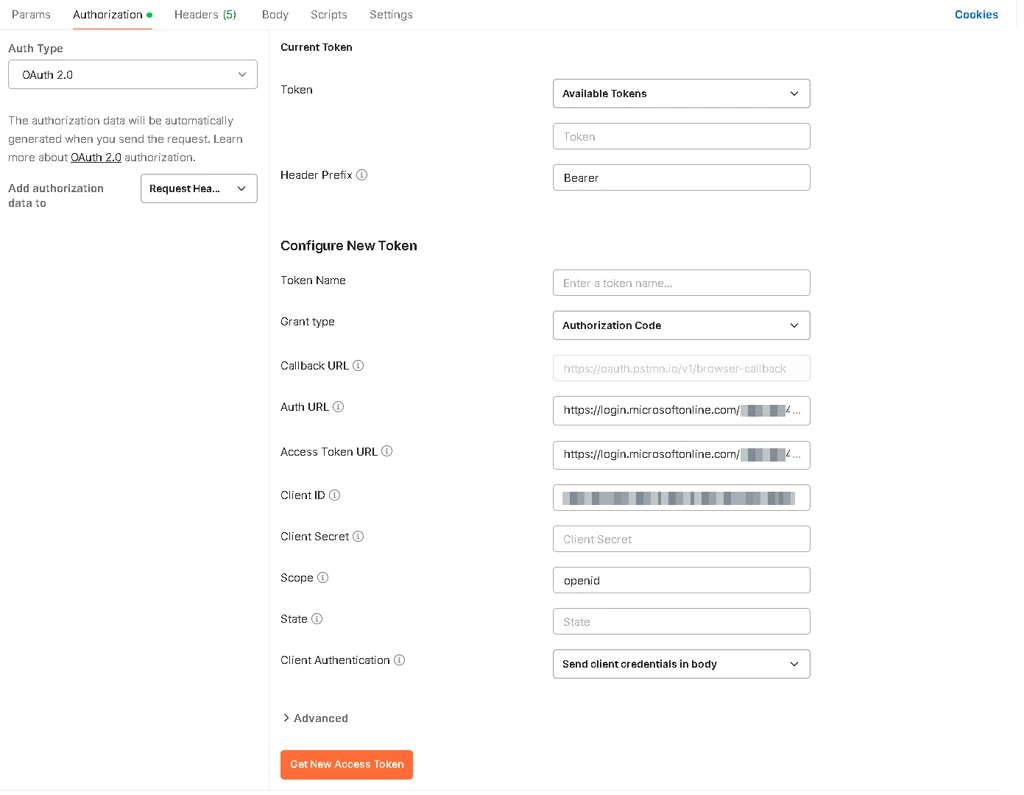
- Complete the following:
- Auth Type: change to Oauth 2.0
- Callback URL: any of the Redirect URIs, Azure app registration step8/9
- Auth URL: OAuth 2.0 authorization endpoint (v2), Azure app registration step 5
- Access Token URL: OAuth 2.0 token endpoint (v2), Azure app registration step 5
- Client ID: Application (client) ID, Azure app registration step 4
- Scope: openid
- Client Authentication: change Send as Basic Auth Header to Send client credentials in body.
- Click the Get New Access Token button and Azure is going to release an Access token and an ID token.
- Scroll down to the id_token.
- Load it into https://jwt.io/ to decode the content.

Make sure the signature is verified (scroll down to the bottom of the page) and check the payload data.
Optional - Configure Additional Claims
There are two ways to release additional claims: add more scopes to the request or enable optional claims to the scope. Azure does not support conditional inclusion of optional claims based on scopes. This means that when you configure optional claims, they are always included in openid. Learn more in OpenID Connect Scopes | Microsoft.
Add optional claims to OpenID scope
- In Azure portal, from the left-menu select Token configuration.
- Under the Optional claims, click the Add optional claim and the Add optional claim form displays.

- For the Token type option button, select ID.
- For the Claim, check the ipaddr check box.
- Click the Add button to add the claim.
- Go back to Postman and click Get New Access Token button.
- Copy the generated id_token.
- Load it into https://jwt.io/ to decode the content.
- Observe how ipaddr claim is now released.
Some optional claims, such as email, require additional permissions to be enabled in order to be released. if you plan to use multiple scopes, it’s not necessary to release the same attribute twice. For example, the openid scope already contains email.
Add more scopes to the request
- Go back to Postman.
- Change Scope to: openid profile email offline_access
- Click the Get New Access Token button
- Observe how a new token, refresh_token is now released.
- Copy the generated id_token.
- Load it into https://jwt.io/ to decode the content.
- Observe how the ipaddr is still present along with addition claims: email, name, oid, preferred_username
{
     "aud": "",
      "iss": "",
      "iat": ,
      "nbf": ,
      "exp": ,
      "email": "",
      "ipaddr": "",
      "name": "",
      "oid": "",
      "preferred_username": "",
      "rh": "",
      "sub": "",
      "tid": "",
      "uti": "",
      "ver": ""
}
- Go back to Azure portal.
- Remove the ipaddr claim as it’s not needed.
Step 4. Set up Archibus Web Central to use the Azure app
Configure the following Archibus Web Central properties files to reflect the Azure identity provider (IdP) and the Apollo GraphQL server.
- \archibus\WEB-INF\config\oidc.properties
- \archibus\WEB-INF\config\context\applications\configservice.properties
Learn what to change, in Configure Web Central to Use the Azure Identity Provider.