Print a Floor Plan in Space Desktop
When you have the building's floor open in the Space Desktop you will see the floor plan. From this floor plan you can adjust the print view, for example zoom in, what you need to remember is any adjustments made here will not be reflected in the print screen.
When the Paper Size/Layout screen displays you will the following options to print the floor plan:
- Standard Printing - adjust the floor plan for paper size, orientation, etc and there is additional Text Menu Options which let you:
- choose a text halo effect
- allow text overlap to be turn on or off
- choose the text label size
- show different text labels
- Compact Printing - adjust the floor plan for paper size, orientation, etc and there is additional Text Menu Options which let you:
- turn on the the Compact view which auto-scales the font size within the p-line. When the Compact View is on this hides the allow text over and text size options.
- choose a text halo effect
- show different text labels
Standard Printing
The Standard Printing is to print from the Paper Size/Layout screen and made adjustments to the paper size, orientation, etc.
- Navigate to Space Desktop.
- Navigate to a building and floor.
Here you will see the floor plan where you can adjust the print view, but remember the adjustments you make here will not be reflected in the printing screen.
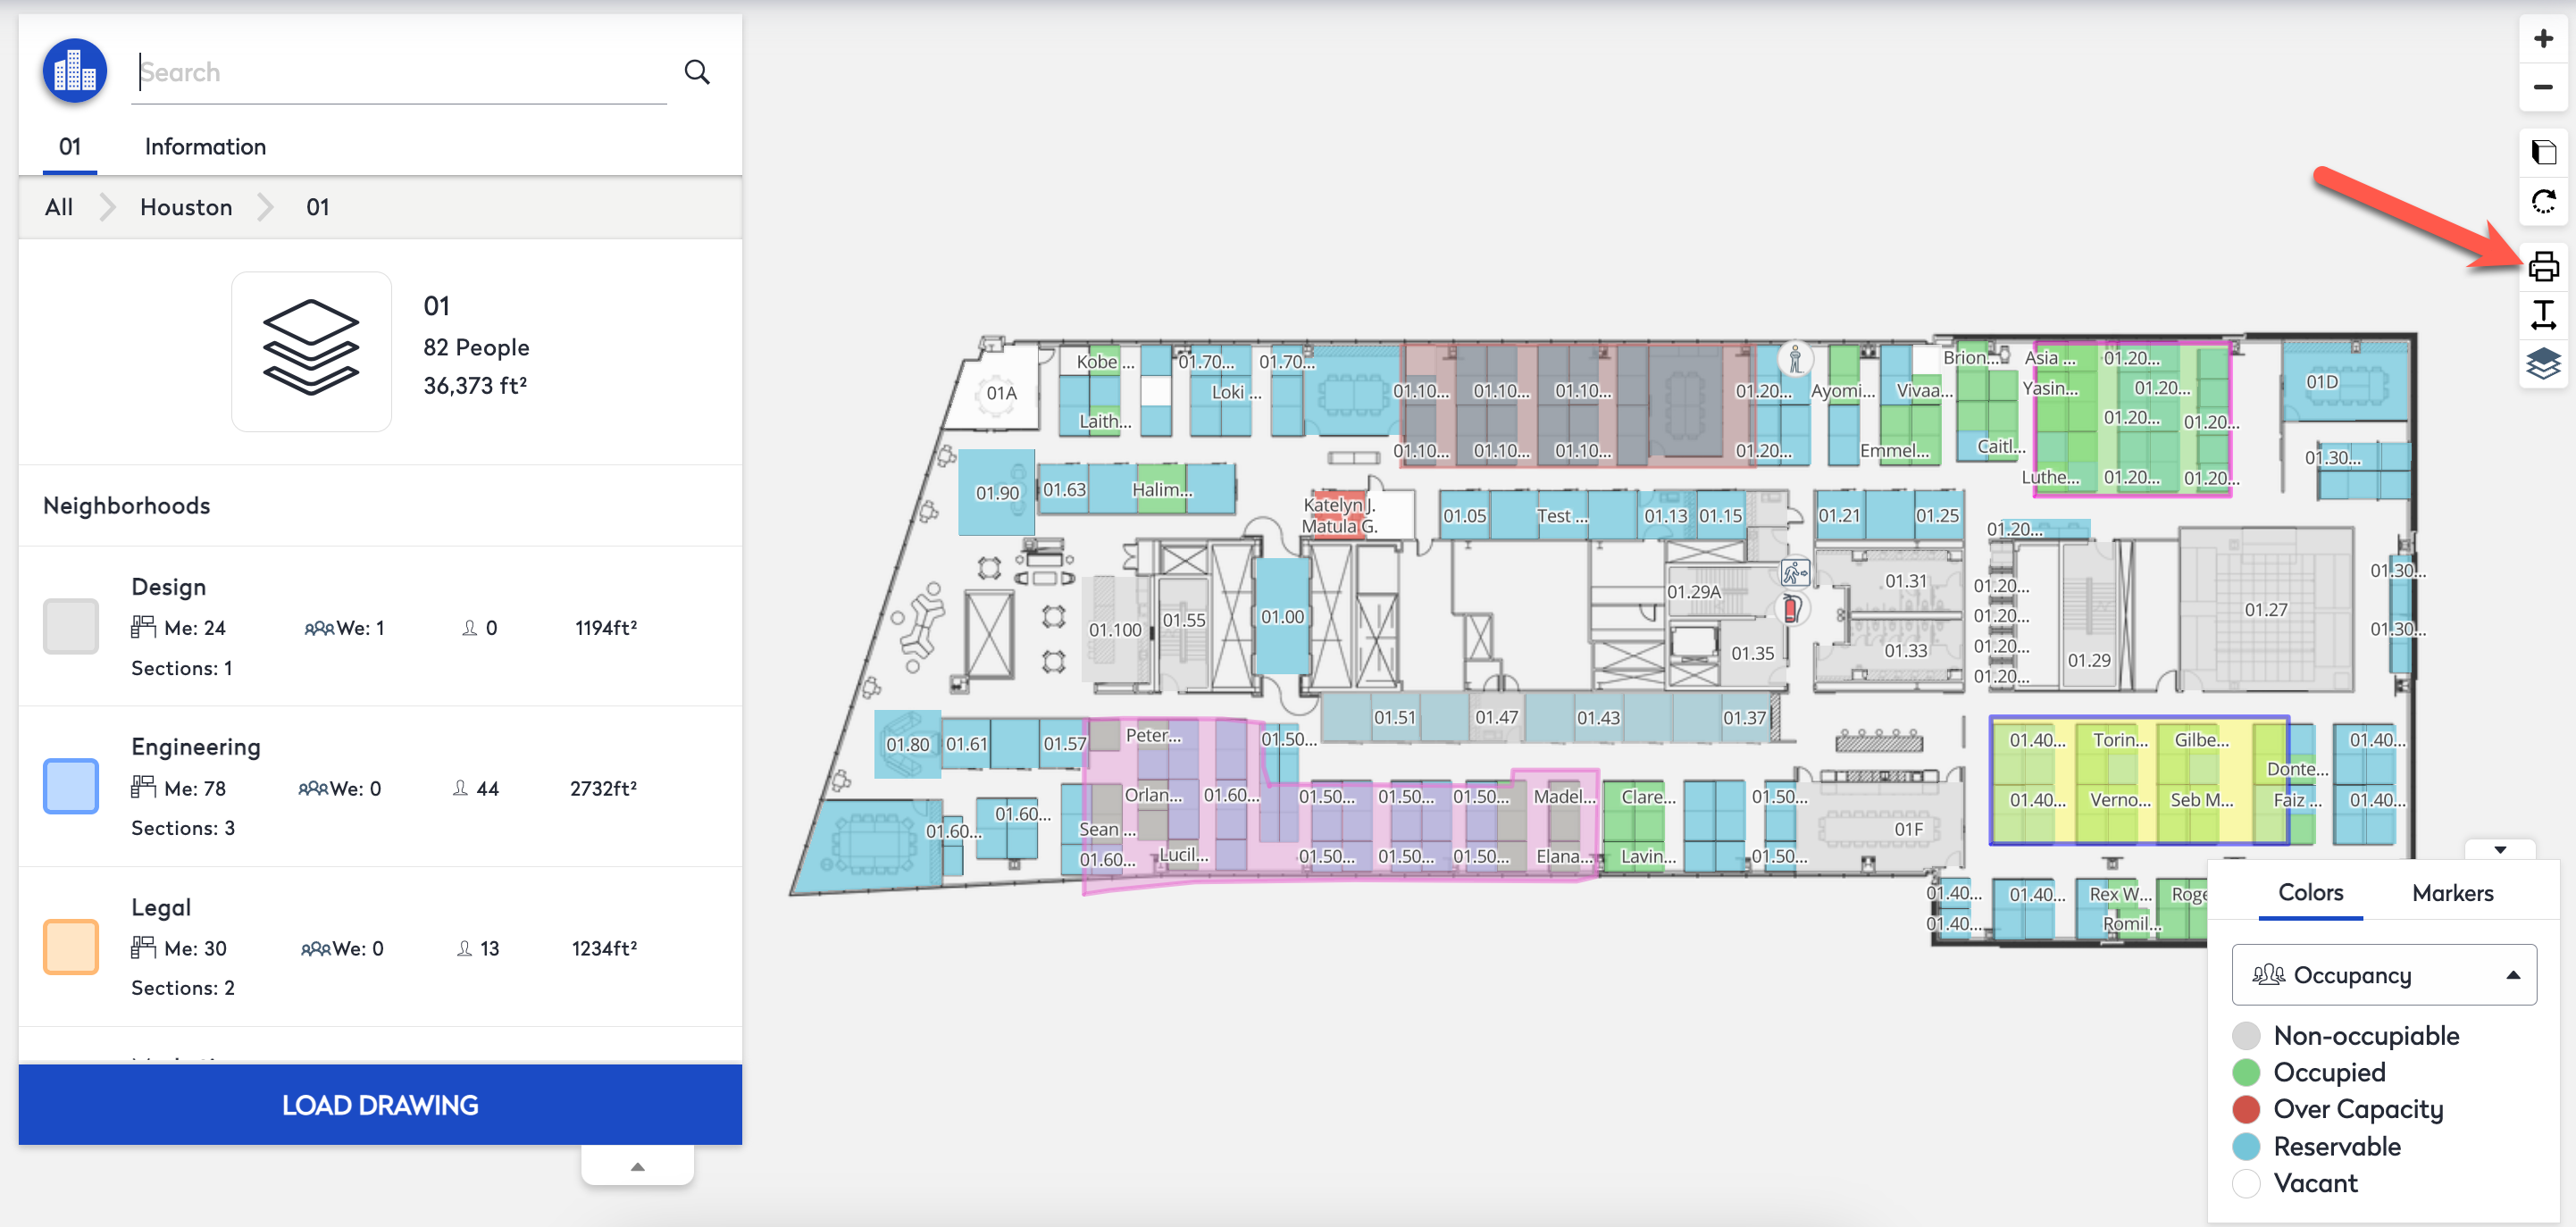
- From the toolbar, click the Print
 icon.
icon.
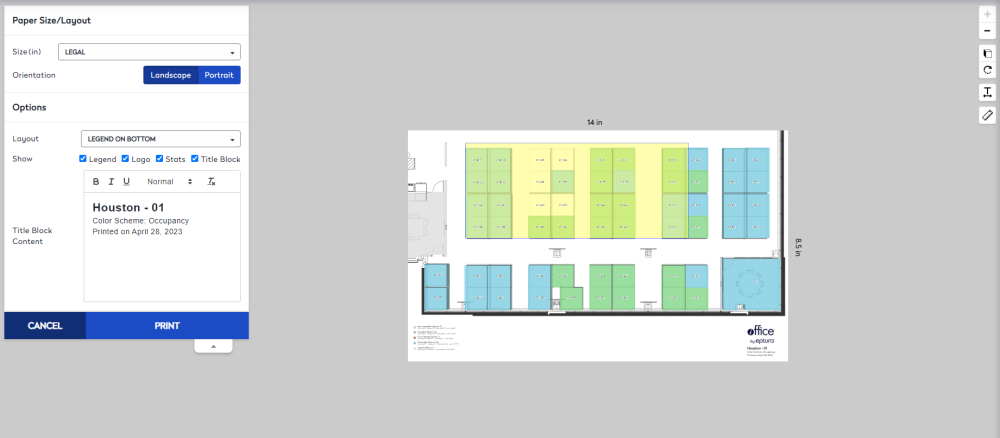
The Paper Size/Layout screen displays. This is where you will complete the adjustments to the print view to get the floor plan ready for printing.
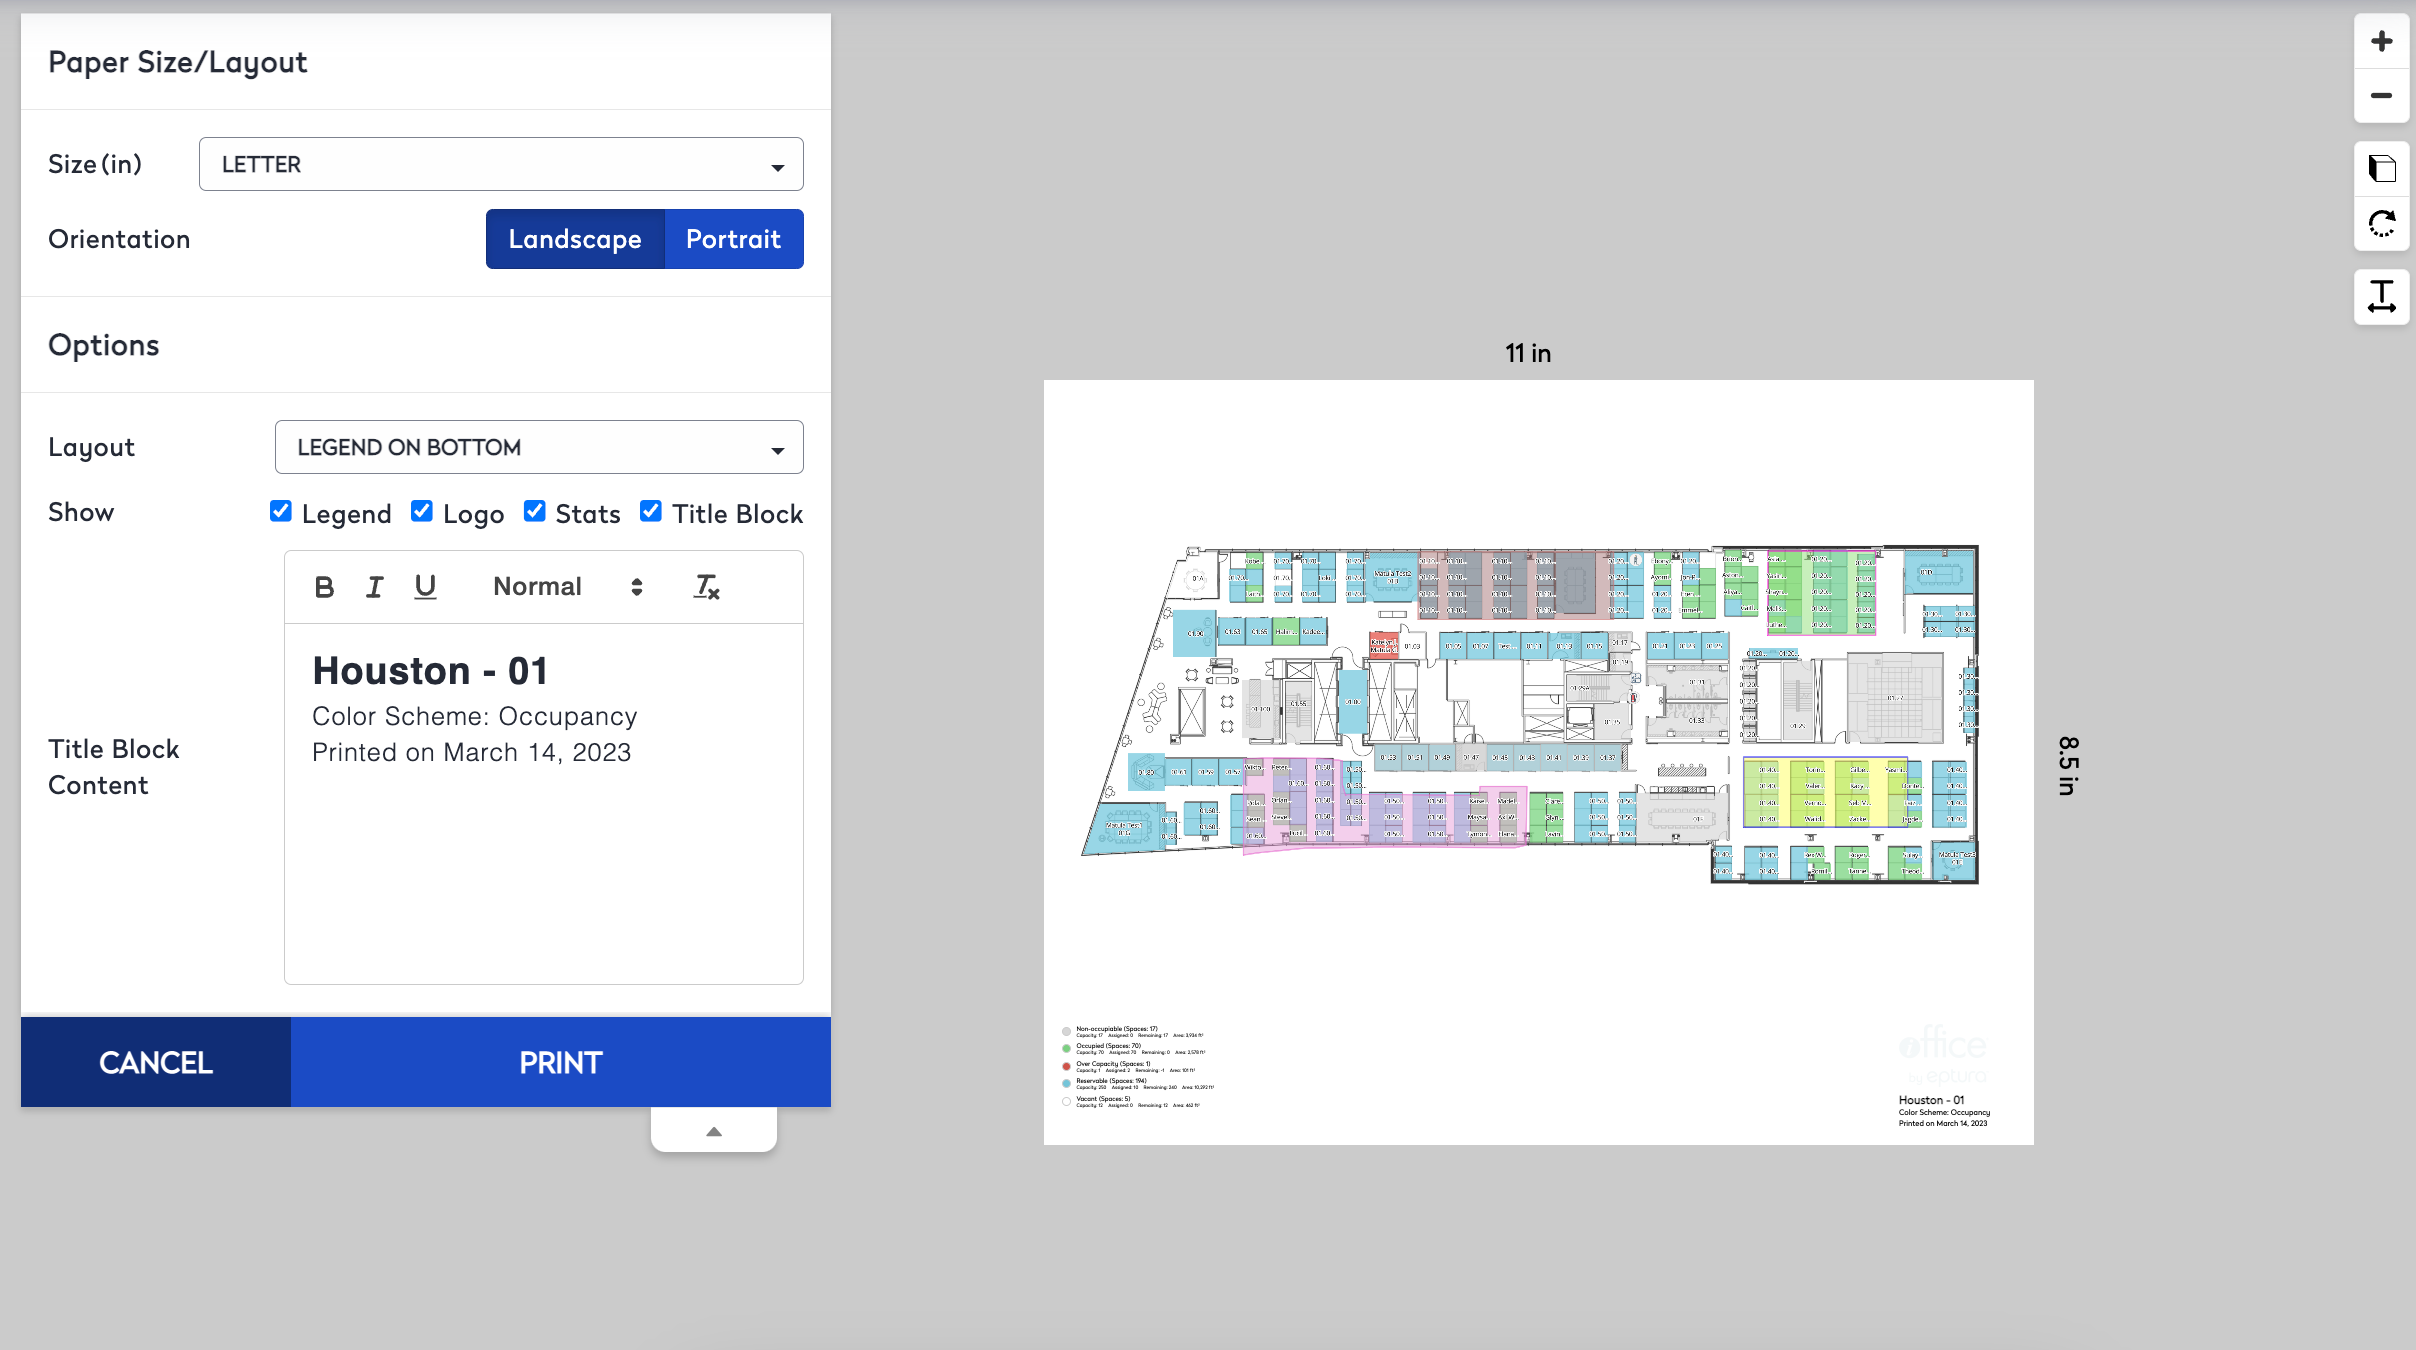
From the Paper Size/Layout screen, you can adjust the layout before your print.
- From the Size drop-down, select either:
- Default paper size. Such as Letter and the print view will change and display the paper size.
- Custom and then in the Width field and Height field enter the size. The print view changes the paper size.
Adjusting the paper size is useful if you want to print on a large paper size. 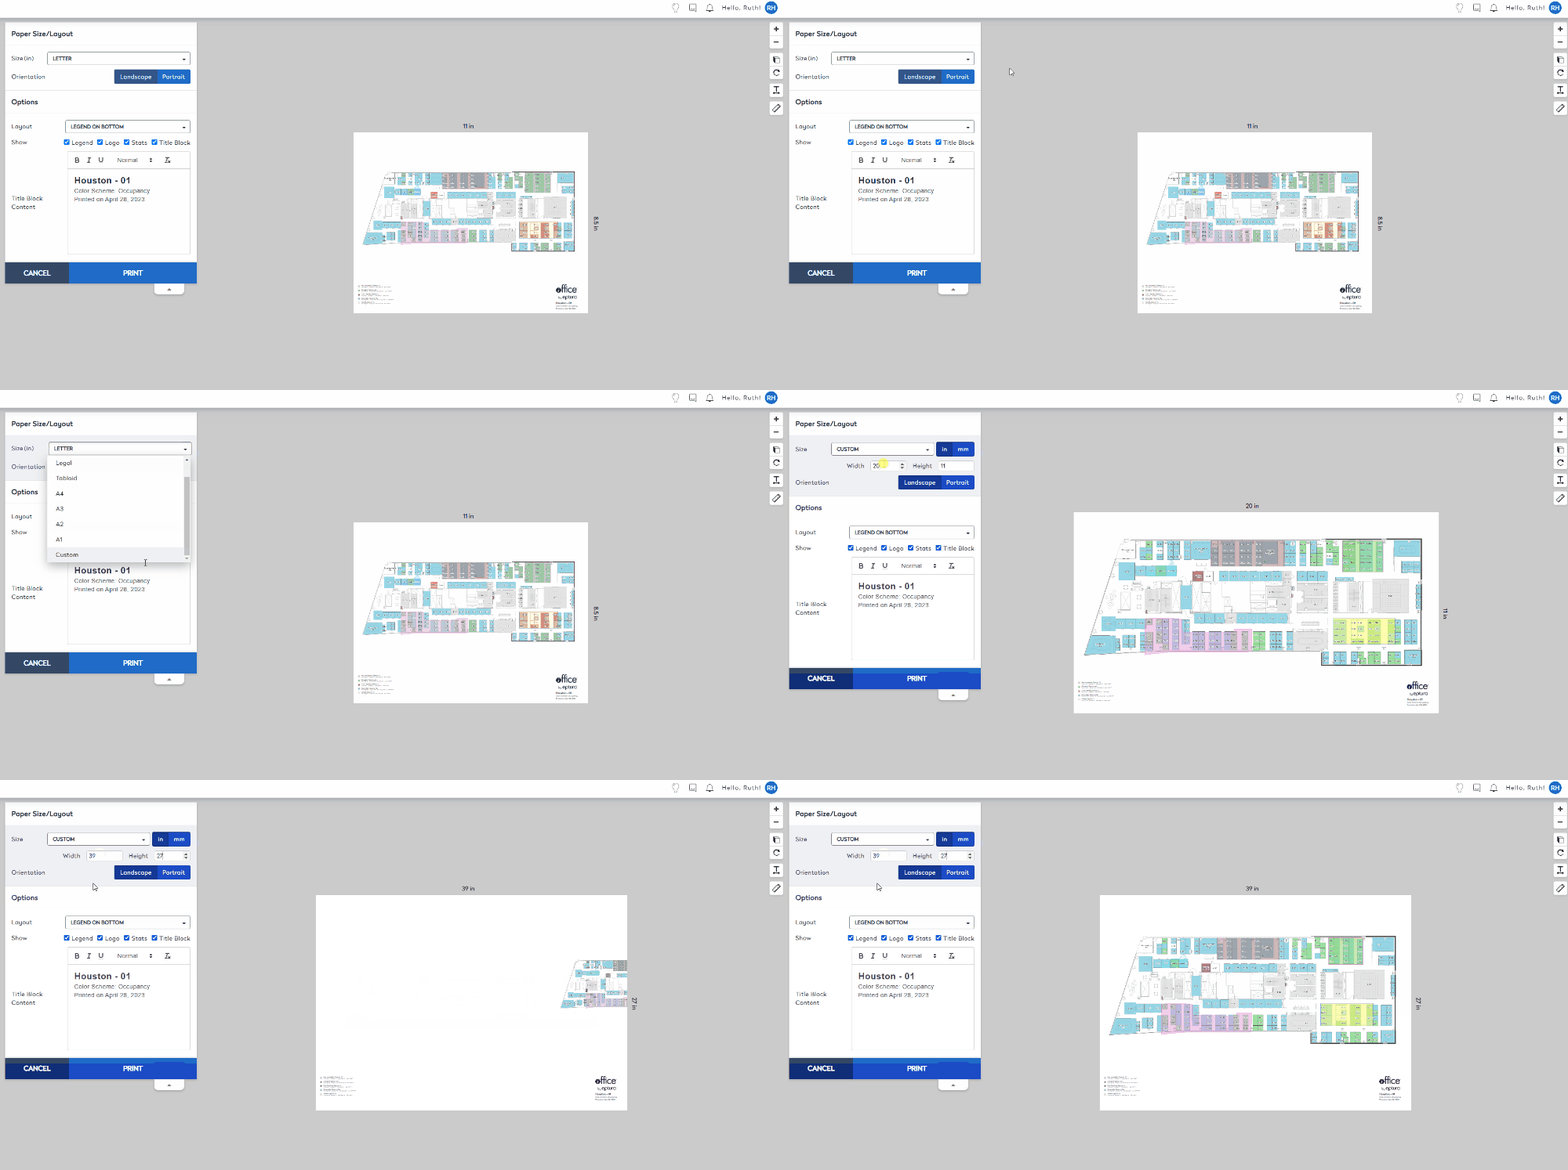
- For the Orientation option buttons, click either Landscape or Portrait.
- From the Layout drop-down, select either Legend on Bottom, Legend on Left, or Legend on Right.
- For the Show checkboxes, check either Legend, Logo, Stats, or Title Block to be visible. If unchecked then the item will be hidden.
- From the toolbar the drawing can be changed:
- Click the Zoom in
 icon or Zoom out
  icon to adjust the zoom.
 - Click the Cube
 icon to tilt the drawing.
 - Click the Rotate
 icon to rotate the drawing.
 - Click the Ruler
 icon and then click on any two point on the the floor map to see the distance between them.
- Click the Zoom in
- When all of the adjustments are made click the Print button.
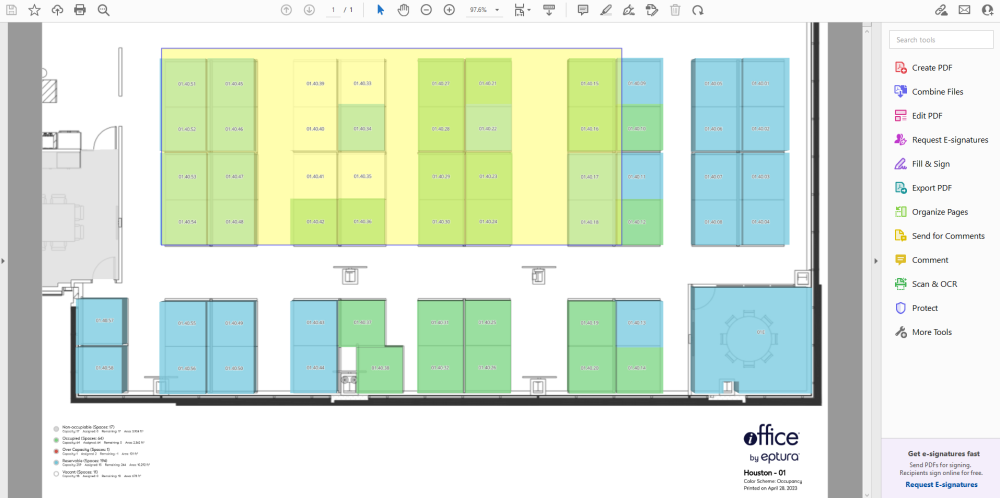
A PDF of the drawing is downloaded and from the PDF you can print this to a printer.
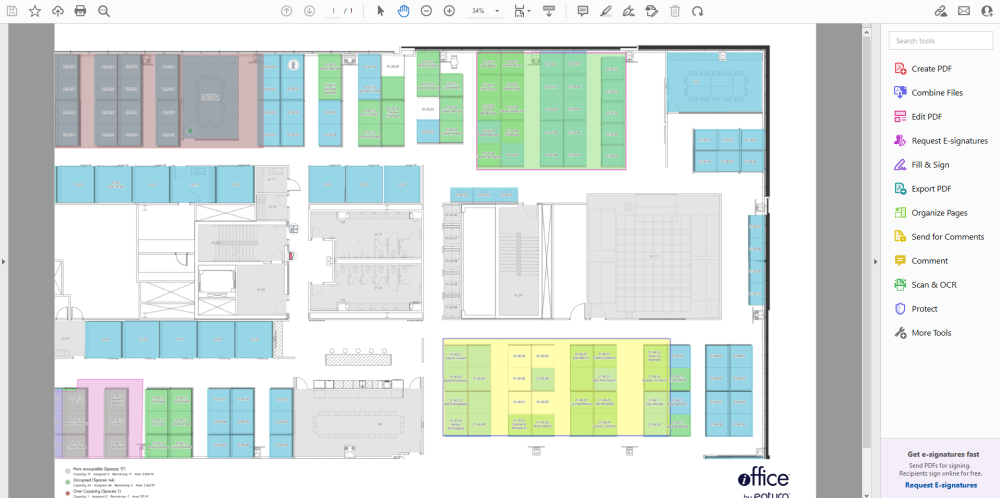
- Open the PDF to see the floor plan and in this example you can see the floor map was zoomed in therefore this is reflected in the PDF too.
Compact Printing
There are additional tools that can be used to display a halo effect and/or auto-scale the font size within the p-line.
- Navigate to Space Desktop.
- Navigate to a building and floor. Here you will see the floor plan where you can adjust the view, but remember the adjustments you make here will not be reflected in the printing screen.
- From the toolbar, click the Print
 icon. The Paper Size/Layout screen displays. This is where you will complete the adjustments to the view to get the floor plan ready for printing.
 - From the toolbar, click the Text Menu Options
 icon. The popup menu displays.
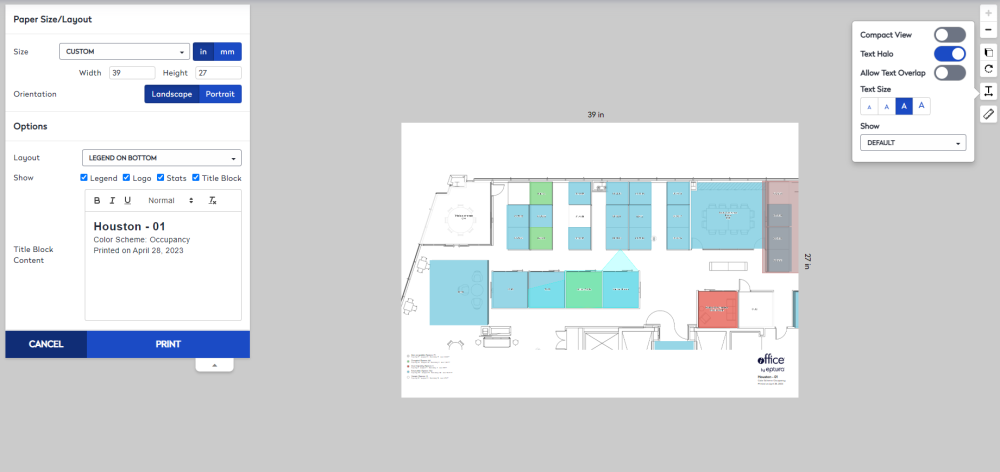
- Click the Compact View toggle to ON to auto-scale the text such as Space Name, Occupants, or Space Type to fit within the boundary of a space’s polyline. When you toggle this on then the settings for Allow Text Overlap toggle and Text Size options button are hidden. For example:
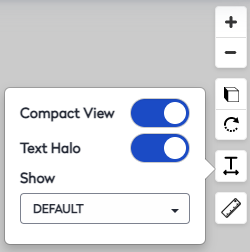
- The Text Halo toggle default to ON to outline floor plan text with a white glow, making text easier to read against various background colors and polylines.
- Click the Allow Text Overlap toggle to ON to let the text overlap on the floor plan. When this setting is Off then the text will truncate and an ellipsis will display.
- Click a Text Size option button from a range of small to large to change the size of the text on the floor plan.
The Text Size option button range is 10, 12, 14, and 16.
- From the Show drop-down, select either Default, Description, Description and People, Description and Type, Name, Name and People, or None.
- Additionally, you can make adjustments in the Paper Size/Layout panel as described above.
- When you are ready, click the Print button.
The floor plan is download as a PDF.
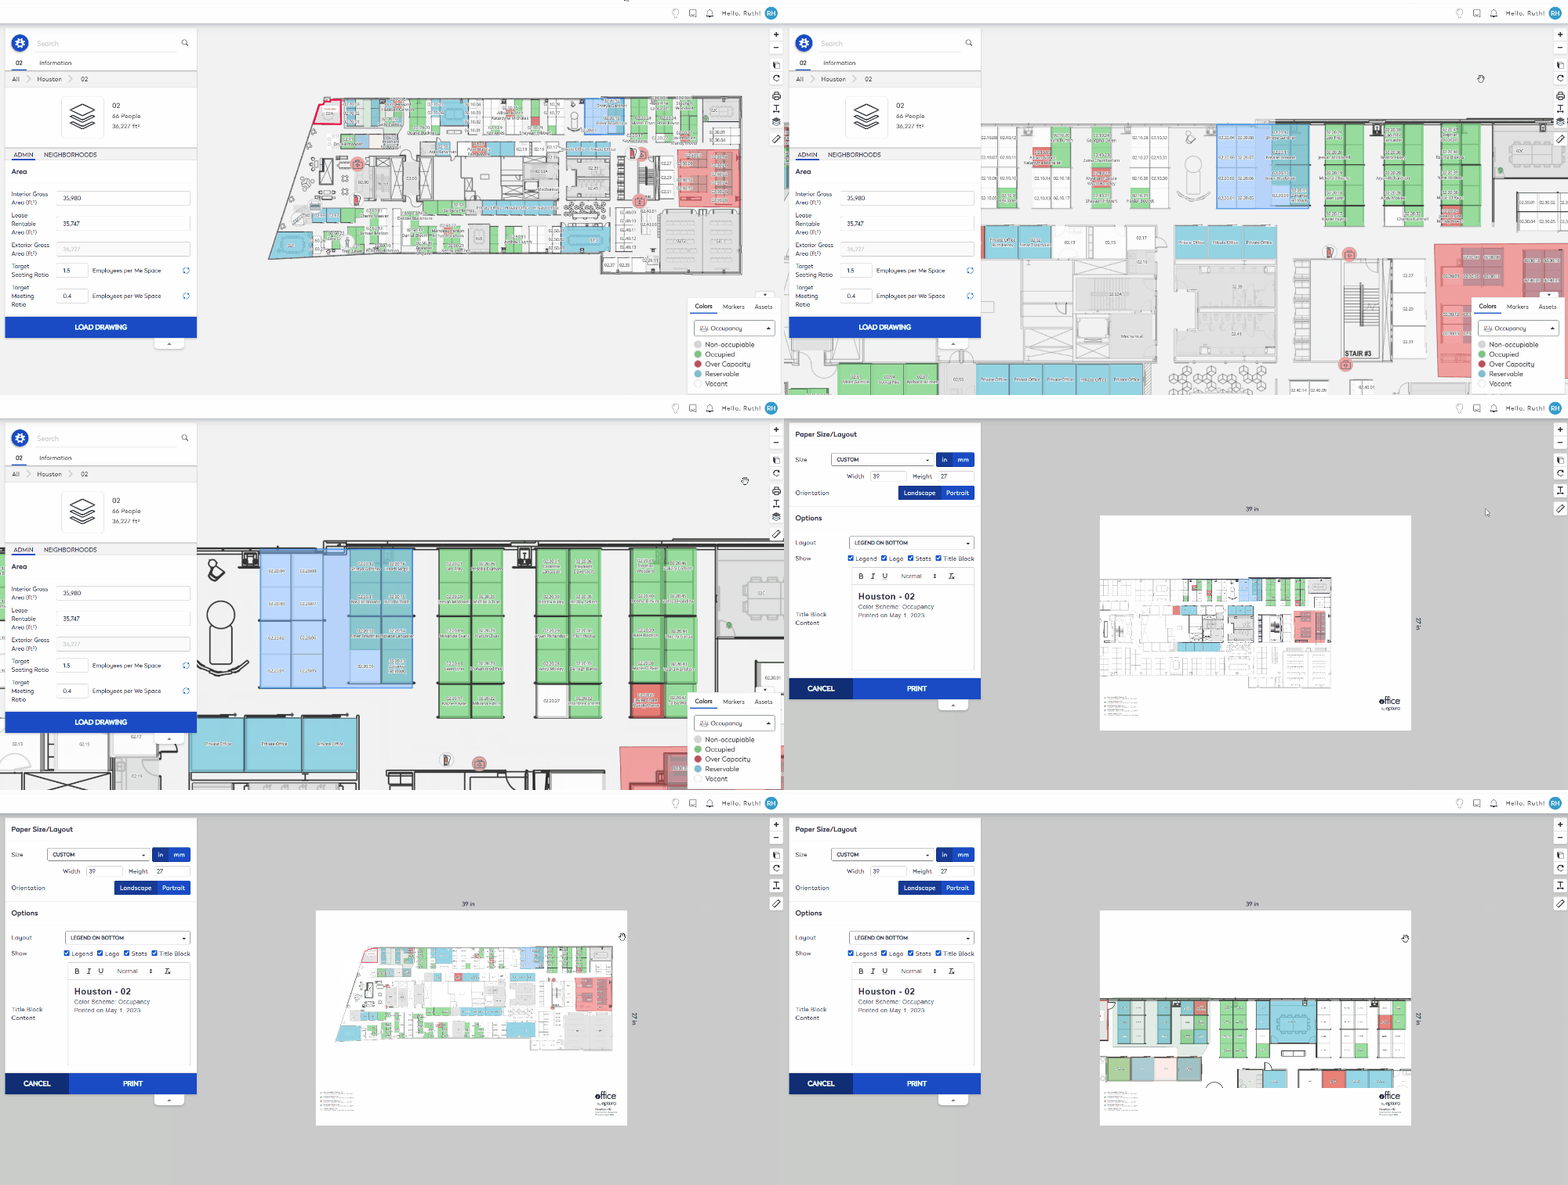
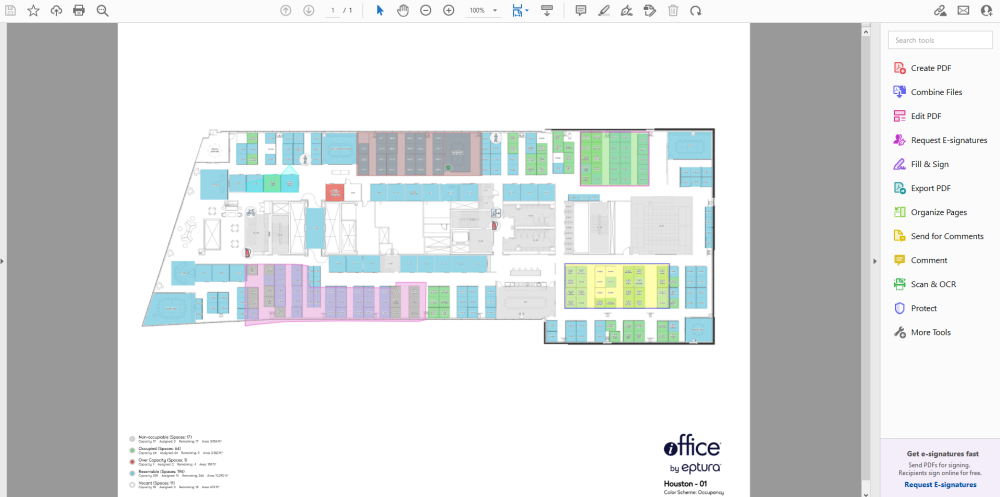
- Open the PDF to see the floor plan and below takes you through a few examples.
Compact Printing Toggled On and Letter Paper Size Example
In this example the paper size was set to Letter 11"x8.5" and text information displays.
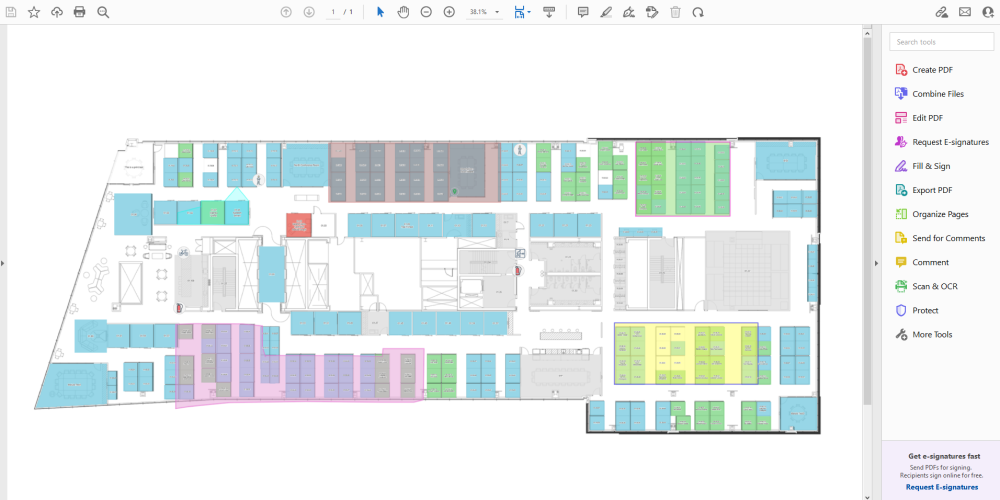
Compact Printing Toggled On and Custom Paper Size Example
In this example the paper size was set to Custom 39"x 27".
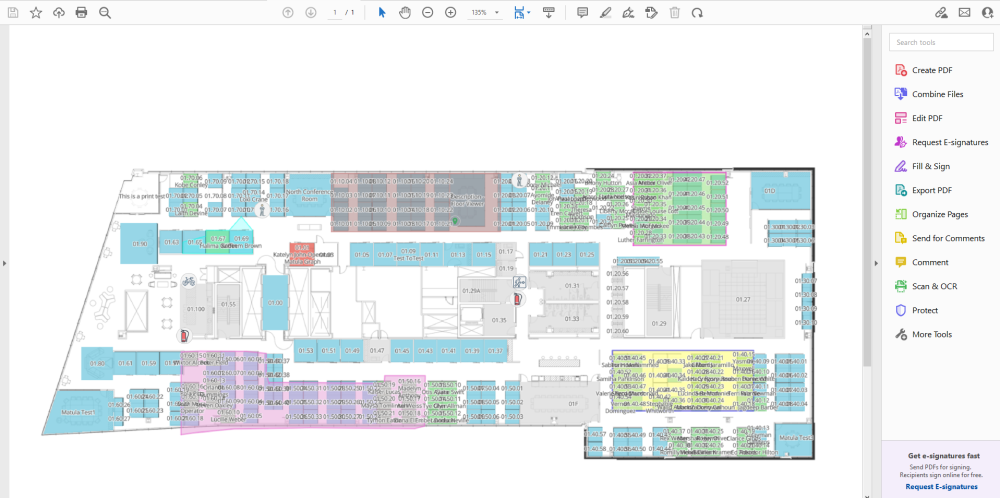
Text Halo Toggled On, Text Overlap Toggled On, and Letter Paper Size Example
In this example the paper size was set to Letter 11"x 8.5" this results in a floor plan where you can't read the information and we would recommend you use a larger paper size or maybe zoom into the floor plan.
Text Halo Toggled On, and Custom Paper Size Example
From the above example, we made the following adjustments:
- changed the paper size to Custom 39"x 27"
- zoom into the floor plan
- turned off the Text Overlap Toggle
- selected the smaller text size
Now the Description and People labels on the floor plan are easier to read.
