Load Floor Plan Drawing Manually
If you are using Softspace for AutoCAD Plug-in then do not use this as it will it will remove the drawing from the Softspace server.
When you want to manually manage drawings on your own internal storage or server you can use load drawing from the Space this. You can load the drawings from the Space Desktop or the Space Administrator.
-
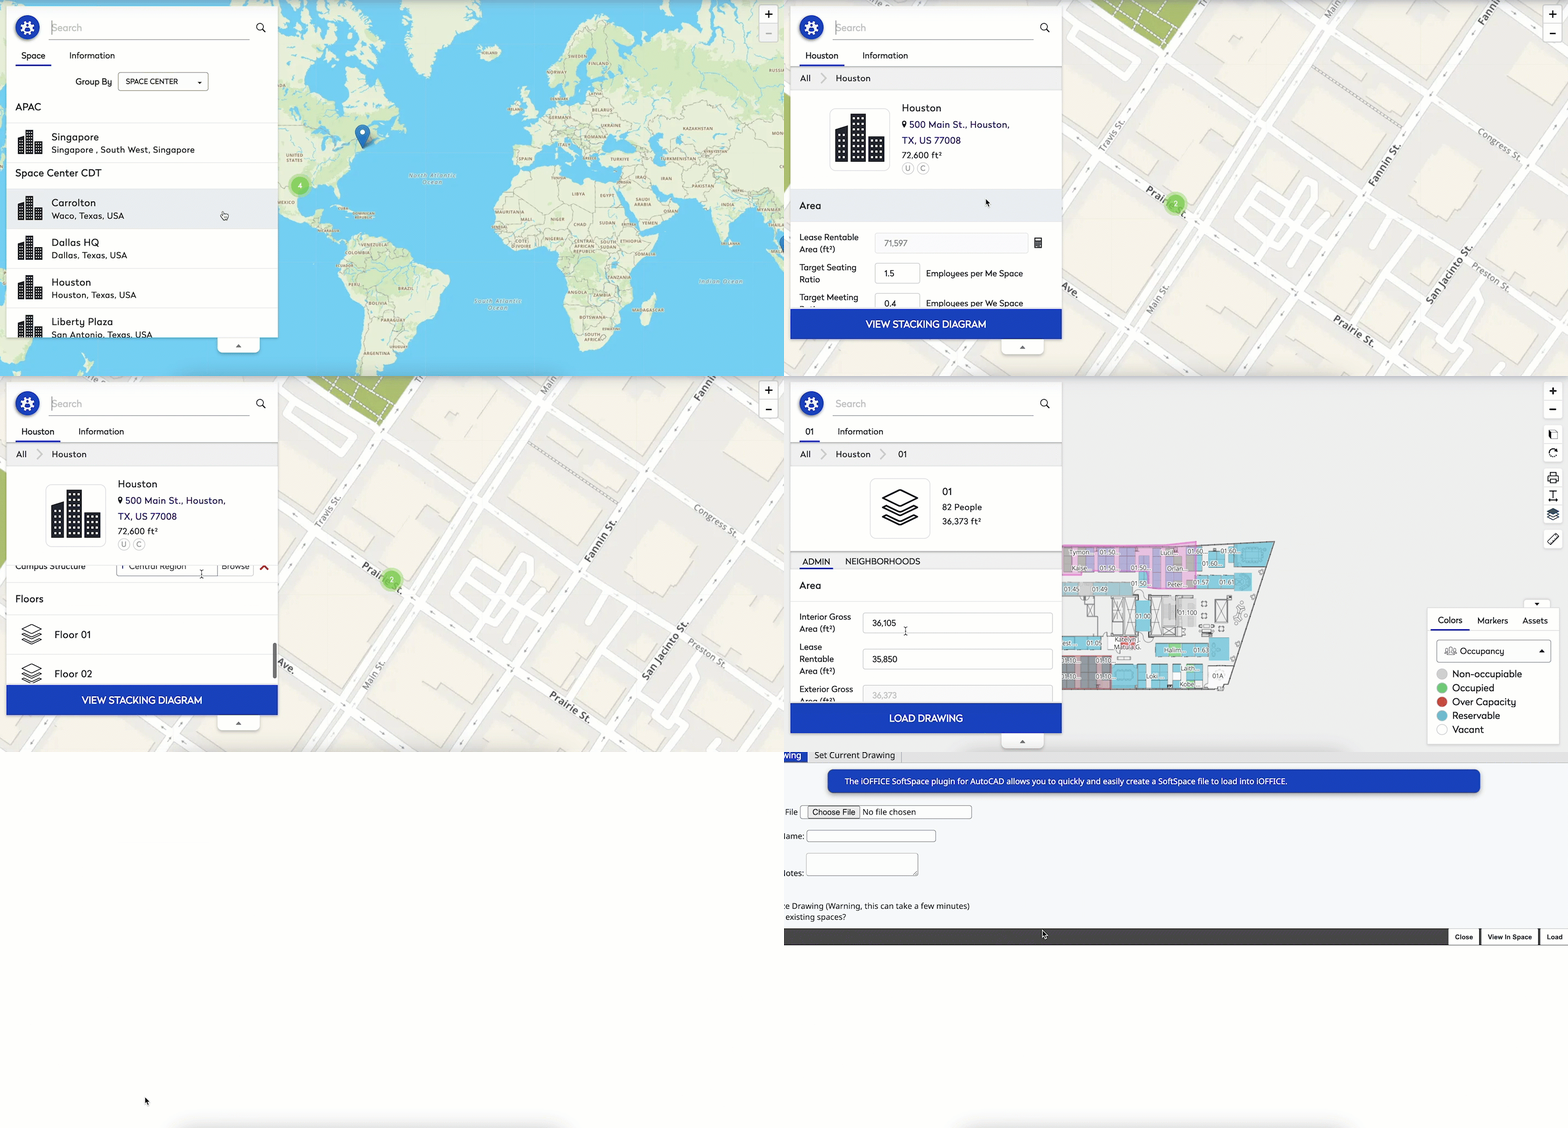
Navigate to Space Desktop.
-
Select a building and floor.
-
Click the Load Drawing button.
-
Click the Choose File button.
-
Locate and attach the file.
-
In the Drawing Name field enter the name.
-
If you want to update existing space then select the check box.
-
Click the Load button to upload the drawing.

Set the Current Version of the Drawing
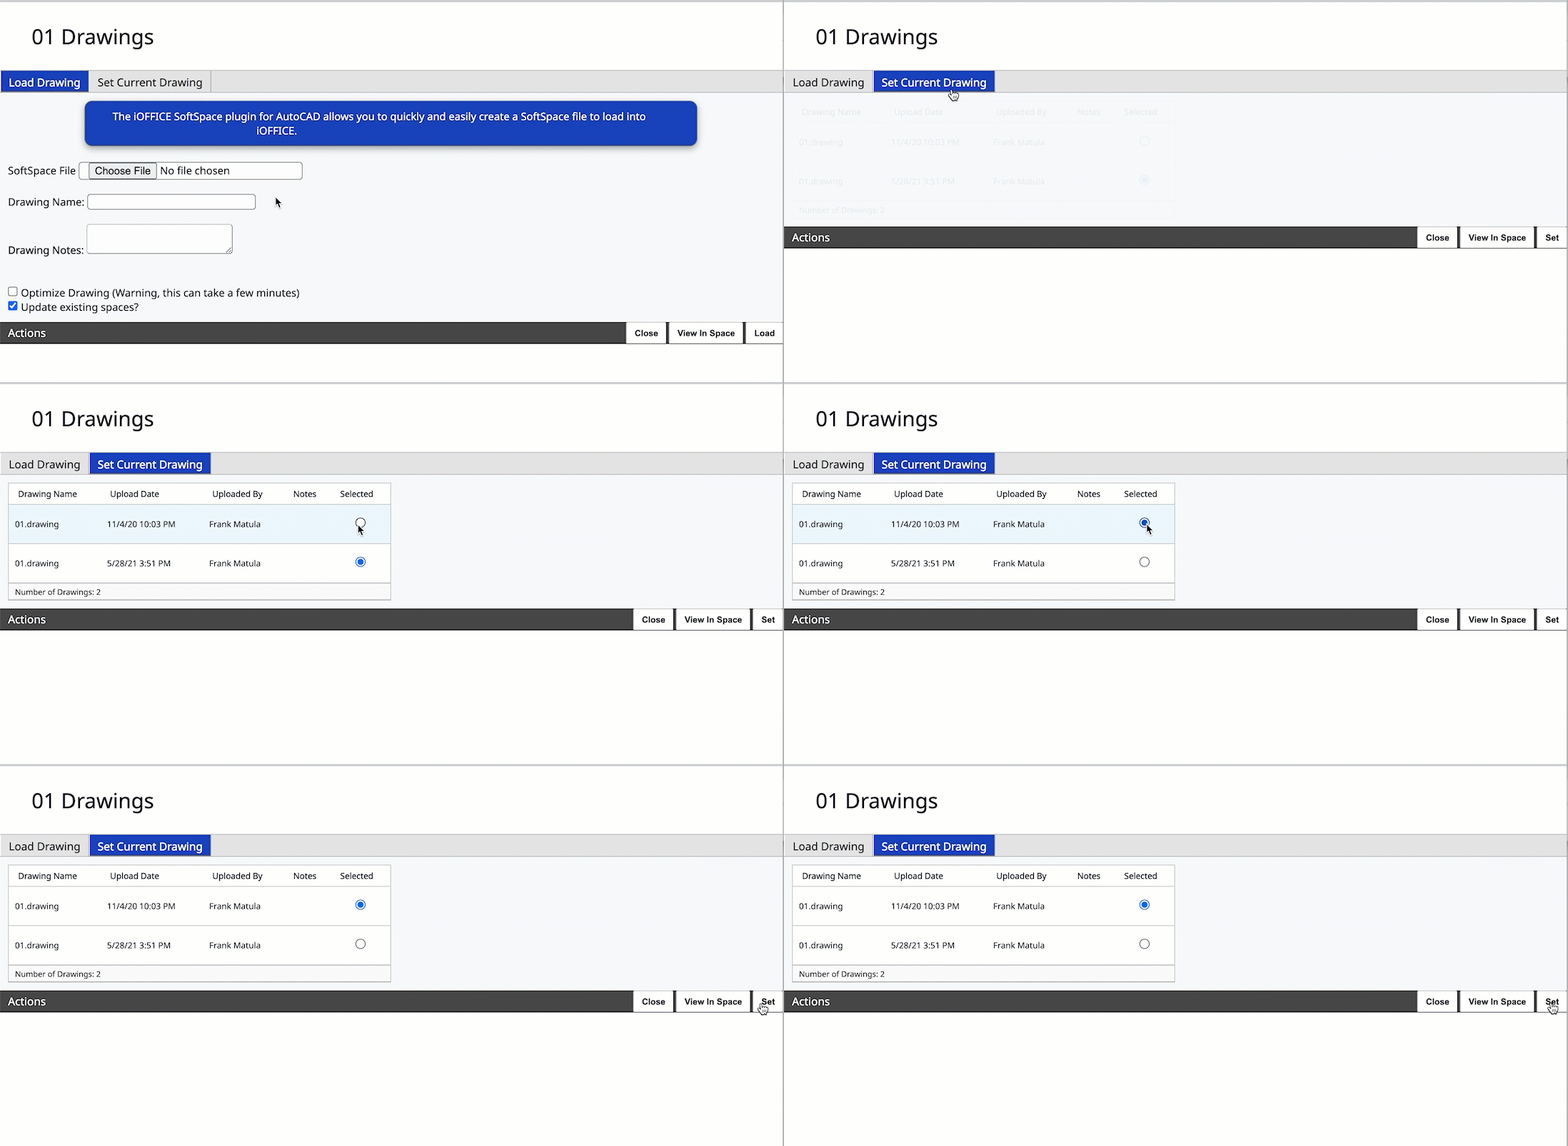
Sometimes, multiple floor plans have been uploaded and you want to choose a particular version as the current version.
-
Click the Set Current Drawing tab.
-
Select the current version option button.
-
Click the Set button to set this as the current version.

Orphaned Users
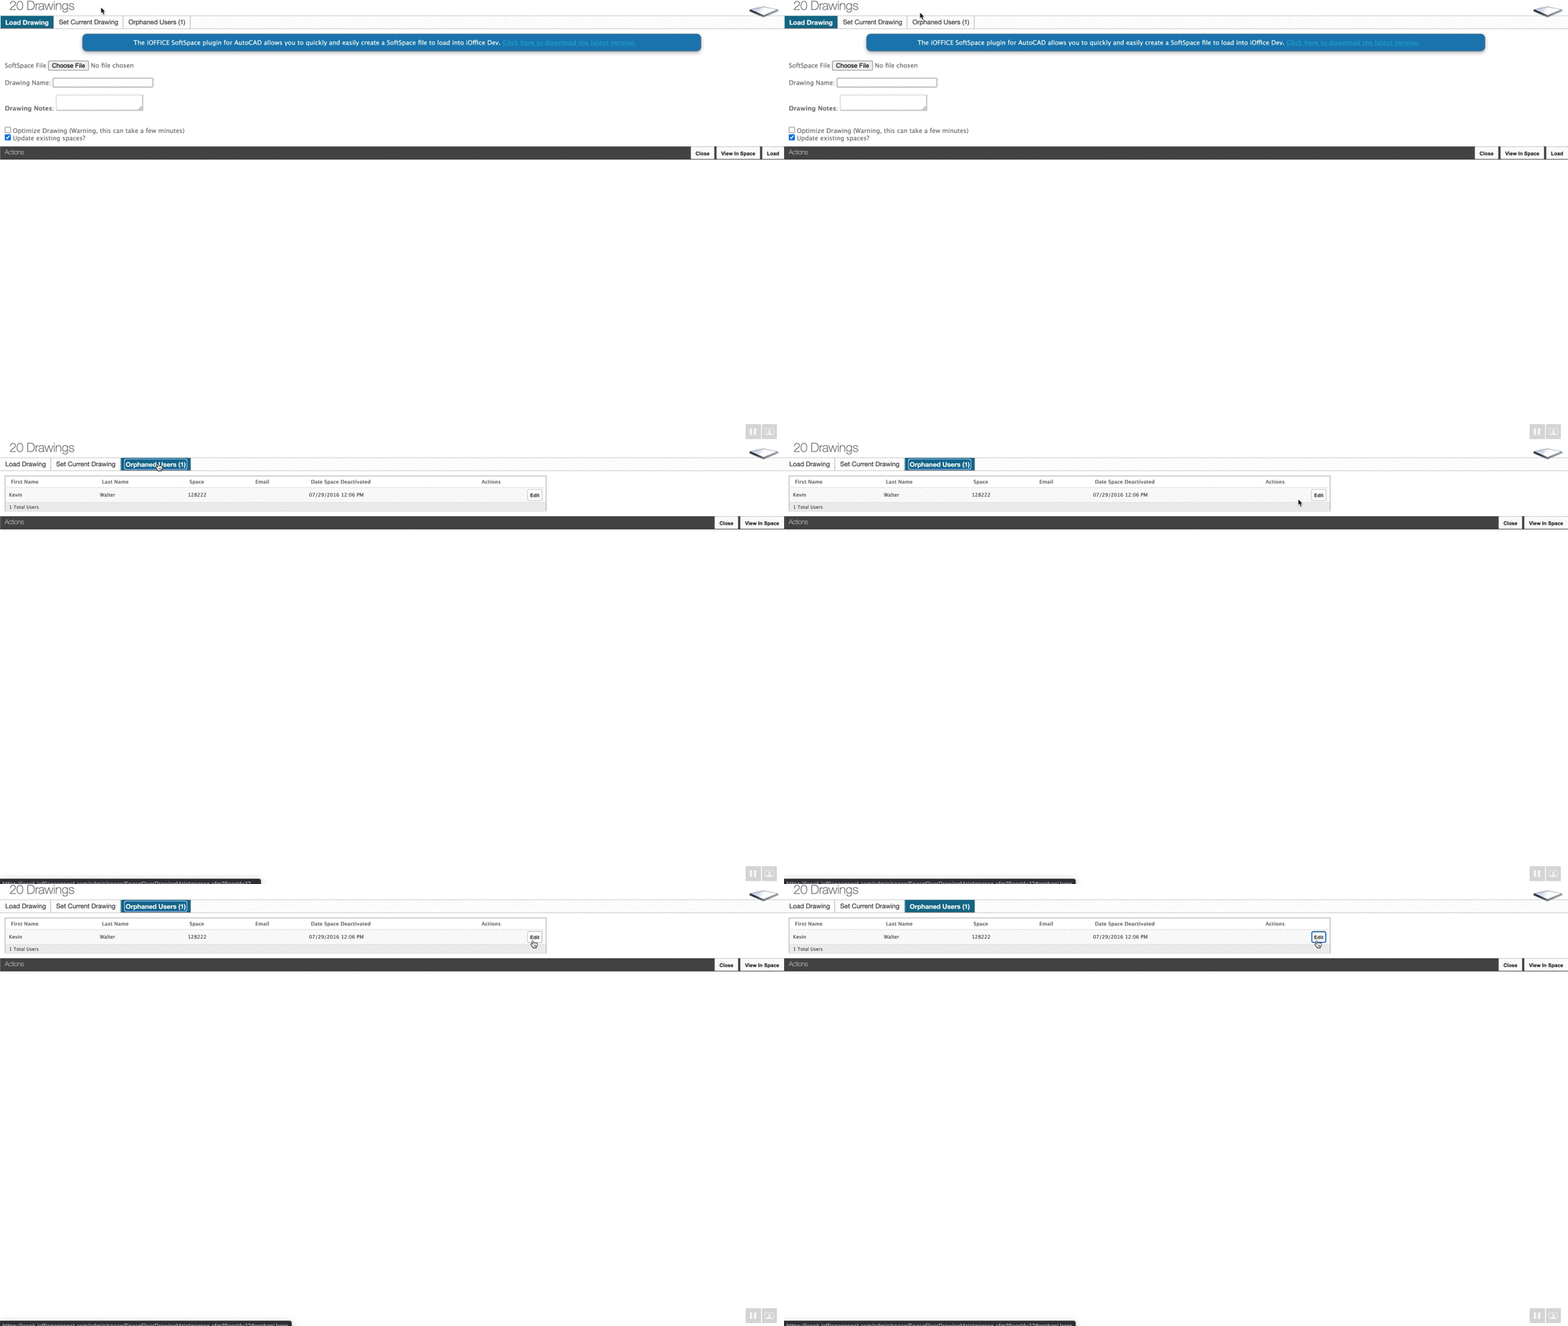
When loading new drawings that remove or change rooms and room numbers (for example when changing cubicle configurations) you can end up leaving users without a current room. To help with this, there is an Orphaned Users tab that appears when orphaned users are identified during the drawing load.
-
If you load a drawing that removes a room, the Orphaned Users tab appears. It shows the user who is orphaned, the room they were in, and the date the room was removed.
-
Click the Edit button to edit the user’s profile and update the room information.

- If you clicked Edit on the floor level to edit a room, or you clicked the Add
icon to add a new room, a new window will open.
-
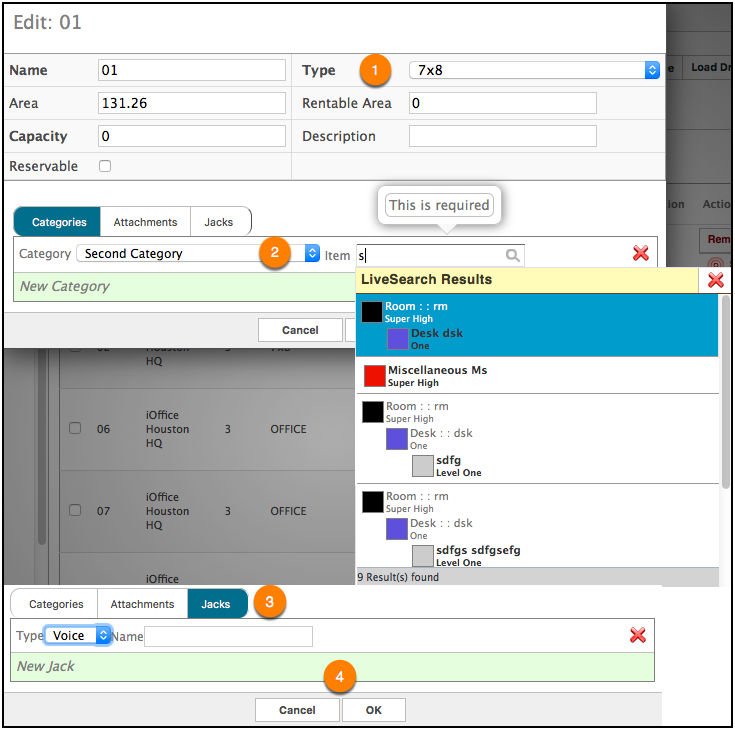
Enter or modify the area, type, and description. To change the room number (Name), contact the Eptura Support team to update the drawing.
-
Add a category by using the Live Search feature. Start typing the category's name and matching results are displayed. This Category assignment overrides the occupant category on the floor plan.
-
Add a voice or data jack by using the drop-down menu and then naming the jack.
-
Delete the jack by click the X
icon.
-
Delete the category by click the X
icon.
-
Click the OK button to save.

