Add, Adjust, or Edit Inventory Items
The Inventory Items section allows you to manage and configure your inventory and stock.
- Navigate to Inventory > Inventory Items. The Inventory Items -- Inventory screen displays.

Add Inventory Item
-
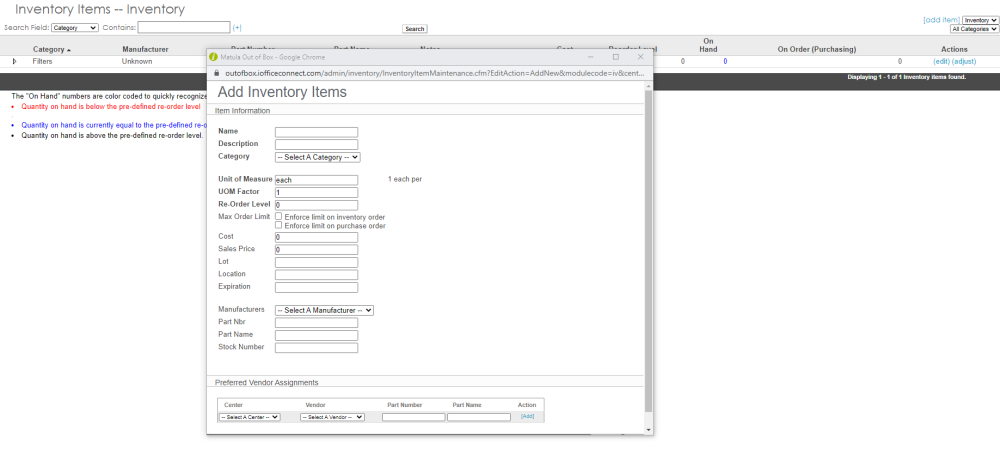
Click the add item link.

The Add Inventory Items dialog displays.

- Complete the fields.
- From the Preferred Vendor Assignments area, complete the following:
- From the Category drop-down, select a category.
- From the Vendor drop-down, select a vendor.
- In the Part Number field, enter the number.
- In the Part Name field, enter the name.
- Click the Add link.
- Click the OK button.
Adjust Inventory Quantity
You can adjust the amount of inventory you have for a specific item.
- For the inventory item you want to adjust, click the adjust link.

The Inventory Adjustments -- Inventory screen displays.

- In the New Quantity field, enter the quantity.
- In the Reason for Adjustment field, enter the reason.
- Click the Save button.
Edit Inventory Item
You can edit the inventory item
-
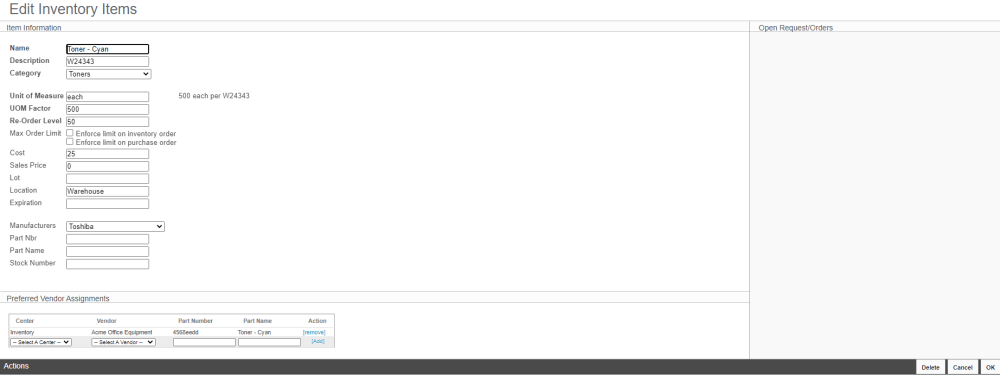
For the inventory item you want to adjust, click the edit link.

The Edit Inventory Items screen displays.

- Make any updates to the fields.
- Click the OK button to save.
If you want to delete the inventory item then click the Delete button.
