Using the Hummingbird Calendar Add-in to Reserve a Space
Use the Hummingbird Add-in to help find a room or desk straight from your Microsoft Outlook in the web browser. This means you can remain in Outlook and seamlessly create events without going to another app.
From the Hummingbird Calendar panel, you can complete the following:
- Launch and Login
- Change the Location
- Using the Filter
- Search and Browse
- Reserve a Room
- Edit or Cancel a Reservation
Launch and Login
From the Microsoft Outlook's calendar (Web App), complete the following:
- Create a New Event.
- From the menu, click the More Actions
 icon. A pop-menu displays.
 - Click the Hummingbird option. The Hummingbird Login panel displays.
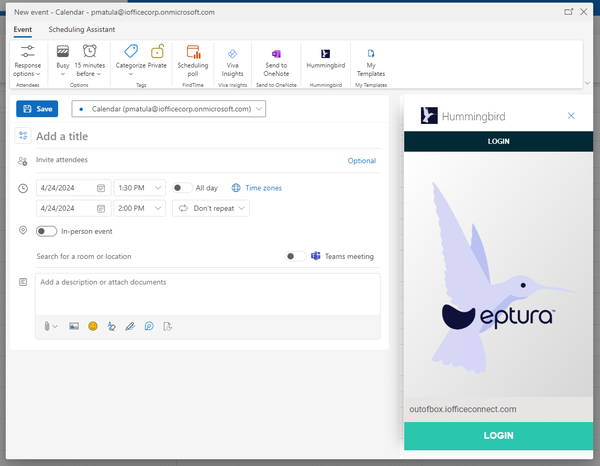
- Click the Login button. The message displays "Hummingbird want to display a new window".
- Click the Allow button.
The Login dialog is a pop-up window; therefore, check that your browser allows pop-ups and it is not blocking them.
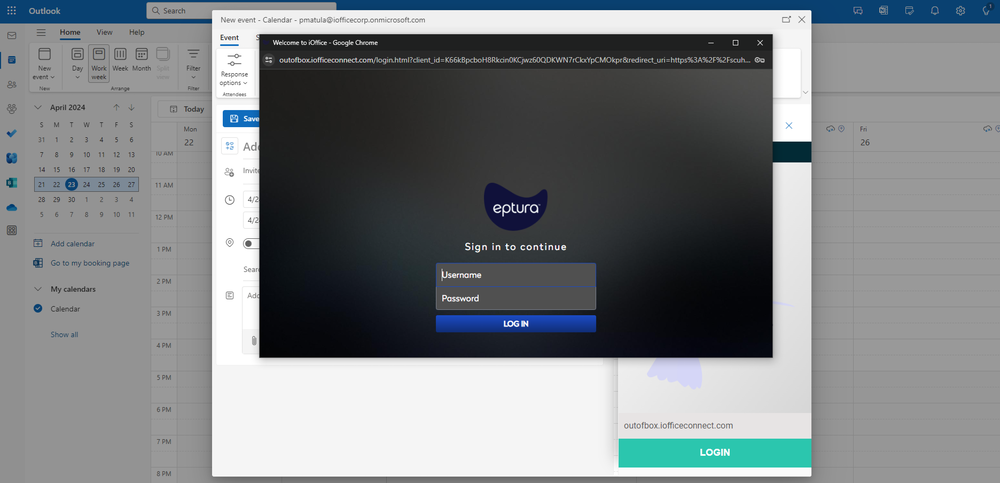
- Complete your username and password.
- Click the Log In button.
You are logged in and the Hummingbird panel displays the available spaces.
Change the Location
If you are assigned to a building and floor, then this will display. You can change the location if you need to make a reservation in a different location.
- From the Building drop-down, select the building.
- From the Floor drop-down, select the floor.

Using the Filter
Use the filter to add or remove specific meeting space requirements such as availability, location, capacity, and amenities (such as Apple TV or Chromecast). Clicking on the x in the filter bar will remove the specific selection. Specific amenities that are available in certain meeting spaces can be selected to assist with filtering.
- Click the Filter
 icon and the Additional Filters panel display.
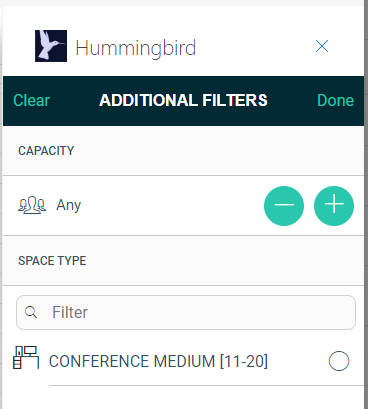
- Capacity - The default is Any and if you want a space that can hold a specific number of people then, click the Add
 and Minus
  icons to specify the capacity number.
 - Space Type - Check the space type check box that you want to filter for.
- Click Done to apply the filters.
To remove the filters, click the Clear button and then click the Done button.
- From the list, you can click the space's name that you want to reserve.
Search or Browse
- If you know the space's name, you can search for it or scroll through the available spaces in the listing.
- Click the space's name that you want to reserve.
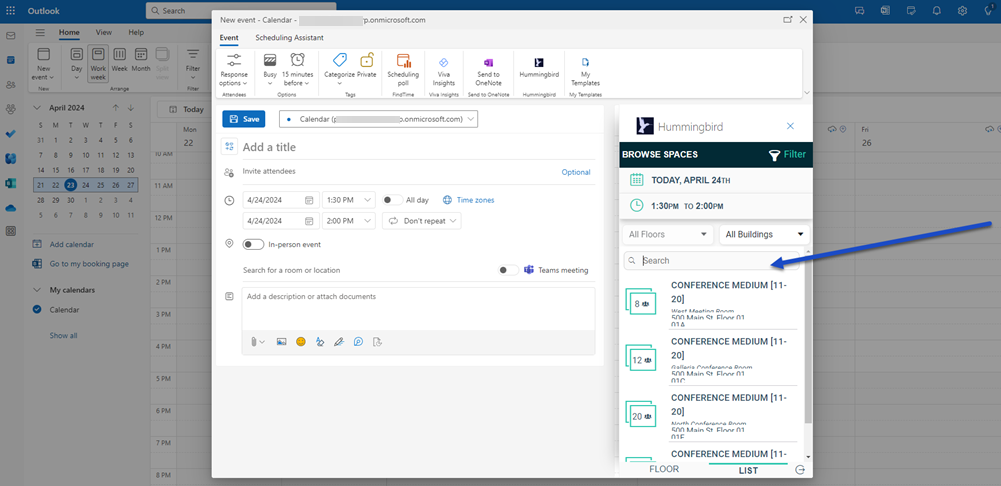
If you want to know where the space is on the map, then click the Floor tab.
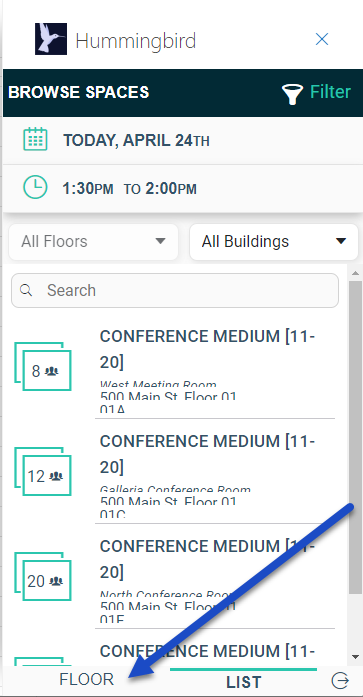
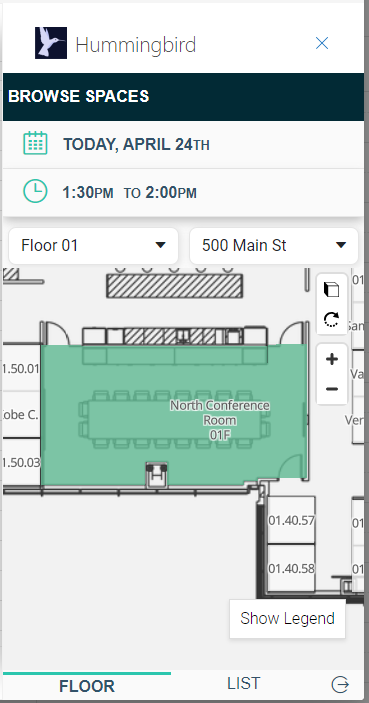
You can use the toolbar icons (or mouse wheel) to zoom in to the floor plan to navigate to the available spaces.
Click the space to add it to the event.
Reserve a Room
After you have logged into Hummingbird and selected the space you want to book, you are ready to complete the event.
- In the Title field, enter the title of the event.
- In the Required field, enter the attendees of the event.
- In the Date and time fields, adjust the date and time.
- In the Description field, enter a short description.
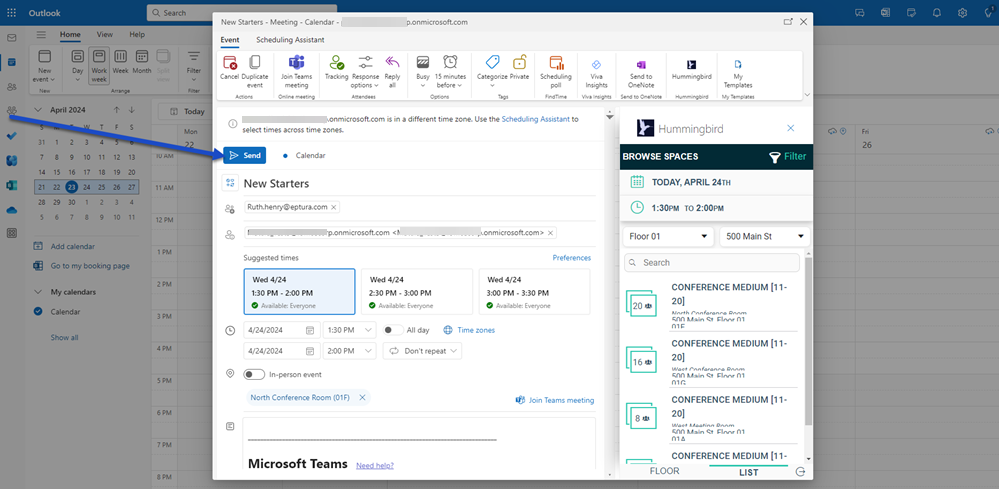
- When you have completed the necessary fields, click the Send button.
Edit or Cancel a Reservation
Just like any other event request, you can edit the reservation or cancel it.
From the Microsoft Outlook's calendar (Web App), complete the following:
- Click the event.
- You can either click the Edit button and then send out an update OR you can click the Cancel button to send out a cancellation.
