
Add a User
Level: Administrator
Your Administrator can add new users in the Admin Module.
1. Navigate to Admin > Users. The users list displays.
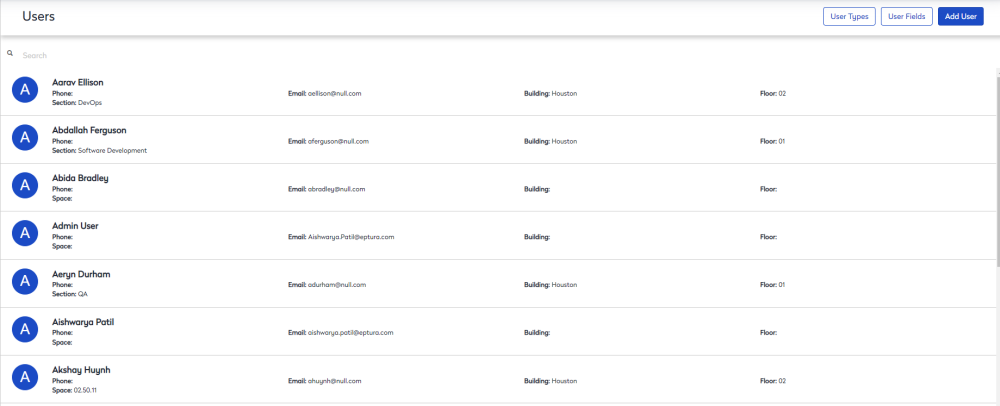
2. Click the Add User button.

The Add User screen contains the following:
- User Information
- Permissions
- Location Information
- Categories
- Additional Information
Step 1. Complete User Information
This contains all the basic information about the user. Complete the following:
| Field | Description |
|---|---|
| First Name field | Enter the first name of the new user. |
| Last Name field | Enter the last name of the new user. |
| Email field | Enter an email address for the new user. |
| Username field | Enter a username for the new user. |
Step 2. Set Permissions
This allows you to set the user's permissions. Complete the following:
| Field | Description |
|---|---|
| Site Admin toggle | Toggle whether or not the user is a system administrator and select which centers they have access. If a user is selected as an administrator, they will automatically have access to all centers (no need to select). |
| Building Centers | |
|
All Centers |
Select All Centers tab to display the centers. Then select which centers the user has access to and what role, for example, Customer, Operator, Manager, Administrator. |
Step 3. Complete Location Information
This contains all of the location information about the user. Complete the following:
| Field | Description |
|---|---|
| Work Mode drop-down |
Select the Work Mode either:
User’s access is based on the permissions defined within each module’s center, such as Customer, Operator, Site Administrator and the User Permission Matrix contains the details of the permissions. |
| Location |
If needed, you can select a location for the user, either:
For example:
If you want to know where on the floor plan the space or neighborhood exists, then click the If the space select is inactive or an unoccupiable space, the |

 Location icon and the floor plan displays.
 Incorrect Assignment icon displays to the right of the space field to alert you to the incorrect assignment.
 Step 4. Complete Categories
This allows you to add users to specific categories. Complete the following:
| Field | Description |
|---|---|
| Org Structure field | Click Browse button and then navigate to the Org Structure to select a category. Such as Marketing, Sales, Call Center. |
Step 5. Complete Additional Information
This allows you to enter additional information about a user. Complete the following:
| Field | Description |
|---|---|
| User Type drop-down |
From the drop-down select the user type. Such as Employee. User Types can be defined, see User Types. |
| Alternative Delivery field | Enter another user's name. When you type the list of users display and you can select a user. |
| Company field | Enter the user's company name. |
| Job Title field | Enter the user's job title. |
| Phone field | Enter the user's phone number. |
| Extension field | Enter the user's extension. |
| Mobile Phone Number field | Enter the user's mobile number. |
| Employee ID field | Enter the user's Employee ID. |
| Floor Warden toggle | If the user is a floor warden then toggle to Yes. |
| Special Needs toggle | If the user has special needs then toggle to Yes. |
| Comments field | Enter in any comments. |
| Known as field | Enter the user's preferred name. |
Step 6. Save the User
Click the Save button to add the user.