Create a Neighborhood for a Department
Level: Administrator
In this example, you have a department who is allocated spaces on the floor and these spaces will be allocated to the neighborhood.
- Step 1. Create a Neighborhood
- Step 2. Create a Neighborhood Section
- Step 3. Add Members to a Neighborhood Section
- Step 4. Set up the Reservation Rules
Step 1. Create a Neighborhood
You can select the spaces to be included in the neighborhood.
- Change Mode icon at the upper right-hand corner to the Admin Mode
 .
. - Navigate to the building and floor.
- Navigate to the floor plan.
- Zoom into the area where you want to create the neighborhood.
- Click the Mode icon and select Admin mode.
- Click the Neighborhood tab.
- Click the Create Neighborhood button.
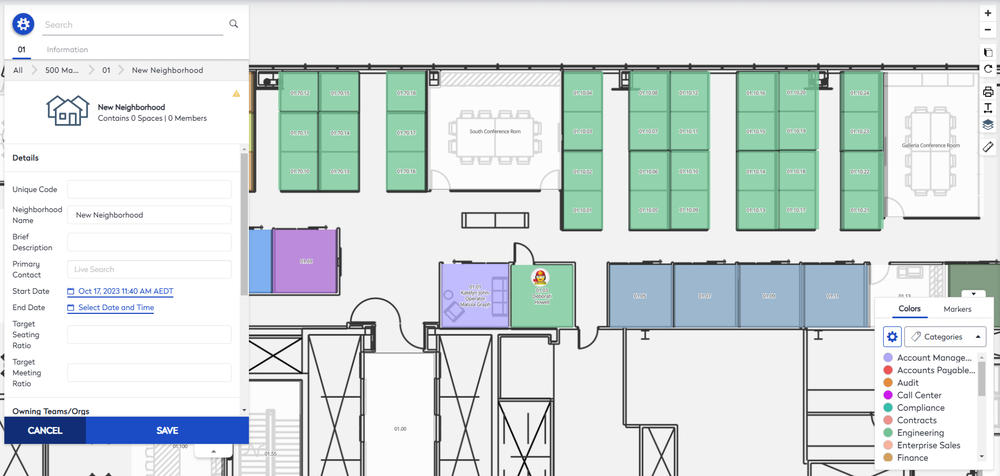
The New Neighborhood displays in the panel.

- In the Unique Code field, enter an unique code to identify the neighborhood.
- In the Neighborhood Name field, enter the name of the neighborhood.
- In the Brief Description field, enter a short description.
- In the Primary Contact field, enter the employee who is the primary contact for the neighborhood.
- From the Start Date and End Date calendar picker, select the start and end date.
- In the Target Seating ratio field, either leave blank for enter an employee-to-seat ratio.
- In the Target Meeting ratio field, enter leave blank for enter an employee-to-meeting ratio.
- If there is an owning team or organization, then click the Add Owner(s) button and then select the Organization Hierarchy category.
- If you want to change the neighborhood border color or fill color, then complete the HEX code and select the weight and opacity.
- Click the Save button.
The neighborhood is saved. Now you can create a neighborhood section.
Step 2. Create a Neighborhood Section
Let's create the section.
- From the panel, click the More button to display the pop-up menu.
- Click the Create Section option.
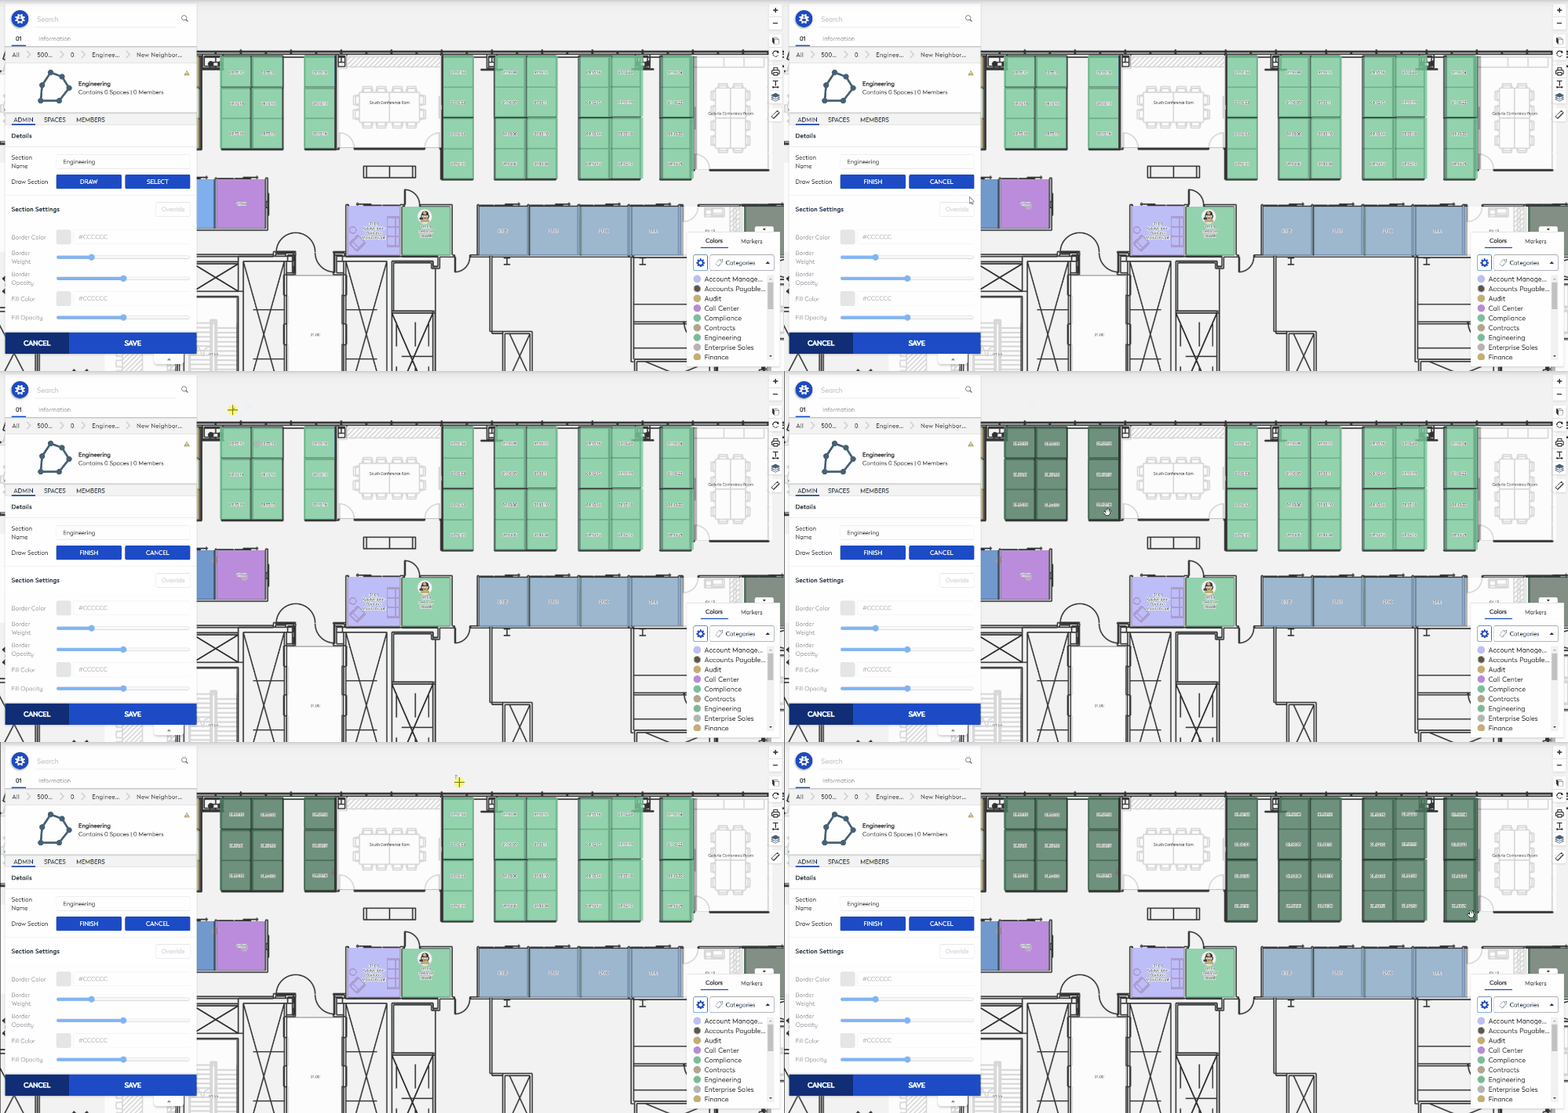
- In the Section Name field, enter the Section Name.
- Either use the Draw to Select to define the neighborhood section.
- Click the Save button and the section is saved.

Step 3. Add Members to a Neighborhood Section
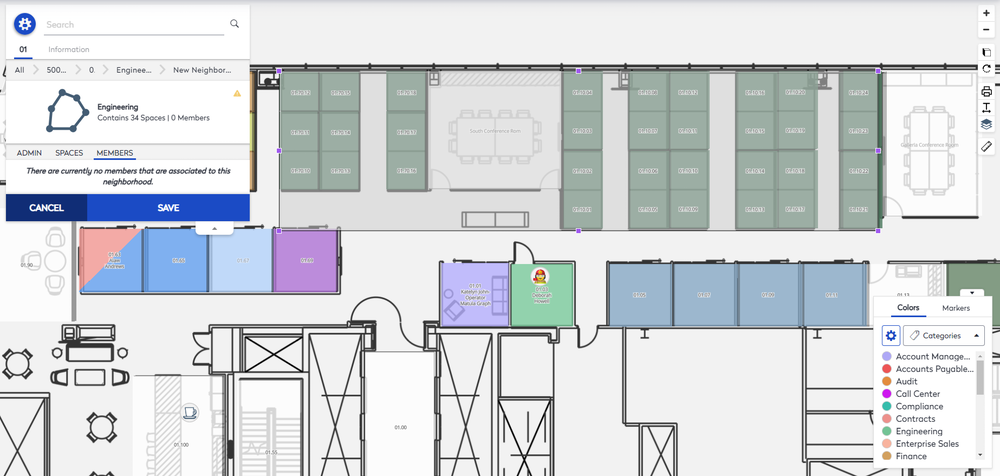
- After your neighborhood section is created and you click the Members tab, you will see there are no members.

- You can add people (users) to be members of the neighborhood, and this is where you need to make sure the user is set to be Hybrid. This can be completed in Assign Hybrid User to a Neighborhood.
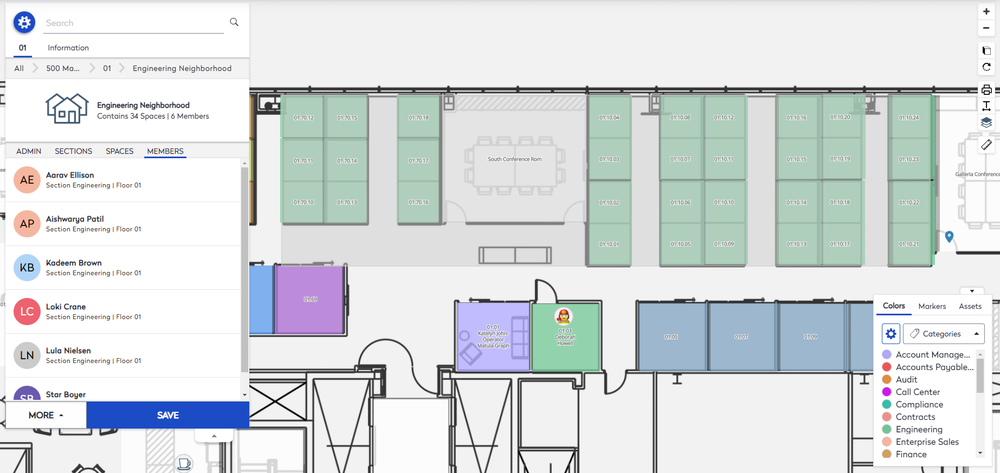
When you assign people as members, you will see the Member tab is populated and only those members can use the allocated spaces.

Step 4. Set up the Reservation Rules
If you want the employees in the neighborhood to reserve the spaces, then you can set up a reservation rule.
For example, below you can see the rule is for the Engineering Neighborhood and includes all members. Therefore, any employee who is a member of the neighborhood can reserve a space.

