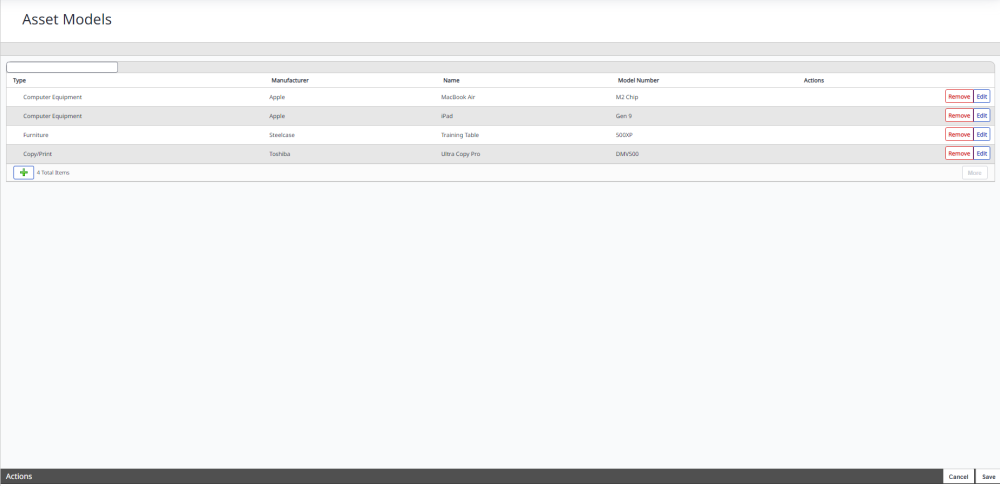
Add, Edit, Delete Models
You can add, edit, or delete specific asset model types in the Models menu.
- Navigate to Admin > Asset > Models.
All existing models for assets display.

Search
-
In the Search field, enter the search team to find specific models, manufacturers, etc.
Add a Model
You can add a new model.
-
Click the Add
icon at the bottom of the list.
The Add New dialog displays.

-
From the Type drop-down, select the asset type.
The asset types are defined in Add, Edit, or Delete Asset Types.
-
From the Manufacturer drop-down, select the manufacturer. Note: If you want to add a manufacturer then click the Add
icon and then complete the details.
The manufacturers are defined in the Add, Edit, or Delete Vendors.
-
In the Name field, enter the asset name.
-
In the Model Number field, enter the asset model number.
-
In the Description field, enter a short description.
-
From the Release Date, click the calendar picker
 icon to select the date.
 -
If you have any attachments these can be uploaded. This can be useful to store instruction manuals, photos, printer drivers, etc.
-
Click the OK button.
-
Click the Save button.
Edit a Model
You can edit an existing model.
-
For the model you want to edit , click the Edit button under the Actions menu.
The Edit Module dialog displays.

- Complete your edits.
-
Click the OK button.
-
Click the Save button.
Delete a Model
- For the model you want to edit, click the Remove button under the Actions column.
- The Remove Model dialog displays the message " Removing the item will remove if from the system. Any open tickets or requests using this item may become inaccessible.

- Click the Remove button and the model is deleted.
- Click the Save button.
