Add or Delete New Users
Level: Administrator
The New Users area contains the employees who have requested a new user account. Your Administrator can either add or delete the new users.
- Navigate to Admin > New Users. The New Users screen displays.

Add a New User
- For the user you want to add, click the add link. The Add User screen displays.
User Information
- Review the User Information fields and make any changes.

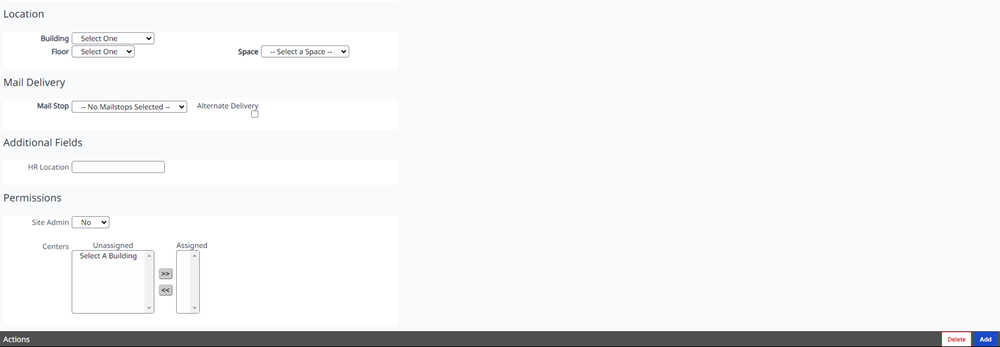
- Scroll to display the Location, Mail Delivery, Additional Fields, and Permissions section.

Location
- From the Building drop-down, select the building.
- From the Floor drop-down, select the floor.
- If the employee is to be assigned a seat, then from the Space drop-down, select a space.
Mail Delivery
- From the Mail Stop drop-down, select the mail stop. This is important to select if the employee is to receive mail.
- If the employee needs mail to be deliver to an alternative location, then check the Alternative Delivery check box and then search and select the location.
Additional Fields
- If there are additional fields then complete these.
Permissions
- If the user is a Site Admin, then complete the following:
- If the user is a Site Admin then from the Site Admin drop-down, select Yes. The message "This will give the selected user full control of the entire system."
- Click the OK button. The permission to the centers is hidden.
- If the user is not a Site Admin, then complete the following:
- From the Unassigned list, select the centers you want to assign to the user.
- Click the Add icon.
- Click the Add
 button to grant the user permission to the centers.
 - When you have finished, click the Add button. The user is added.
Delete a New User
- For the user you want to delete, click the delete link.
The user is deleted.
