Add, Edit, or Delete a Floor
Level: Administrator
Your Administrator will be able to manage the floors in your building.
Navigate to your Building and Floor
- Navigate to Admin > Space > Space Administrator. The Space Administrator screen displays.
- Click the "Click here to try the new look. Customers can now build portfolio hierarchies that best suit their needs."
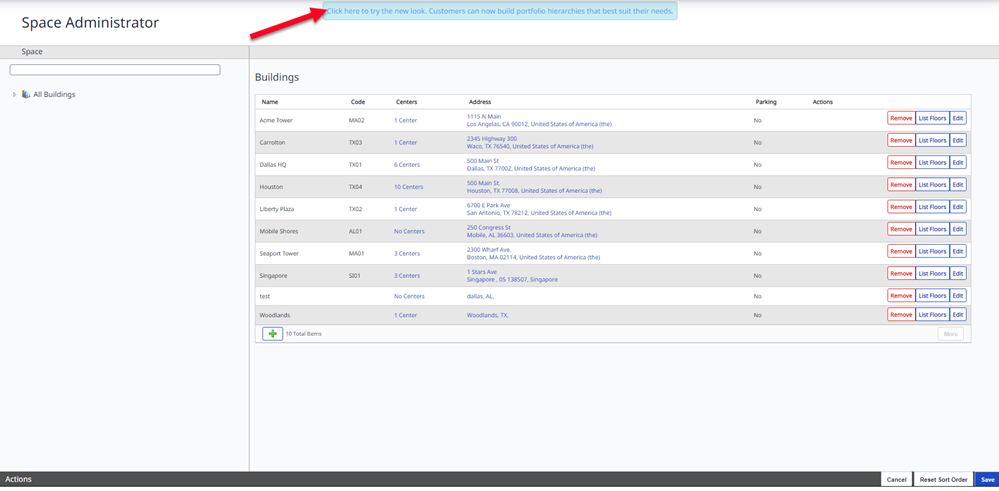
The new look Space Administrator screen displays.
- Navigate the building hierarchy and select a floor.
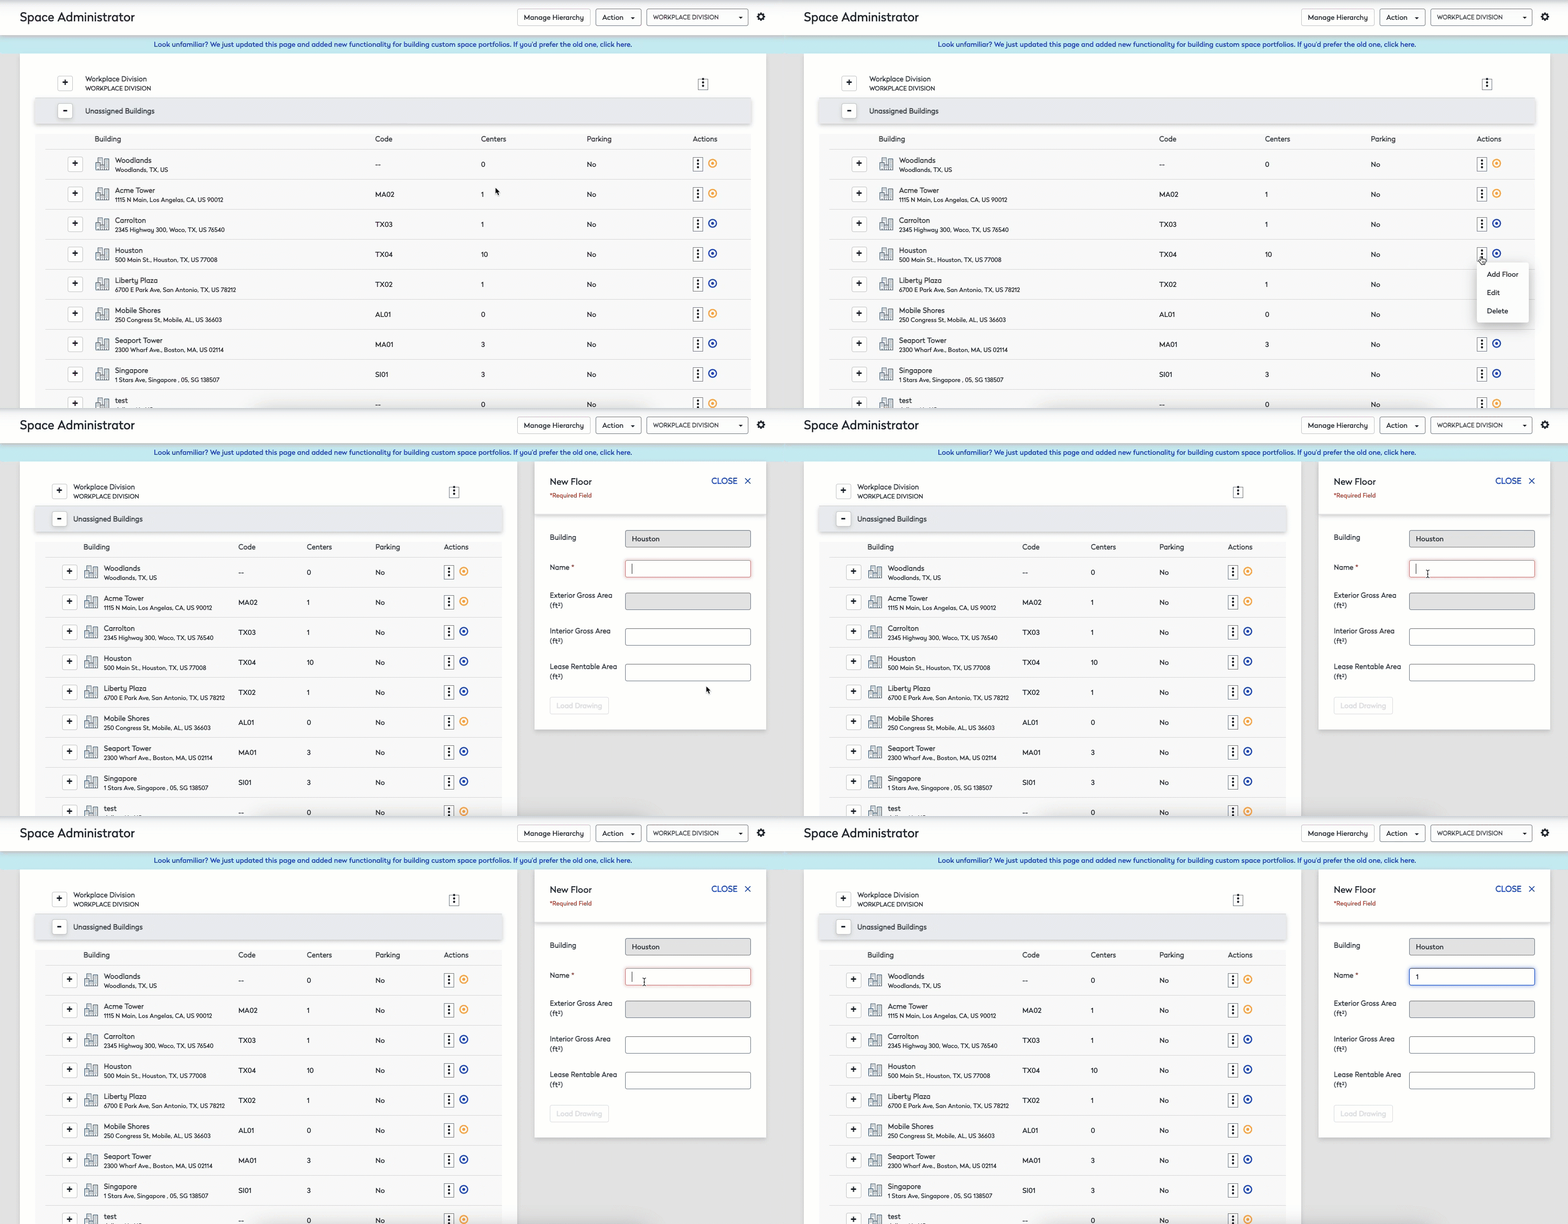
Add Floor
1. Click the More Actions  icon within the Actions column.
2. Click Add Floor.
3. In the Name field, enter the floor's name.
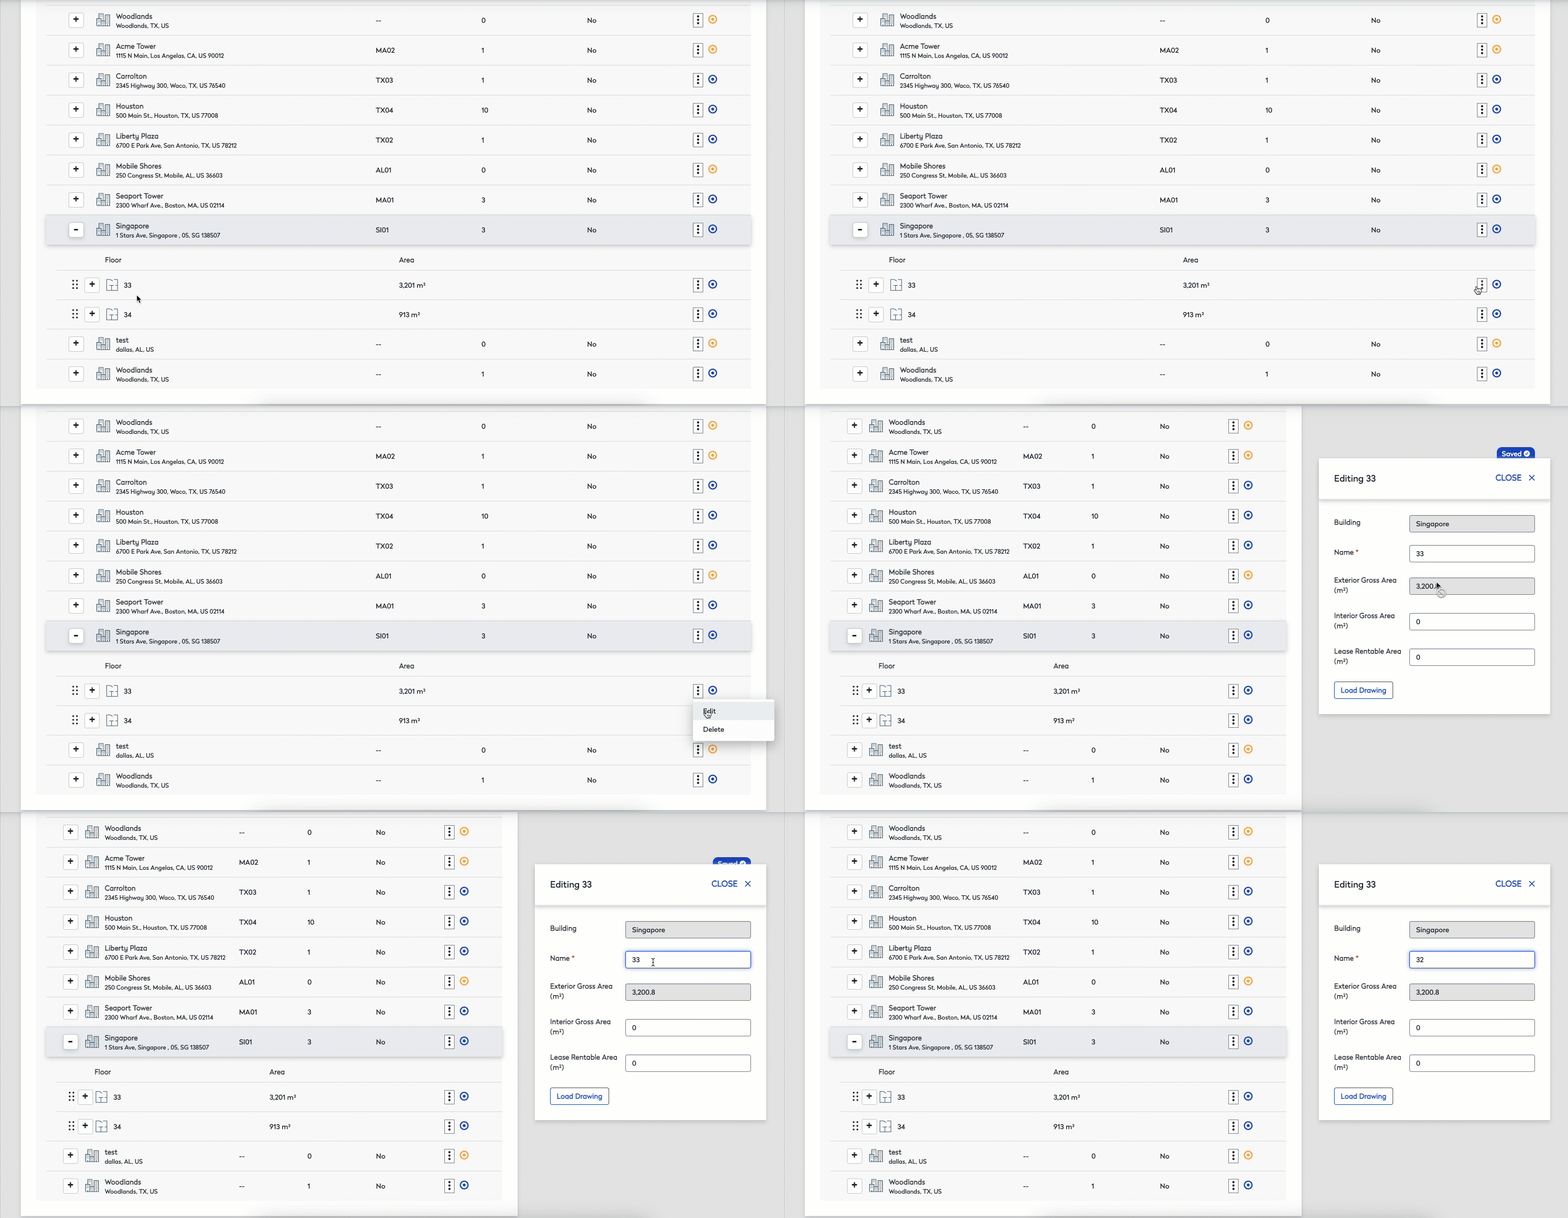
Edit Floor
1. Navigate to the appropriate floor.
2. Click the More Actions  icon within the Actions column.
2. Click Edit.
3. Edit the appropriate fields.
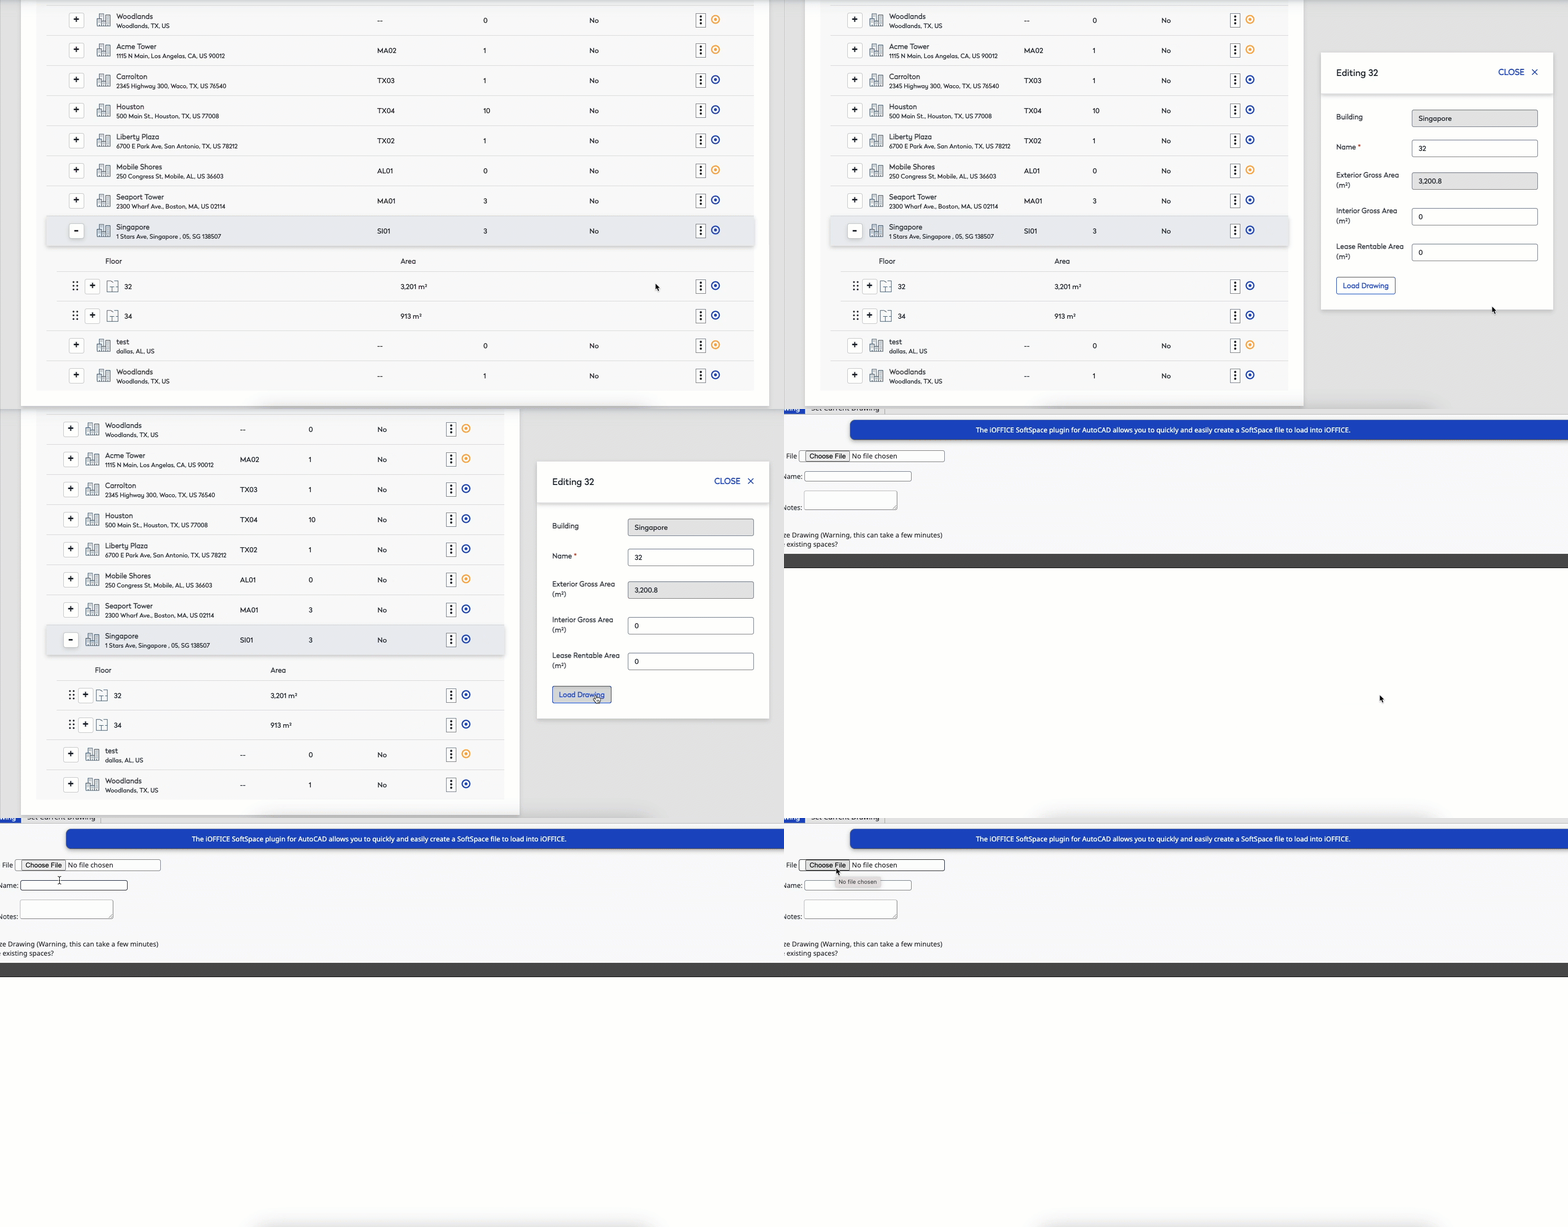
Load Floor Plan Drawing
If you are using Softspace for AutoCAD Plug-in then do not use this as it will it will remove the drawing from the Softspace server.
When you want to manually manage drawings on your own internal storage or server you can use load drawing from the Space this. You can load the drawings from the Space Desktop or the Space Administrator.
1. Navigate to the appropriate floor.
2. Click the More Actions  icon within the Actions column.
3. Click Edit on the appropriate Floor.
4. Select Load Drawing.
5. Click the Choose File button to locate and attach the file.
6. Click the Load button to upload the drawing.
When you load the drawing the tabs for Set the Current Drawing and/or Orphaned Users may display, see Load Floor Plan Drawing Manually for more information.
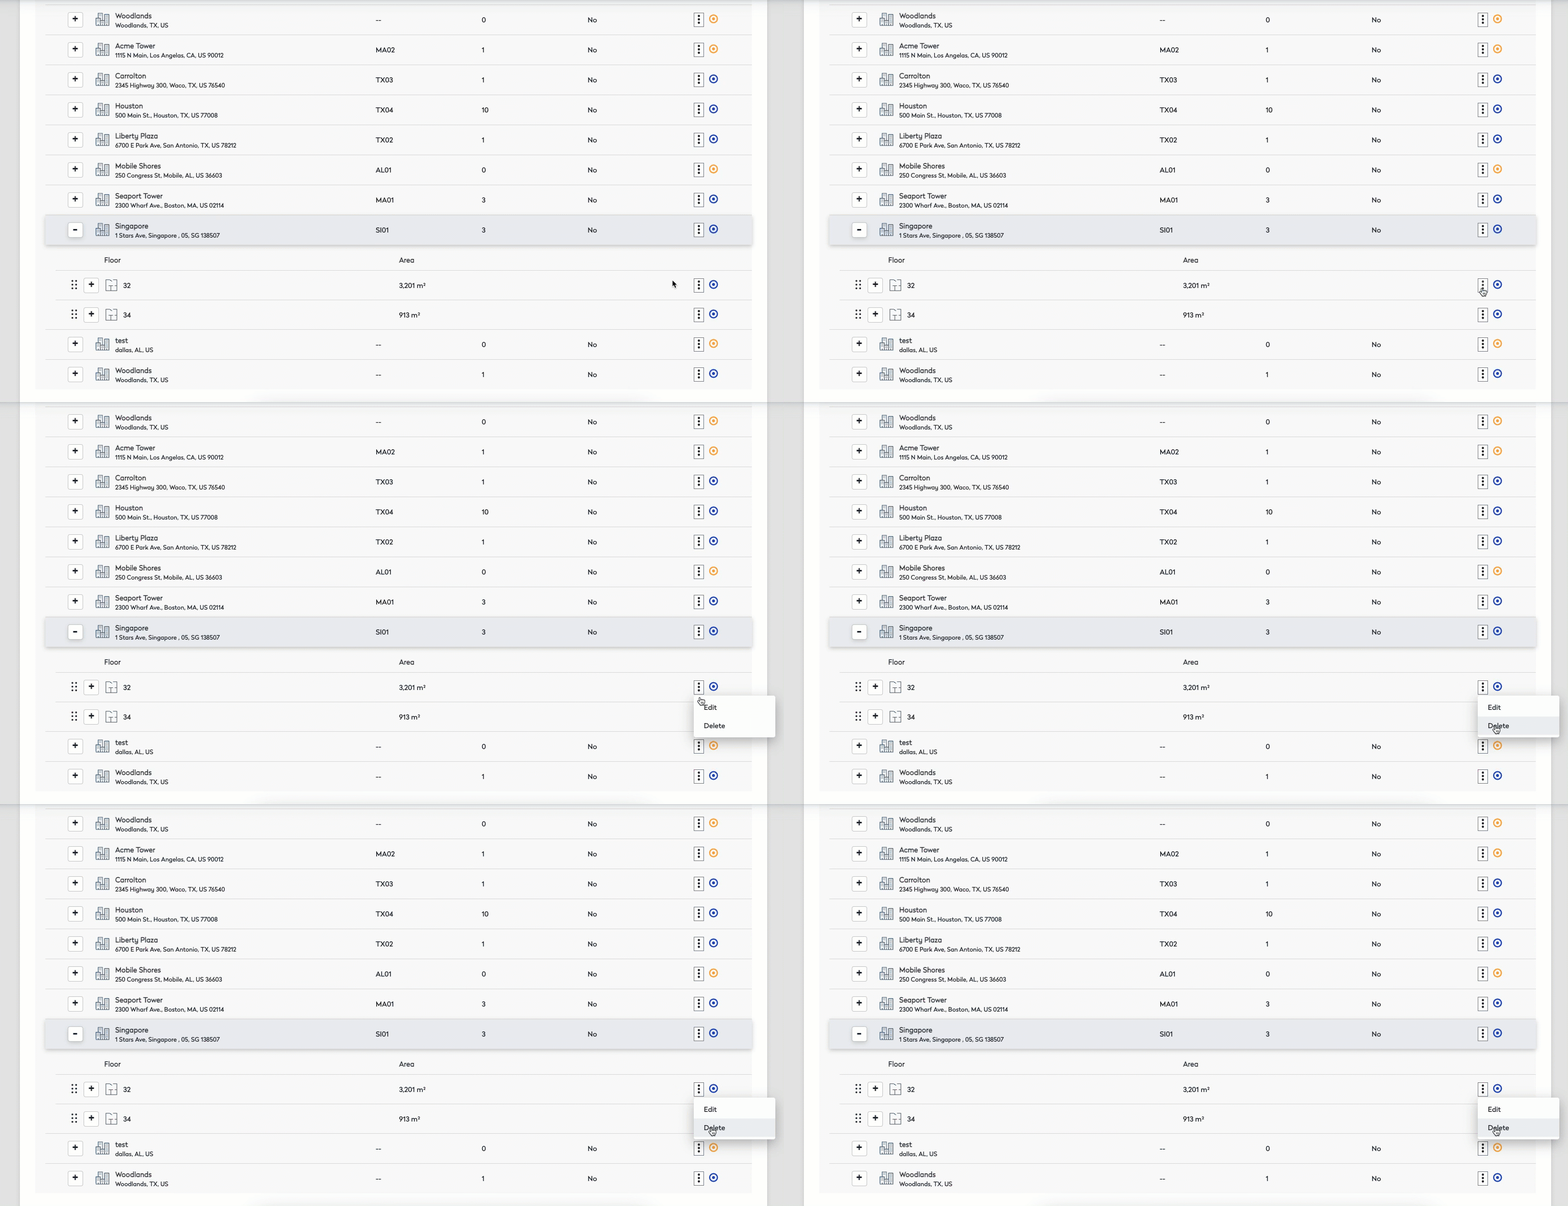
Delete Floor
1. Navigate to the appropriate floor.
2. Click the More Actions  icon within the Actions column.
2. Choose Delete on the appropriate floor.
3. Select Delete from the prompt to remove the floor.
