
Add a Neighborhood
Eptura Workplace and Eptura platform services
Level: Administrator
Easily create a new neighborhood by completing the initial fields. After you have saved the neighborhood, then you can complete the Allocation (to the Organization Unit), People (or User Group) allocation, and Spaces allocation.
- Access the Spaces Floor Plan Viewer.
- From the right toolbar, click the Neighborhood
 icon and the Neighborhood panel displays.
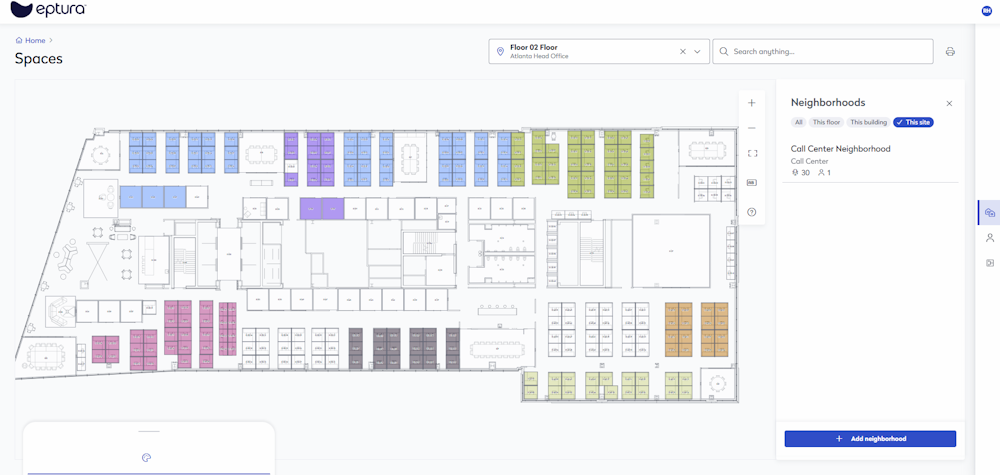
- Click the Add neighborhood button and the Add neighborhood form displays.

- In the Name field, enter the name of the neighborhood.
- From the Site drop-down, either use the default site or select the site.
- In the Target seating ratio, enter the ratio and this determines the seats to people. From the target ratio and the seats (spaces) allocated to the neighborhood and people allocated to the neighborhood, this will calculate the Target Capacity.
- From the Contact drop-down, search for and select the primary contact.
- If the primary contact can't be found, then enter their name in the Notes field.
- From the Color picker, select either a preset color or you can enter the HEX, RGB, or HSL codes.
- After the color is chosen, click the Save button.
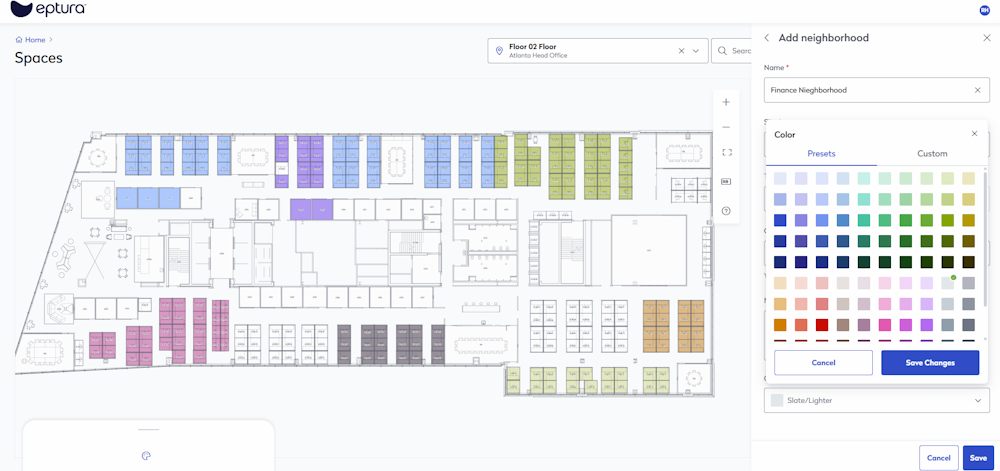
- When you are ready, click the Save button and the neighborhood is created.
- Next, go to Edit a Neighborhood.