Set up the Visitor app (Admin)
Administrator
The Visitor app settings for the home page, required fields, enabled/disabled fields, and background are managed in Eptura Workplace.
Contents
- Access Visitor Settings
- Add/Pair a new device
- Edit an existing device
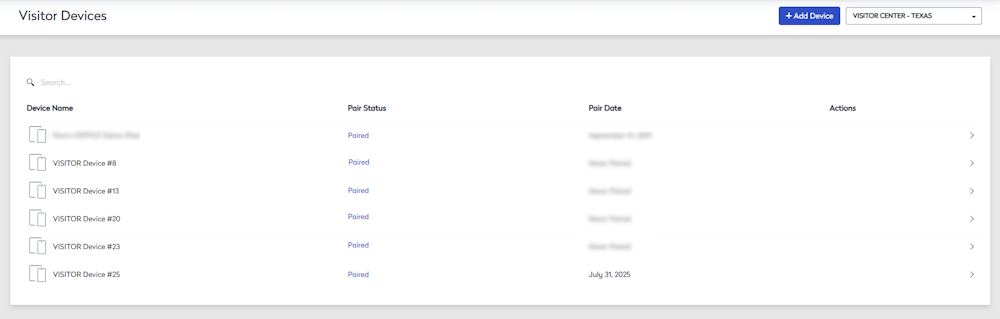
Access Visitor Settings
- Navigate to Admin > Visitor > Devices and the Visitor Devices display.
- From the Center drop-down select either All Centers or a specific Center.
Add/Pair a new device
- Click the +Add Device button and the Edit Visitor Device displays.

- Complete the settings in the tabs and note this can be done after you have paired the device; learn more about the tab settings below.
- To pair the device, open the Visitor app on the iPad.

- In the Site URL field, enter your site.
- Tap the Pair Securely button.

- From Eptura Workplace, you will see the code display and this code will also display on the iPad device.
- Click the code button and the message displays "Allow code?".
- Click the Allow button and the device is paired and the Home screen displays on the iPad.
Edit an existing device
- For the existing device you want to set up, click the device and the Edit Visitor Device displays.
From the top of the Edit Visitor Device, this is where you will find the Unpair Device button, where you can remove a device from Eptura Workplace.
General tab
- In the Device Name field, enter the device's name. Use a descriptive name so you will know where the device is located.
- From the Center Name drop-down, select a center.
- For the Go Touchless, this is either Disabled or Enabled. When you enable the touchless check in, this is what your employees will experience, see Check In - Visitor Touchless Check in.
- For the Home Page Graphic this is either Hidden or Displayed.
- For the Home Page Card, this is either Transparent or Opaque.
- For the Badge Photo, this is either Not Required or Required. Learn more about Set up your Badge Printer (iPad).
- For the Host Location, this is either Hidden or Displayed.
All settings are saved automatically.

Background tab
- Click the Background tab.
- Scroll the background list to find an image you want to use. Or scroll to the end and then upload an image.
- Select the background.
All settings are saved automatically.

Fields tab
- Click the Fields tab.
- For the fields you want to display to the visitor click the field toggle to On. Note that the required fields can not be turned off.
All settings are saved automatically.
