Set up Move Approvals
Move approvals allow you to control the approval process for move requests. There are two approval settings:
Role Based - Request Approval Summary
- Selected roles require approval, such as Customer, Operator, Administrator.
- Requesters must specify an approval contact.
- Set up email alerts for approval.
Advanced Move Approval Summary
- Set up templates based on size, location, or cost.
- Create multiple templates with distinct triggers.
- Desingate individuals or roles as approvers.
- Arrange templates by priority to create an approval sequence.
Watch the Video
Audio: Sound Video Length: 5:37 minutes
Watch the video in ...
French (FR)
Spanish (ES)
Disclaimer: These videos are translated from English using an AI tool; you might notice the speech is slightly out of sync with the recording.
Learn more
Set up Role Based - Request Approval
Your Administrator needs to enable the Enable Request Approval, set up the Approval Email, and then select the roles. Learn more, see Move Preferences.
Set up Advanced Move Approvals
Before you set up the Move Approval Templates, you will need to enable Advance Move Approval setting in the Move Preferences.
Create the Move Approval Template
When the preference is turned on, you can then create the approval triggers.
1. Click the Admin > Move > Approvals.
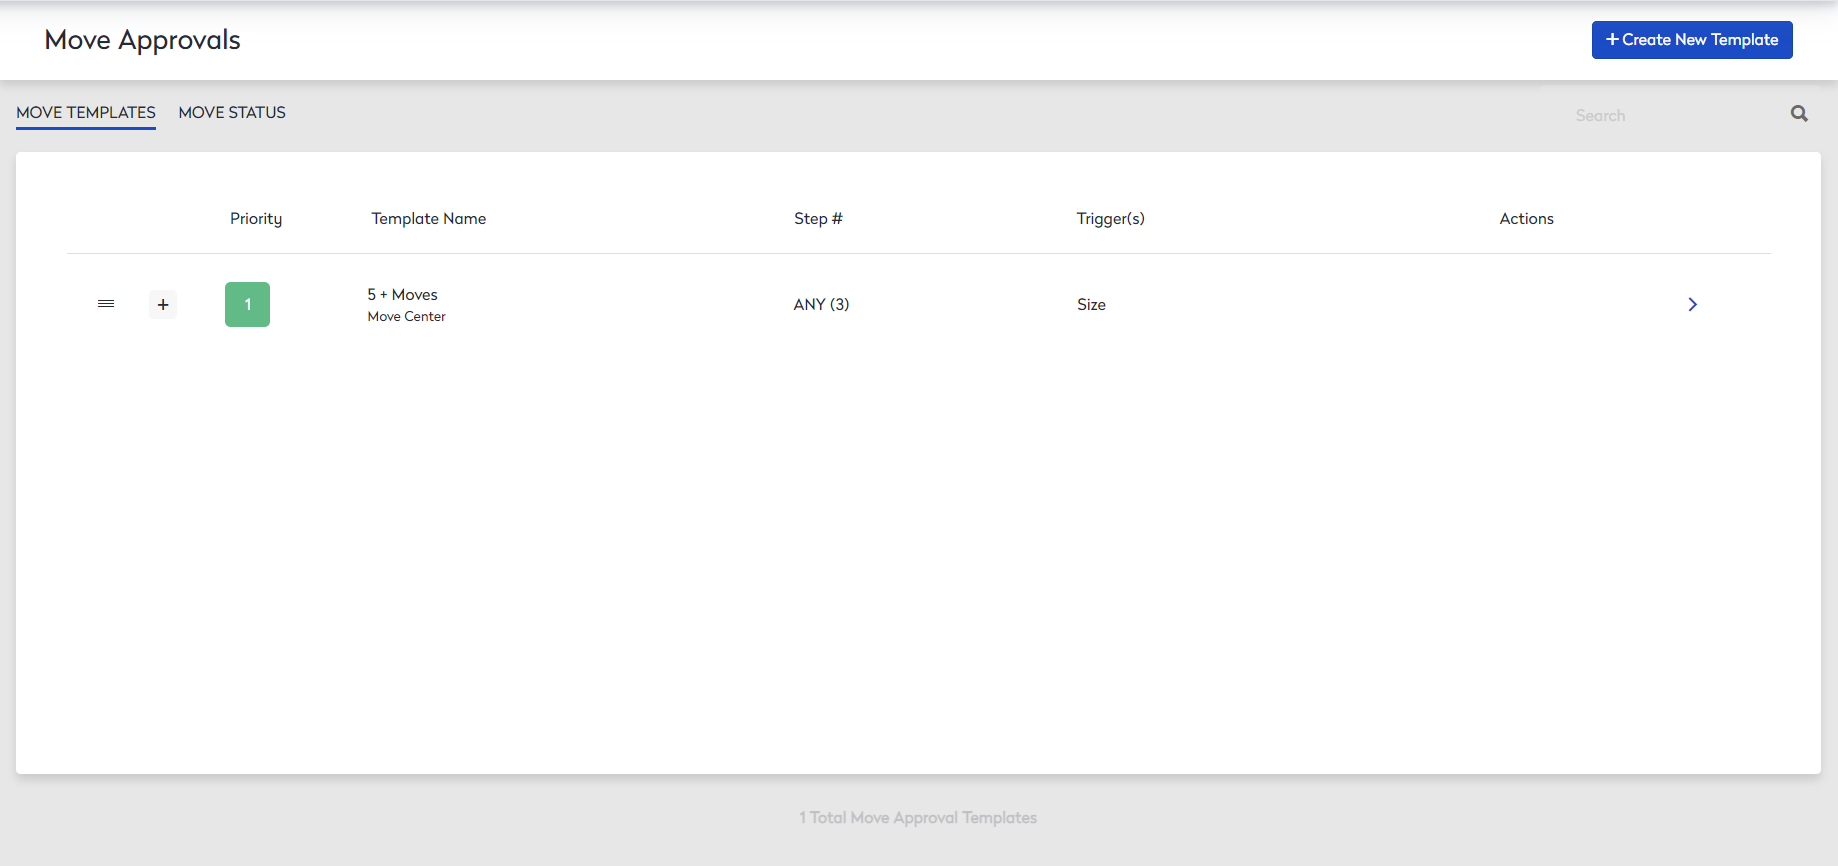
- Click the Create New Template button.
- In the Template Name field, enter a name.
- From the Template Color picker, select a color.
- Click the + Add Trigger button and then you can set up the rules based on the following:
Location
- From the 1st drop-down, select Location.
- From the 2nd drop-down, select either Majority From or Majority To.
- From the 3rd drop-down, select the address of the location.
Size
- From the 1st drop-down, select Size.
- From the 2nd drop-down, select either: equal, greater than, or less than.
- In the 3rd field, enter the number of the move items.
Move Cost
- From the 1st drop-down, select Move Cost.
- From the 2nd drop-down, select either: greater than or less than.
- In the 3rd field, enter the amount it costs per move.
When you have multiple triggers, then you will see AND displays between the triggers; this means all trigger criteria must to be met before the approval trigger is activated.
Then set the criteria for the trigger.
Next, choose the approvers as they can send notifications to key personnel such as internal move teams.
- From the + Add Approver drop-down, choose specific users or group of users.
- Click the + Add Notifications button.
- In the Live Search field, enter the person's name.

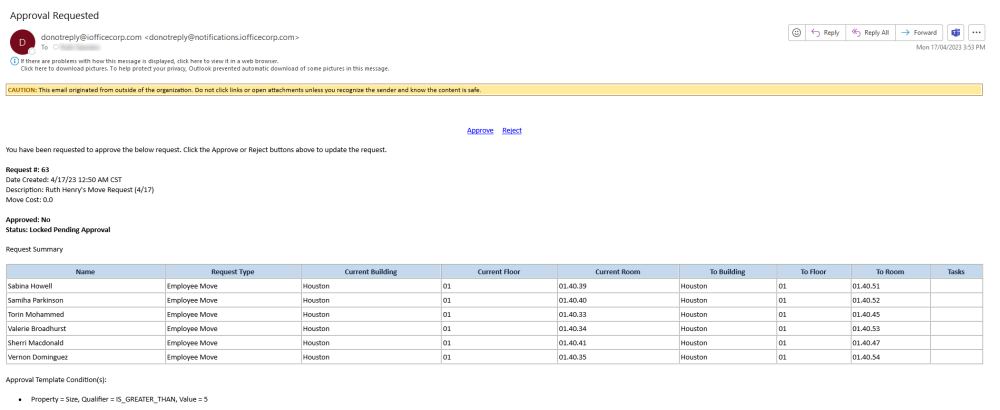
If someone is added to the notification list, they will receive a notification email when the move has the final approval. The email will look similar to the email below.
- Click the +Create New Template button.
When a Move Template is created, it is automatically assigned a priority.
The priority is the order in which the templates are triggered, starting with one being the top priority. The Templates can be rearranged by clicking and dragging the Template to set the priority.
Resend the Move Approval
- Navigate to Admin > Move Approval.
- Click the Move Status tab. The Move Status displays the columns Request ID, Approvers, Status, and Original Date Sent.
- Click the + icon to expand the request to see the additional information, such as Last Email Sent date and the how many times the notifications were sent out can be found under Notified column
- If you need to resend the approval, then click the Resend button and the message "Are you sure you want to resend this email? displays.
- Click the Resend button.
Cancel a Move Approval
If the advanced move approval needs to be canceled do the following steps. After the approval is canceled the move request can be edited again.
- Navigate to Admin > Move Approval.
- Click the Move Status tab.
- Click the CANCEL button. The message "Are you sure you want to cancel this approval?"
- Click the Yes button.