The Check in lets you complete the check in for mail items that are Inbound, Outbound, or Interoffice.
Check in
- From the Home screen, tap Check in.
- Either:
- Use the camera to scan the barcode and the Check-in screen displays with the mail details populated.
- Tap the Manual entry button and the Check-in screen displays.
Remember if you are in a low-light area, the Light  icon will turn on the camera light. icon will turn on the camera light.
|

|
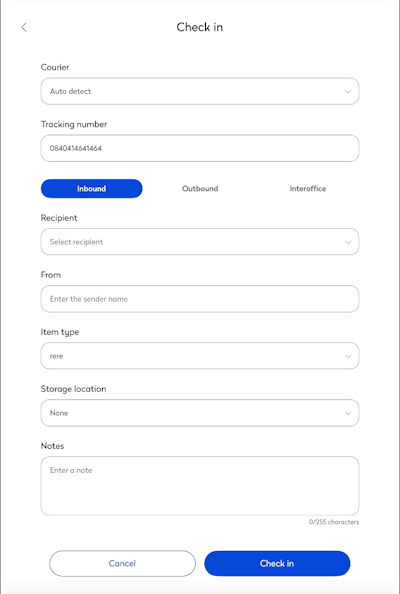
- If you used the scanner, then Courier field is populated with courier's name or you can select the courier from the list.
- In the Tracking number field, this will be populated or you can enter the tracking number.
- Tap either Inbound, Outbound, or Interoffice.
- From the To drop-down, select the recipient.
- From the From drop-down, select the sender's name. Note if this mail item is Inbound, then enter the sender's name.
- From the Item type drop-down, select the item type, for example Pouch, Skid, Carton, Package.
- From the Storage location drop-down, select the storage location.
- If needed, in the Notes fields, enter notes or comments (up to 255 characters).
- In the Mail item photos, tap the + icon and your camera activates. You can either take a photo or select from your photo gallery.
- Tap the Check in button.
|
 |
|
The Item details screen displays where you can either print or take a photo of the mail item.
- For the Mail item photos, tap the + and the select photo menu displays.
|
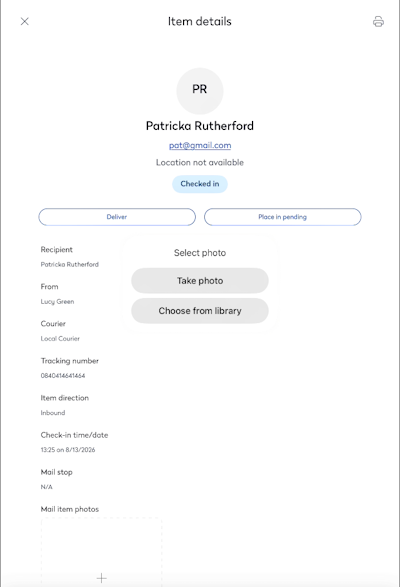 |
- To record a photo of the mail item, either:
- Tap Take photo.
- Take the photo and when you have the photo you want, tap Use Photo.
OR
- Tap Choose from library.
- Select a photo.
- After the photo uploads, tap the Check button and the Items details screen displays.
|
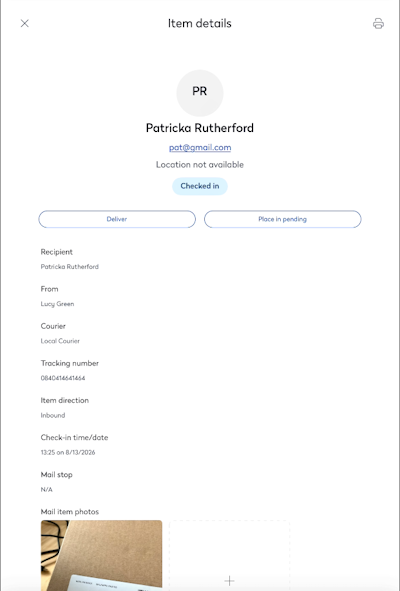
In this example, we have taken a photo of the mail item.

|
|
Next, you can choose to either:
- Deliver
- Place in pending - If you can't deliver a mail item, it can be placed in pending, see below.
- Mail item photos - Add more mail item photos
- Notes - Scroll to the end of the screen and then:
- Tap the Add note button.
- Enter a short note.
- Tap Add note button and the note is recorded.
 Print - This lets you print a label, see below. Print - This lets you print a label, see below. Map - If your user has an assigned location, then you will see this icon, see below. Map - If your user has an assigned location, then you will see this icon, see below.
|
 |
Place in pending
|
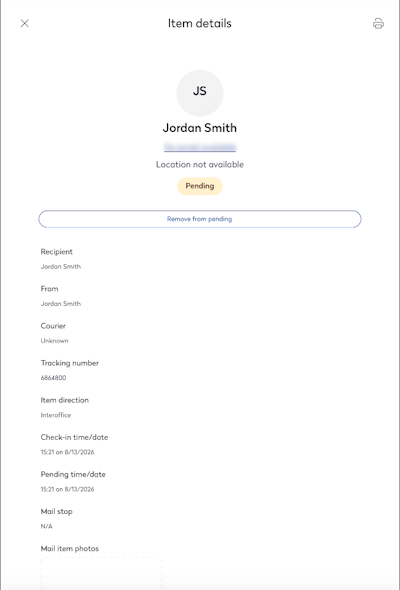
When the mail item is placed in pending, the status changes to Pending.
Later you can search and find the mail item, and then in the Item Details screen, you can tap the Remove from pending button.
|
 |
Print a Label
| After you tap the Print icon, the print options display; if you are connected to a print, adjust the print options and then tap Print. |
 |
Display Map
| After you tap the Map icon, the floor plan displays with the deliveries. |
 |
