Add, Edit, or Remove Markers
Level: Operator and Administrator
Space Planners can add markers on the floor plan to display points of interest and other relevant details for each floor. For example, safety equipment, exits, facilities, or any other relevant items.
- Update the Marker's Groups and Marker's List(Including the Add a new Marker Group and Marker video)
- Add or Delete Markers on the Floor Plan
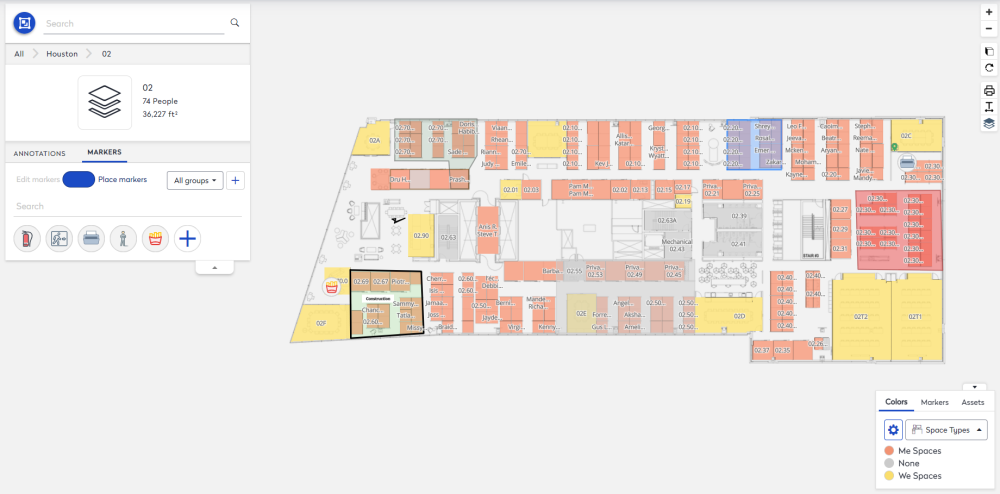
Access the Markers
- Navigate to Space > Space Desktop.
- Click the Mode and select the Annotations mode
 .
. - Navigate to the building and floor.
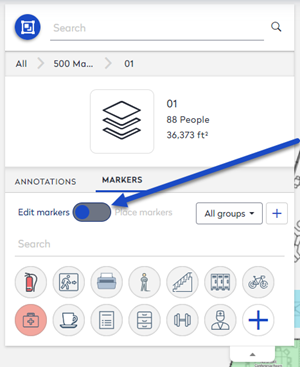
- Click the Markers tab. The marker's panel displays.
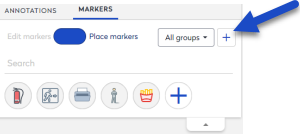
Update the Marker's Groups and Marker's List
The marker's panel will contain a list of all the markers that your organization uses on the floor plan. You can either search for a particular marker in the list or organize them in marker's groups.
Audio: Sound Video Length: 1:37 minutes
Add a Marker Group
To help organize you markers, you can make a group of markers, such as Amenities, Assets, Health and Safety, etc.
- Click the Add Group
 icon.
icon.
The New Marker Group displays in the panel.
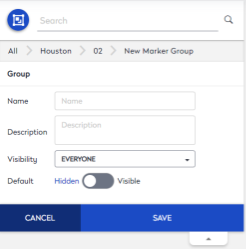
- In the Name field, enter the name of the group.
- In the Description field, enter the description of the group.
- From the Visibility drop-down, select either Everyone, Administrators & Operators, or Only me.
- From the Default toggle to either Hidden or Visible.
- Click the Save button.
Add a New Marker Icon
In the Markers tab, see if the marker you want is in the list and if it is not in the list then ou can add a new marker.
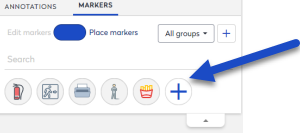
- Click the Add Marker
 icon. The Marker Type displays in the panel.
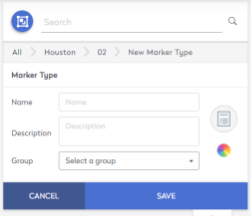
- In the Name field, enter the name of the marker.
- In the Description field, enter the description of the marker.
- From the Group drop-down, select the group.
- Click the marker
 icon to select an icon for your marker. The search displays.
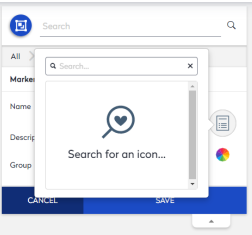
- In the Search field, search for the marker's icon.
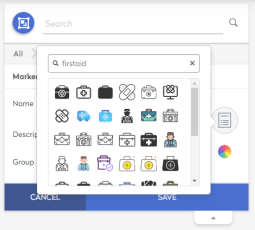
- Click on the marker you want to use.
- Click the color
 icon to select a color. The color picker displays.
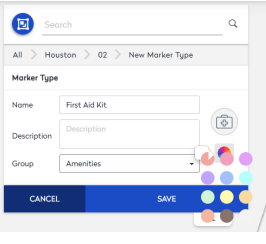
- Select the color for the icon.
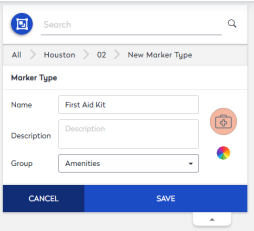
- Click the Save button.
Edit or Delete an existing Marker Icon
- Click the marker's toggle to change it from Place markers to Edit Markers.
- Click the marker icon you want to edit. The Marker Type displays in the panel.
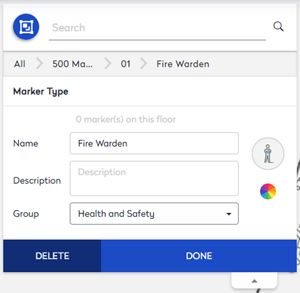
- Make your edits to the fields, icons, color, or group.
- Click the Done button to save.
If you want to delete the Marker Icon, then click the Delete button.
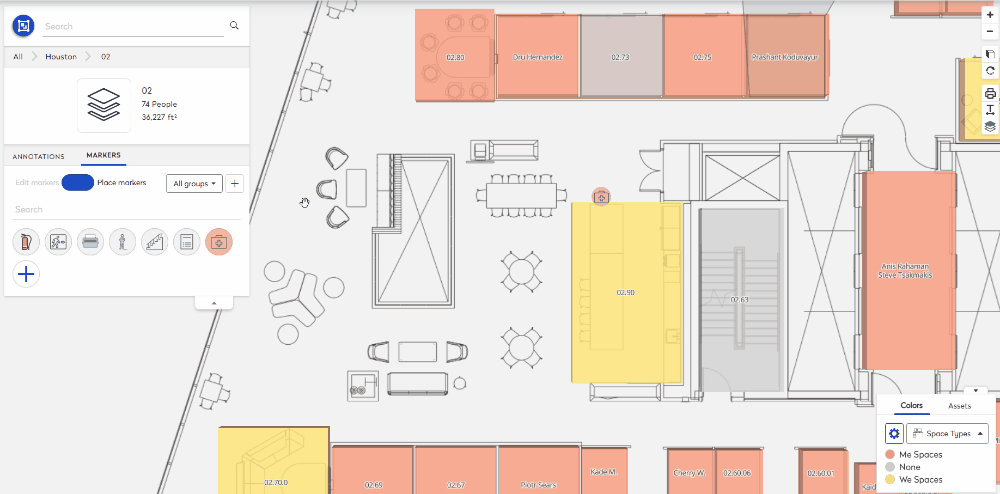
Add or Delete Markers on the Floor Plan
Add the Marker to the Floor Plan
You can add an existing marker to the floor plan.
- From the markers list, select the marker.
- Navigate to where you want to place the maker.
- Either:
- Click the marker on the floor plan to place a single marker.
- Hold the SHIFT key + left click the mouse to place multiple markers.
- Press the Tab key to cycle through the markers.
- Press the ESC key to exit.
The floor plan is automatically saved.
Watch the video examples to learn more, Add Safety Equipment to the Floor Plan and Add First Responders to the Floor Plan.
Delete a Marker from the Floor Plan
You can delete a marker from the floor plan.
- Navigate to the marker's position.
- Click the marker. The Marker screen displays.

- Click the Delete button. The message "Are you sure you want to delete this marker? displays.
- Click the Confirm button. The marker is removed from the floor plan.