Turn On Physical Distancing
We use a physical distancing algorithm to assign distancing categories to space. This is the first step to creating a floor plan that considers physical distancing to plan occupancy. By simply selecting a safety level distance, we will make recommendations for safe and unsafe spaces and help Space administrators plan a safe floor plan for occupants.
Step 1. Access and Turn on Space-Right
- Navigate to Spaces > Space-Right.
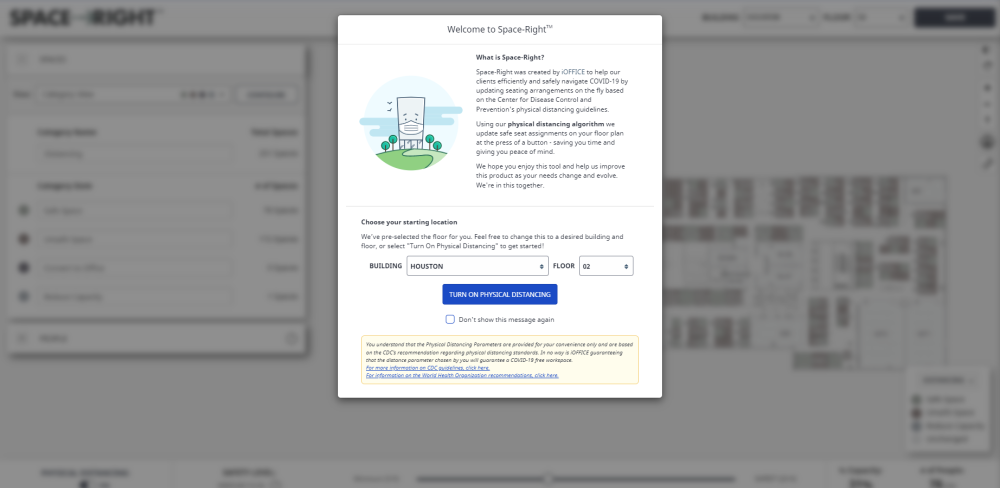
- From the Building drop-down, select the building.
- From the Floor drop-down, select the floor.
- Click the Turn On Physical Distancing button.
To deactivate physical distancing, use the Physical Distancing toggle on the bottom left side of the screen.
Step 2. Adjust Safety Level
The amount of distance between the center of any two spaces that can be occupied will display on the slider bar.
To select the minimum amount of allowable distance between spaces:
- From the Safety Level slider, slide the selector, the following will occur:
- As you slide the selector to the left, the minimum amount of physical distance decreases and more spaces are categorized as Safe Space.
- As you slide the selector to the right, the minimum amount of physical distance increases and more spaces are categorized as Convert to Office, Reduce Capacity, and Unsafe Space.
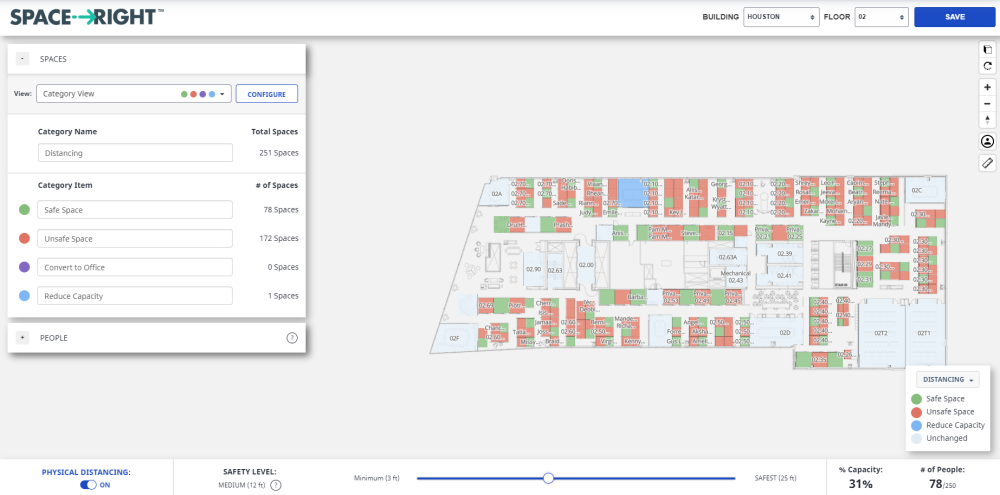
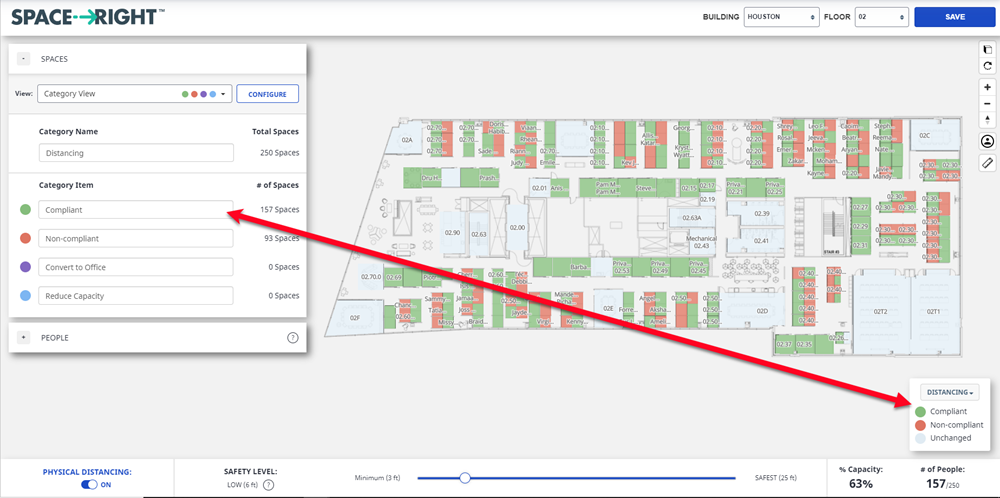
On the right side of the Safety Level slider bar the following displays:
- % Capacity - Capacity is the number of seats occupied and available with physical distancing parameters considered divided by the number of seats occupied and available with physical distancing parameters turned off.
- Number of People display - Number of People is a combination of two numbers for example 78/250.
- The first number displayed represents the number of people that can safely occupy the floor plan based on the distance selected on the Safety Level slider bar.
- The second number represents the number of total occupiable spaces and assumes each occupiable space has a capacity of 1.
When Physical Distancing is toggled on, the toggle will display Physical Distancing ON. The Legend displays categories with a color-coded view.
The default category name is Distancing and the category items are:
- Safe Space - A Safe Space is an occupiable or non-occupiable space such as a workstation or meeting room that's maximum capacity would allow for people to physically occupy the space and be at least as physically distant as the Safety Level selected. For example, if the Safety Level selected was 12 ft, a space would be categorized as Safe Space if a person sitting in the center of that space be at least 12 ft away from any other space that could be occupied.
- Unsafe Space - An Unsafe Space is an occupiable or non-occupiable space such as a workstation or meeting room that's maximum capacity would not allow for people to physically occupy the space and be at least as physically distant as the Safety Level selected. For example, if the Safety Level selected was 12 ft, a space would be categorized as Unsafe Space if a person sitting in the center of that space be closer than 12 ft to another occupiable or non-occupiable space. This is unsafe because it would not meet the minimum amount of distance between the occupants.
- Convert to Office - A Convert to Office space is a non-occupiable space, such as a huddle space or meeting room, with a capacity of 2 or more where the occupants would not meet the minimum amount of distance required between occupants. This space will be categorized as Convert to Office with a capacity of 1. This will allow the smaller collaborate spaces on the floor plan to be used as office space to maximize the capacity of the floor while maintaining the selected Safety Level selected.
- Reduce Capacity - A Reduce Capacity space is a non-occupiable space, such as a huddle space or meeting room, where more than one person can occupy and maintain the selected Safety Level, but that the current capacity would not create enough distance to safely occupy the area. This category allows for the meeting room to continue to be a collaborative space.
Additionally, Physical Distancing Circles can be placed on the floor plan and these circles show which spaces are safe and unsafe. To see distancing circles appear on the floor plan:
- From the toolbar, click the Physical Distancing Circles
 icon.
icon. - Click on an occupiable space(s) to see how the physical distance applies to the space and nearby spaces.
- Use the Safety Level slider to see how the physical distancing circles change in size depending on the safety level.
Step 3. Rename Physical Distancing Category and Category Items
You can rename the Physical Distancing Category and/or the the Category Items.
- In the Category Name field, enter the name of the category. For example Social Distancing.
- In the Category Item field, enter the name of the category item. Repeat this for each category, if needed.
As you enter the text the Legend will be updated.
Step 4. Configure your Space Options
You can configure your Space Options and this lets you:
- mark specific space types to be marked as safe
- modify whether non-occupiable spaces are reduced in capacity or converted to an office
- reservable spaces to be changed to non-reservable if unsafe or kept as reservable
Complete the following:
- Click the Configure button. The Configure Your Space Options dialog displays.
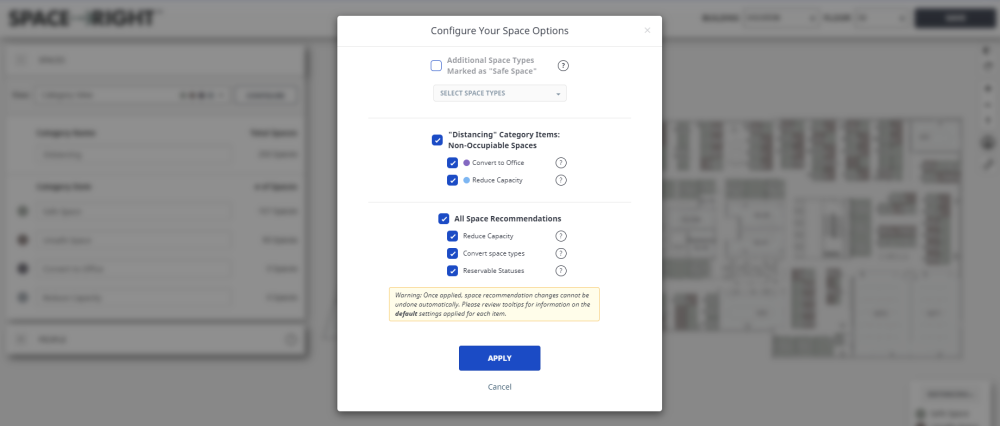
Additional Space Types
- Check the Additional Space Types check box to define additional space types that can be categorized as "Safe Space", for example, space types that have walls.
- From the Select Space Types drop-down, select the space types. You can select multiple space types.
Distancing Category Items
- When checked the Convert to Office check box applies the "Convert to Office" category item, updates the space type to a non-occupiable type, the status to non-reservable, and the capacity to 1.
- When check the Reduce Capacity check box applies the "Reduce Capacity" category item and the capacity recommendations to non-occupiable spaces.
All Space Recommendations
- When checked Reduce Capacity check box applies Reduce Capacity: Lower capacity than original.
- When checked Convert space types check box applies Convert to Office: Converted to "Office" space type (or the default space type if "Office" doesn't exist).
- When checked Reservable Statuses check box applies the Convert to Office: Will update to non-reservable.
When applied, space recommendation changes cannot be undone automatically. We recommend you review the tool tips for information on the default settings applied for each item.
When finished, click the Apply button.
Step 5. Save Space-Right
After you have selected the safety level and finalize the category item names, you will need to save.
- Click the Save button. The What would you like ot save? dialog displays.
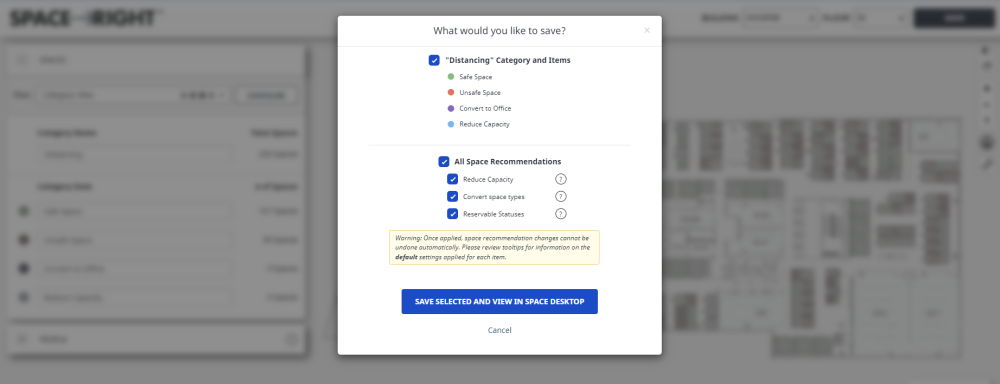
- This gives you an opportunity to not save the Category and Items, and the All Space Recommendations.
- Click the Save Selected and View in Space Desktop button.
The Space-Right plan is generated.
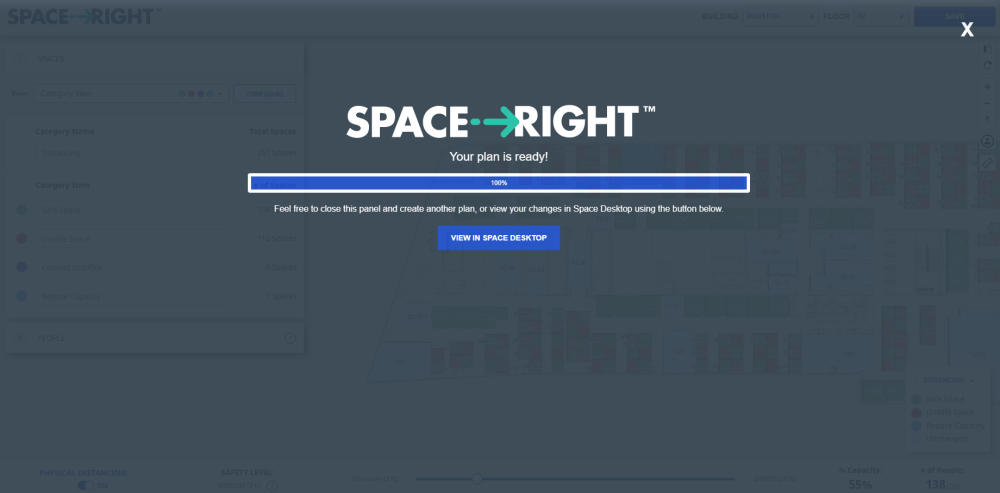
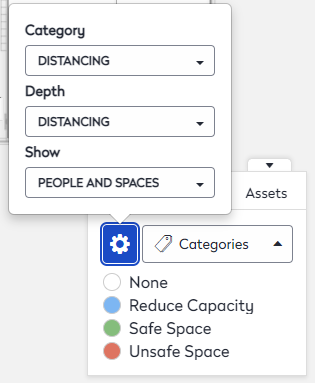
- Click the View in Space Desktop button. The Space Desktop displays with the categories set to Distancing.
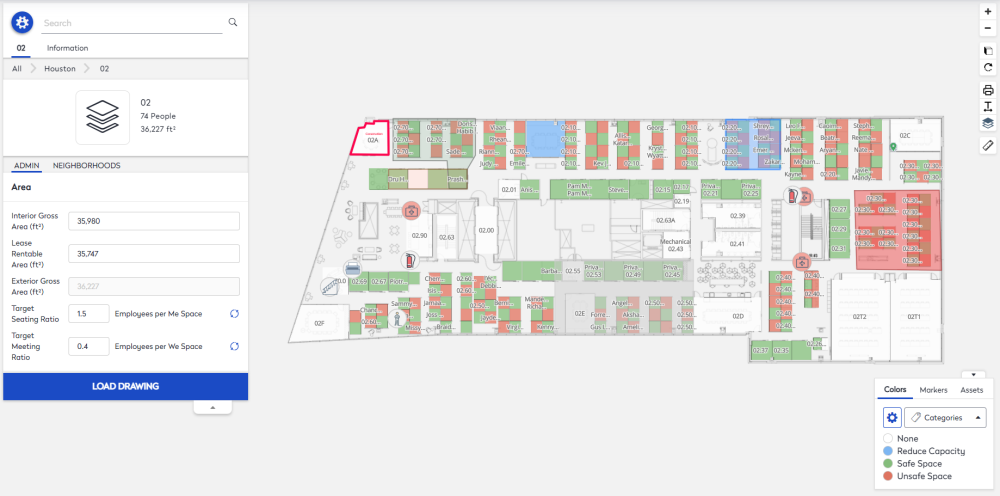
When you click the Gear  icon this will display the Distancing Category.