Floor Plan Toolbar
The floor plan view in Information Mode on Space Desktop contains a toolbar which includes:
 Zoom in
 Zoom out
 Cube
Cube Rotate
 Print
Print Text View Options
 CAD Layers
 Ruler (this displays in the Admin Mode)
Watch the Video
Audio: Sound Video Length: 3:28 minutes
Learn more
Move the Floor Plan
- Use the cursor to click on the floor plan and then drag the floor plan to move around the floor plan.
Zoom In and Out of the Floor Plan
It is easy to adjust the size of your floor plan, either use the toolbar icons or the mouse scroll wheel.
Use the toolbar icons to zoom in and out of the flor plan.
- Click the Zoom in
 icon will zoom into the floor plan and to zoom out click the Zoom out
  icon.
icon.
Use the scroll wheel on your mouse to zoom in or to zoom out on a floor plan.
- Point your cursor on the area you want to zoom in to.
- Use the mouse's scroll wheel to scroll forward.
- When zoomed in, use the cursor to click and drag your way around the floor plan.
- To zoom out, use the mouse's scroll wheel to scroll backwards.
2D and 3D Floor Plan View
Click the Cube icon to view the floor plan in 3D and then click the Cube disable  icon to change it back.
Rotate Floor Plan
Click the Rotate icon to rotate the floor plan clockwise.

When you have the building's floor open in the Space Desktop you will see the floor plan. You must click the Print icon and then read Print a Floor Plan in Space Desktop to learn about Standard Printing and Compact Printing.
Text
Remember any adjustments made here will not be reflected in the print screen.
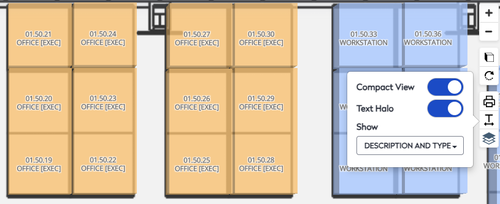
The Text View Options icon allows you to choose what information displays on the Space Desktop.
- Click the Text View Options
 icon.
icon.
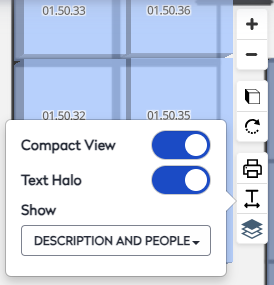
- By default, the Compact View toggle is ON to auto-scale the text such as Space Name, Occupants, or Space Type to fit within the boundary of a space’s polyline. When you toggle this on then the settings for Allow Text Overlap toggle and Text Size options button are hidden.
The Compact View can be turned off and then you can adjust te text size manually.
- Click the Compact View toggle to OFF.

- Click a Text Size option button from a range of small to large to change the size of the text on the floor plan. The Text Size option button range is 10, 12, 14, and 16.
- Click the Allow Text Overlap toggle to ON to let the text overlap on the floor plan. When this setting is off then the text will truncate and an ellipsis will display.
- By default the Text Halo toggle is ON which outlines the floor plan text with a white glow, making text easier to read against various background colors and polylines.
- From the Show drop-down, select either Default, Description, Description and People, Description and Type, Name, Name and People, or None.
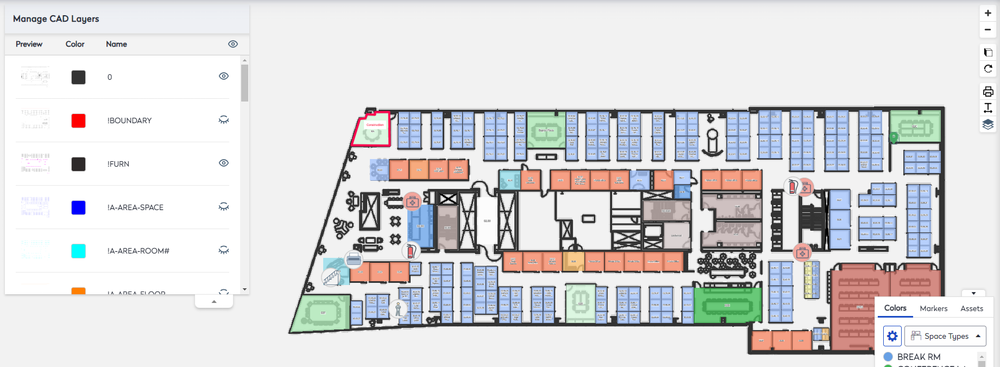
Manage AutoCAD Layers
The AutoCAD layers feature allows you to toggle on and off the display of different CAD layers such as Furniture, Fixtures, Mechanical, etc.
- Click the CAD Layers
 icon. The Manage CAD Layers panel displays and the load time will depend on the amount of AutoCAD layers that need to be loaded.
 - To change the visibility of a layer click the hide
 icon or click the the show
  icon.
icon.
Ruler
The rule lets you measure the space.
- Change the mode to the Admin mode.
- Click the Ruler icon.
- Click on the floor plan for the starting point.
- Click on the end point and the distance displays.
- Repeat this to keep measuring the space.
