Update the Production View
Customers can view their own Copy Jobs and the Operators and Site Admins can view all the Copy Jobs and start processing them.
Access the Production View
- Navigate Copy > Request Queue. The Request Queue displays.

- For the job you want to see the production view, click the Prod View button.
The Production View displays and contains the following tabs:
- Job Details
- Contact Information
- File Attachments
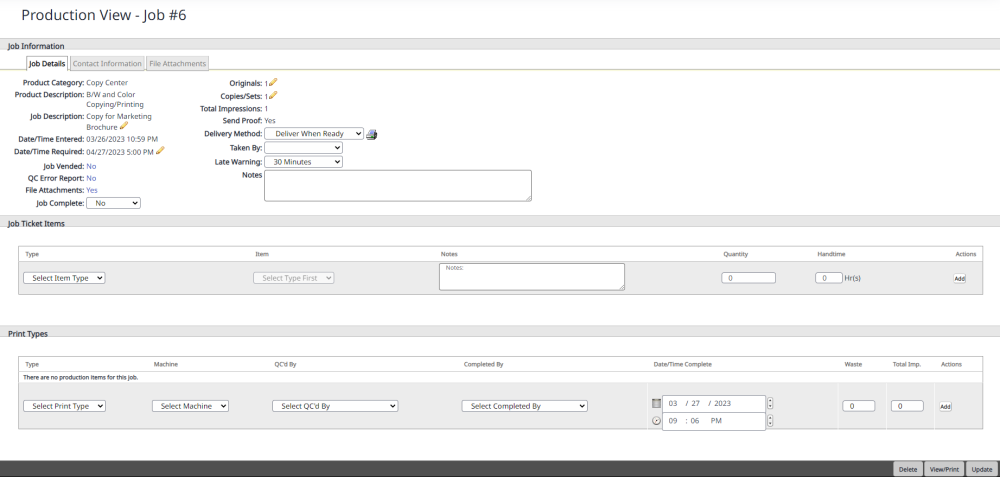
Job Details Tab
The Job Information screen provides overall Job Details, Contact Information, and access to File Attachments.
- Optional - You can edit the fields in the Job Details area.
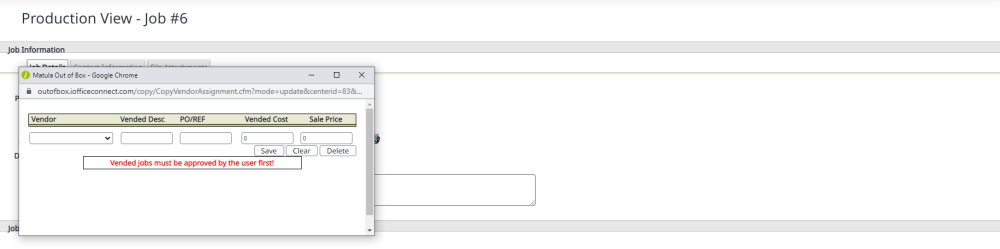
- Optional - For the Job Vended, click the No link to display the Vendor dialog. This lets you to record details about any component of the job that has been sent to a third-party vendor.
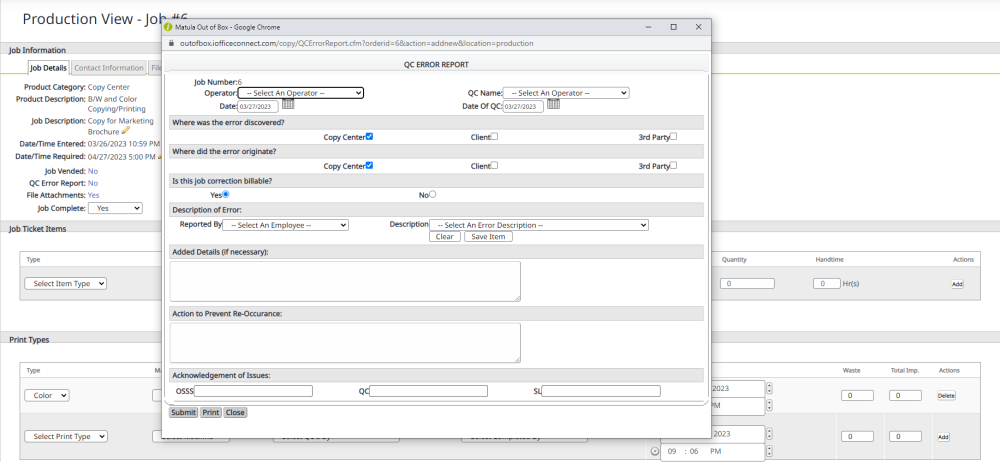
- Optional - For the QC Error Report, No link to display the QC Error Report dialog. This lets you record the details surrounding errors.
- Optional - From the Delivery Method drop-down, select the delivery method.
Your Site Admin can set up the delivery methods, see Add or Edit Delivery Types.
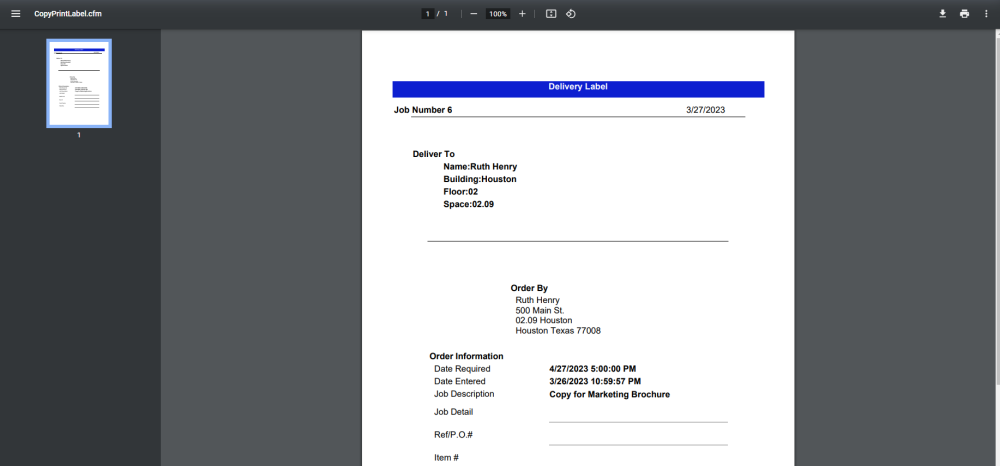
- Optional - If you want to print a delivery label, click the Print
 icon. The Delivery Label print displays.
- Optional - From the Take By drop-down, select an operator.
- Optional - From the Late Warning drop-down, select either 30 minutes or 60 minutes.
- Optional - In the Notes fields, enter any special instructions.
- From the Job Complete drop-down, select Yes.
When you have finished the job, then you mark the job as complete. When you select Yes and save the job this will change the Copy Job's status to Complete.
- In the Job Ticket Items area, complete the fields.
- In the Print Types area, complete the fields.
Contact Information Tab
- Click the Contact Information tab.
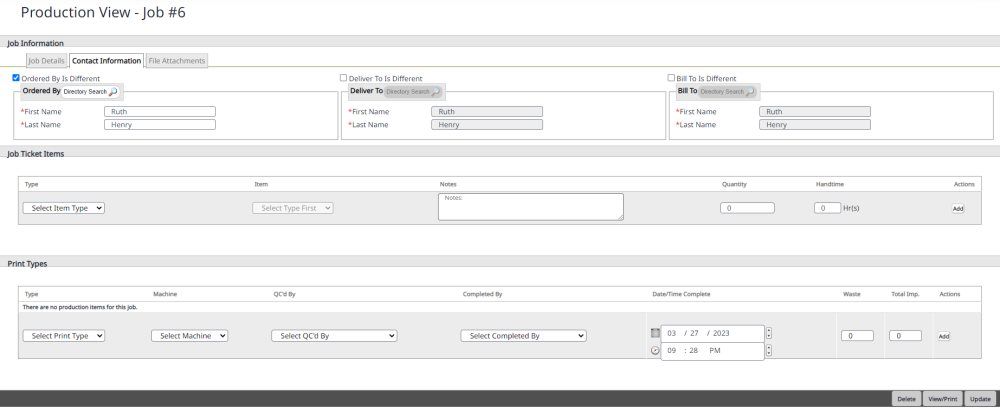
The top the section contains the following:
- Ordered by
- Deliver To
- Bill to
If you need an alternative person can be entered.
- In the Contact Information area, you can change the order by information:
- Check the Order By is Different check box.
- Either click the Directory Search button to find the person's name OR enter in the name in the First Name field and Last Name field.
- In the Contact Information area, you can change the deliver to information:
- Check the Delivery To Is Different checkbox.
- Either click the Directory Search button to find the person's name OR enter in the name in the First Name field and Last Name field.
- In the Contact Information area, you can change the bill to information:
- Check the Bill To Is Different checkbox.
- Either click the Directory Search button to find the person's name OR enter in the name in the First Name field and Last Name field.
File Attachments Tab
- Click the File Attachment tab. The File Attachment screen displays.
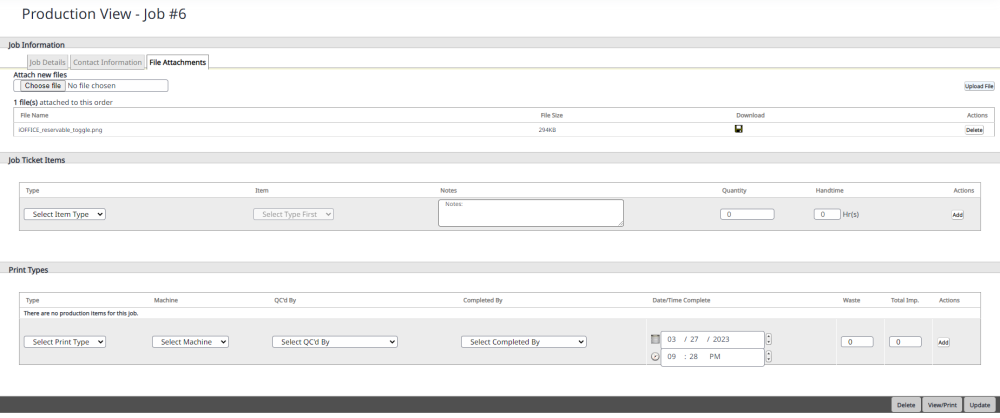
- Optional - You can upload another file, click the Choose file button, the select the file to upload, and then click Upload File button. Note: That you can delete a file attachment.
- Optional - You want to download the file, then click the Download
 icon.
icon. - The Job Ticket Items area lists the various selections made on the job ticket pertaining to supplies and finishing.
- The Type column populates based on the selections made via the ticket including the Category Type, Specific Item, Notes, Quantity, Handtime and Actions.
- For supply items such as paper stock, the Quantity will reflect number of originals times number of sets.
- For finishing or binding items, the Quantity will reflect the requested number of sets only.
- The Quantity can be easily updated based on actual production and items can be deleted.
- The Print Types section allows you to complete the ticket with the print type, machine utilized, who quality checked the job, who completed the job, the date and time completed, the wastage and the total impressions.
When you have finished, click the Update button to save.