Redesigned Mail Check In/Out Screens
The Mail Check In and Check Out screens have been updated with a sleek, modern design, allowing you to process packages more efficiently. While the new design continues to be keyboard friendly, the improved screens provide you with simple, clearly defined options, allowing you to check packages in and out with ease.
To provide you with access to the new Check In screen, a link has been added to the existing Check In screen. Simply click this link to explore the new screen prior to the complete transition to the new layout. The updated Check In screen displays.
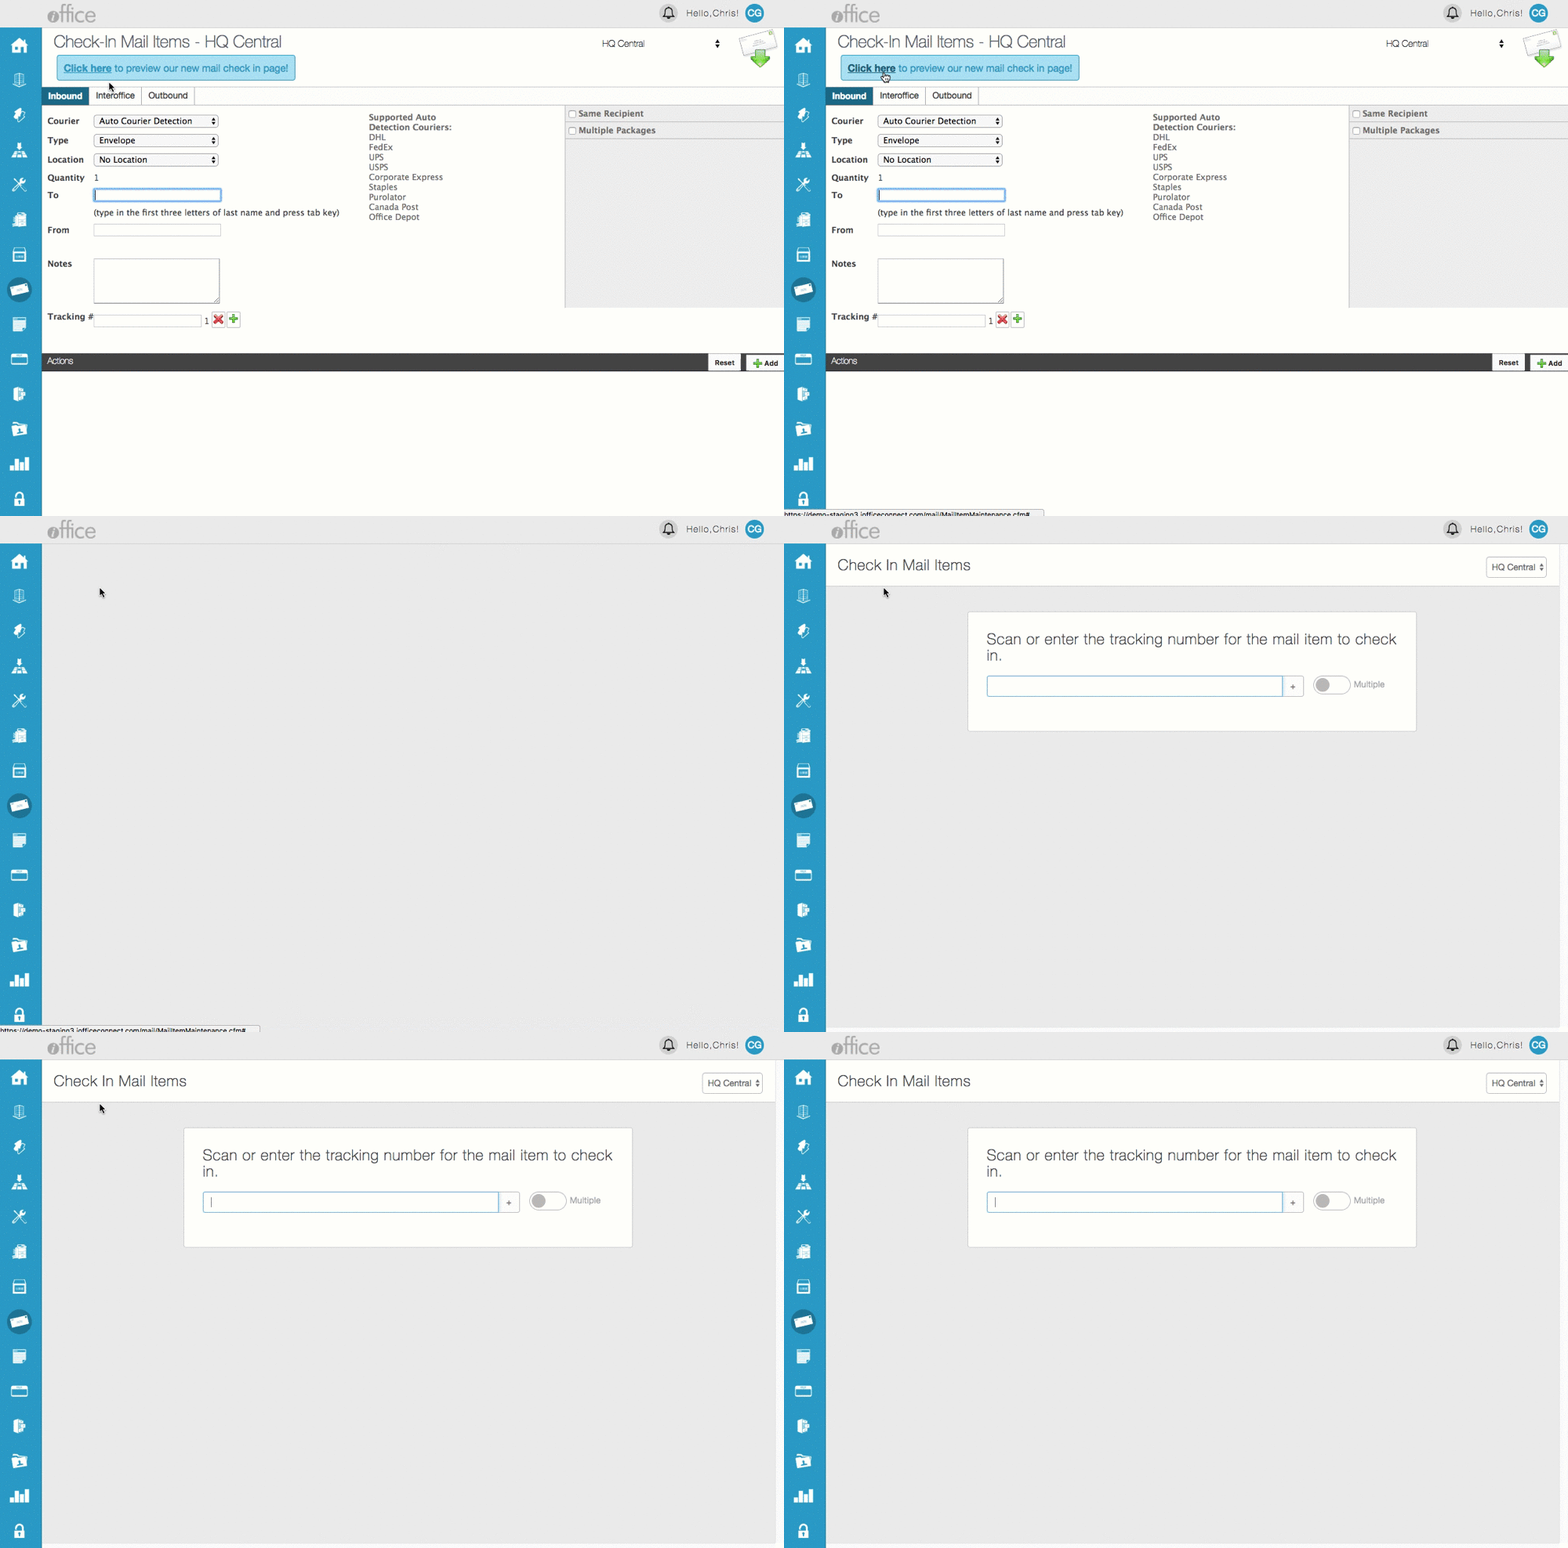
Refer to the following sections for highlights on the new Check In screen, including new check-in procedures for normal and "speedy" check in.
New Check In Process - Single Package
The first thing you will notice on the new Check In screen is the simplified layout. On the new screen, the tracking number is required before any other package information can be entered. Previously, you could make multiple entries including the courier, package type, recipient, and notes for the package before realizing the package had already been checked in. Now, the tracking number is required as the first entry, streamlining the check-in process by eliminating the potential for unnecessary entries.
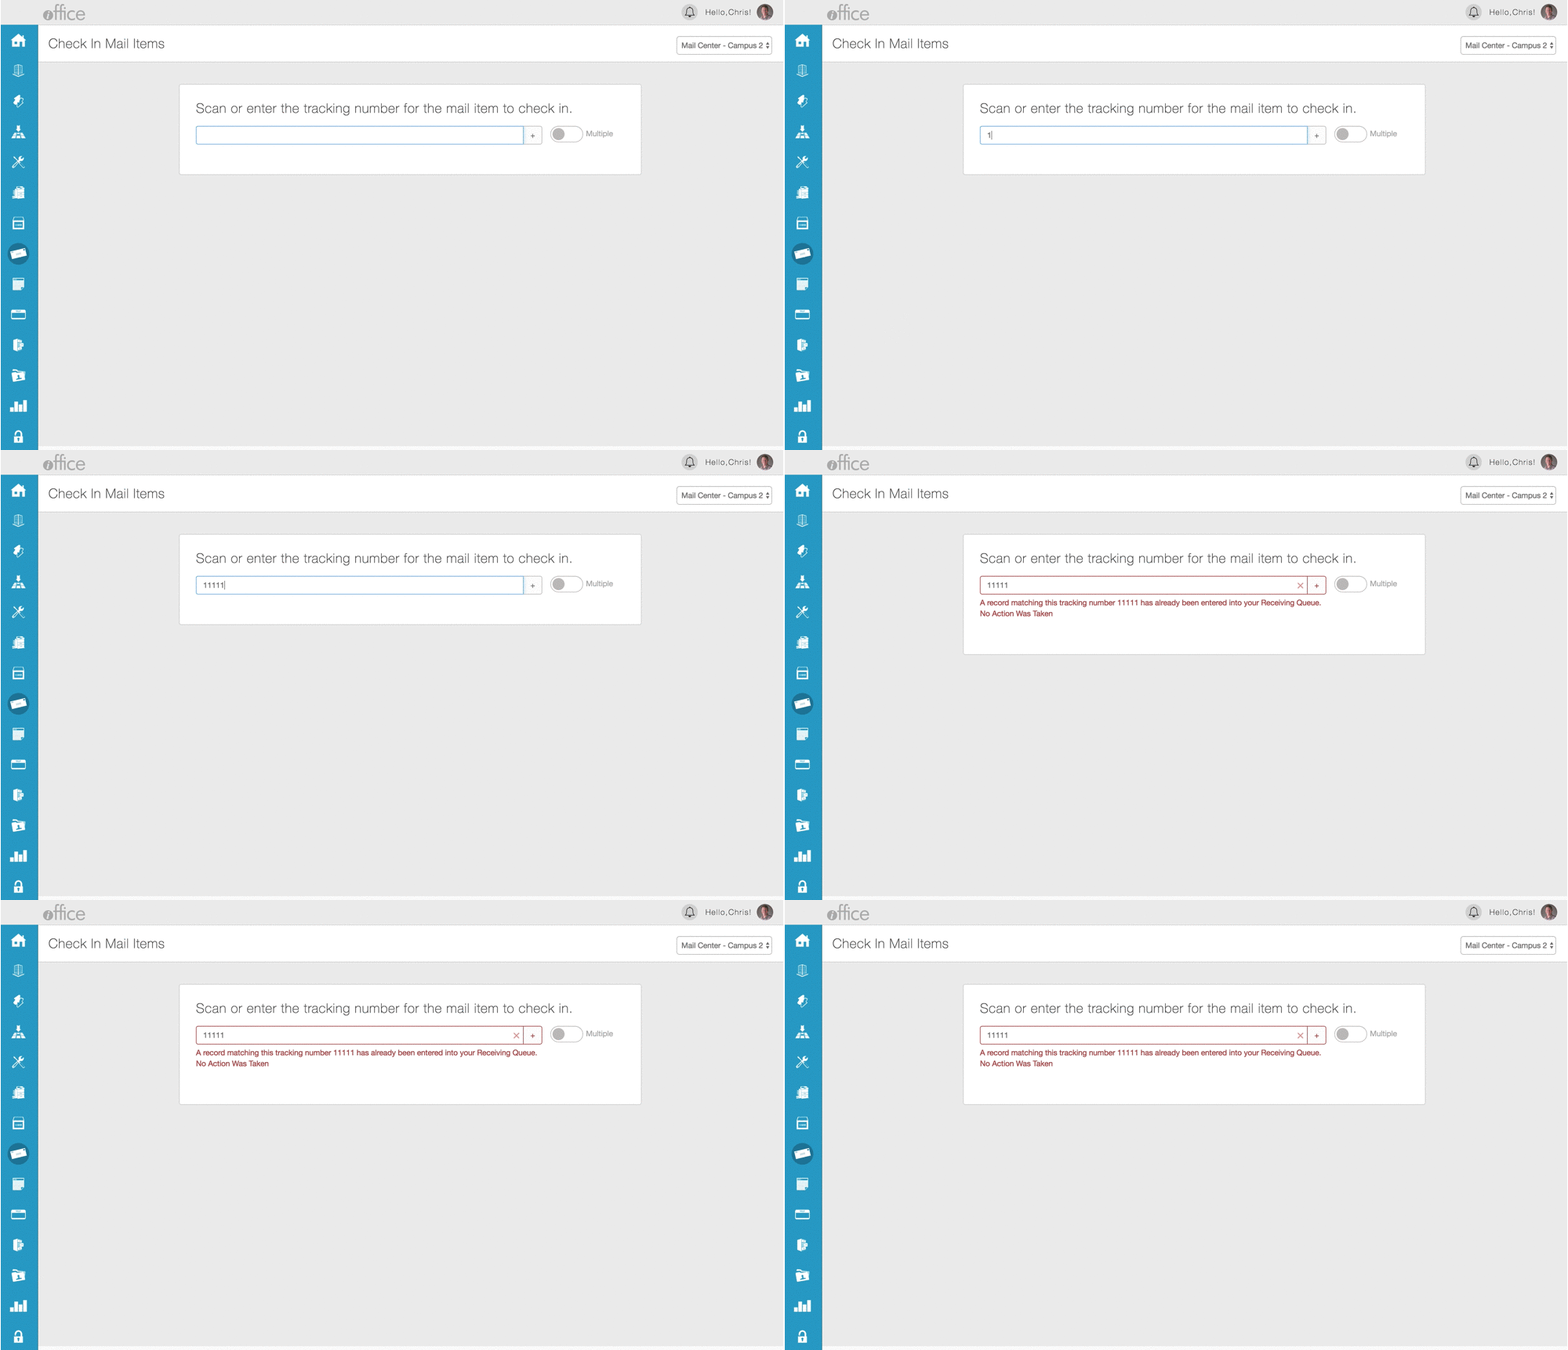
To check in a package using the new Check In screen, use the following procedure:
- Enter the tracking number for the package and press the TAB key or click the
 (Add) button to the right of the tracking number. The User Search window displays, where you can search for and select the package recipient. In addition, the remaining fields display on screen.
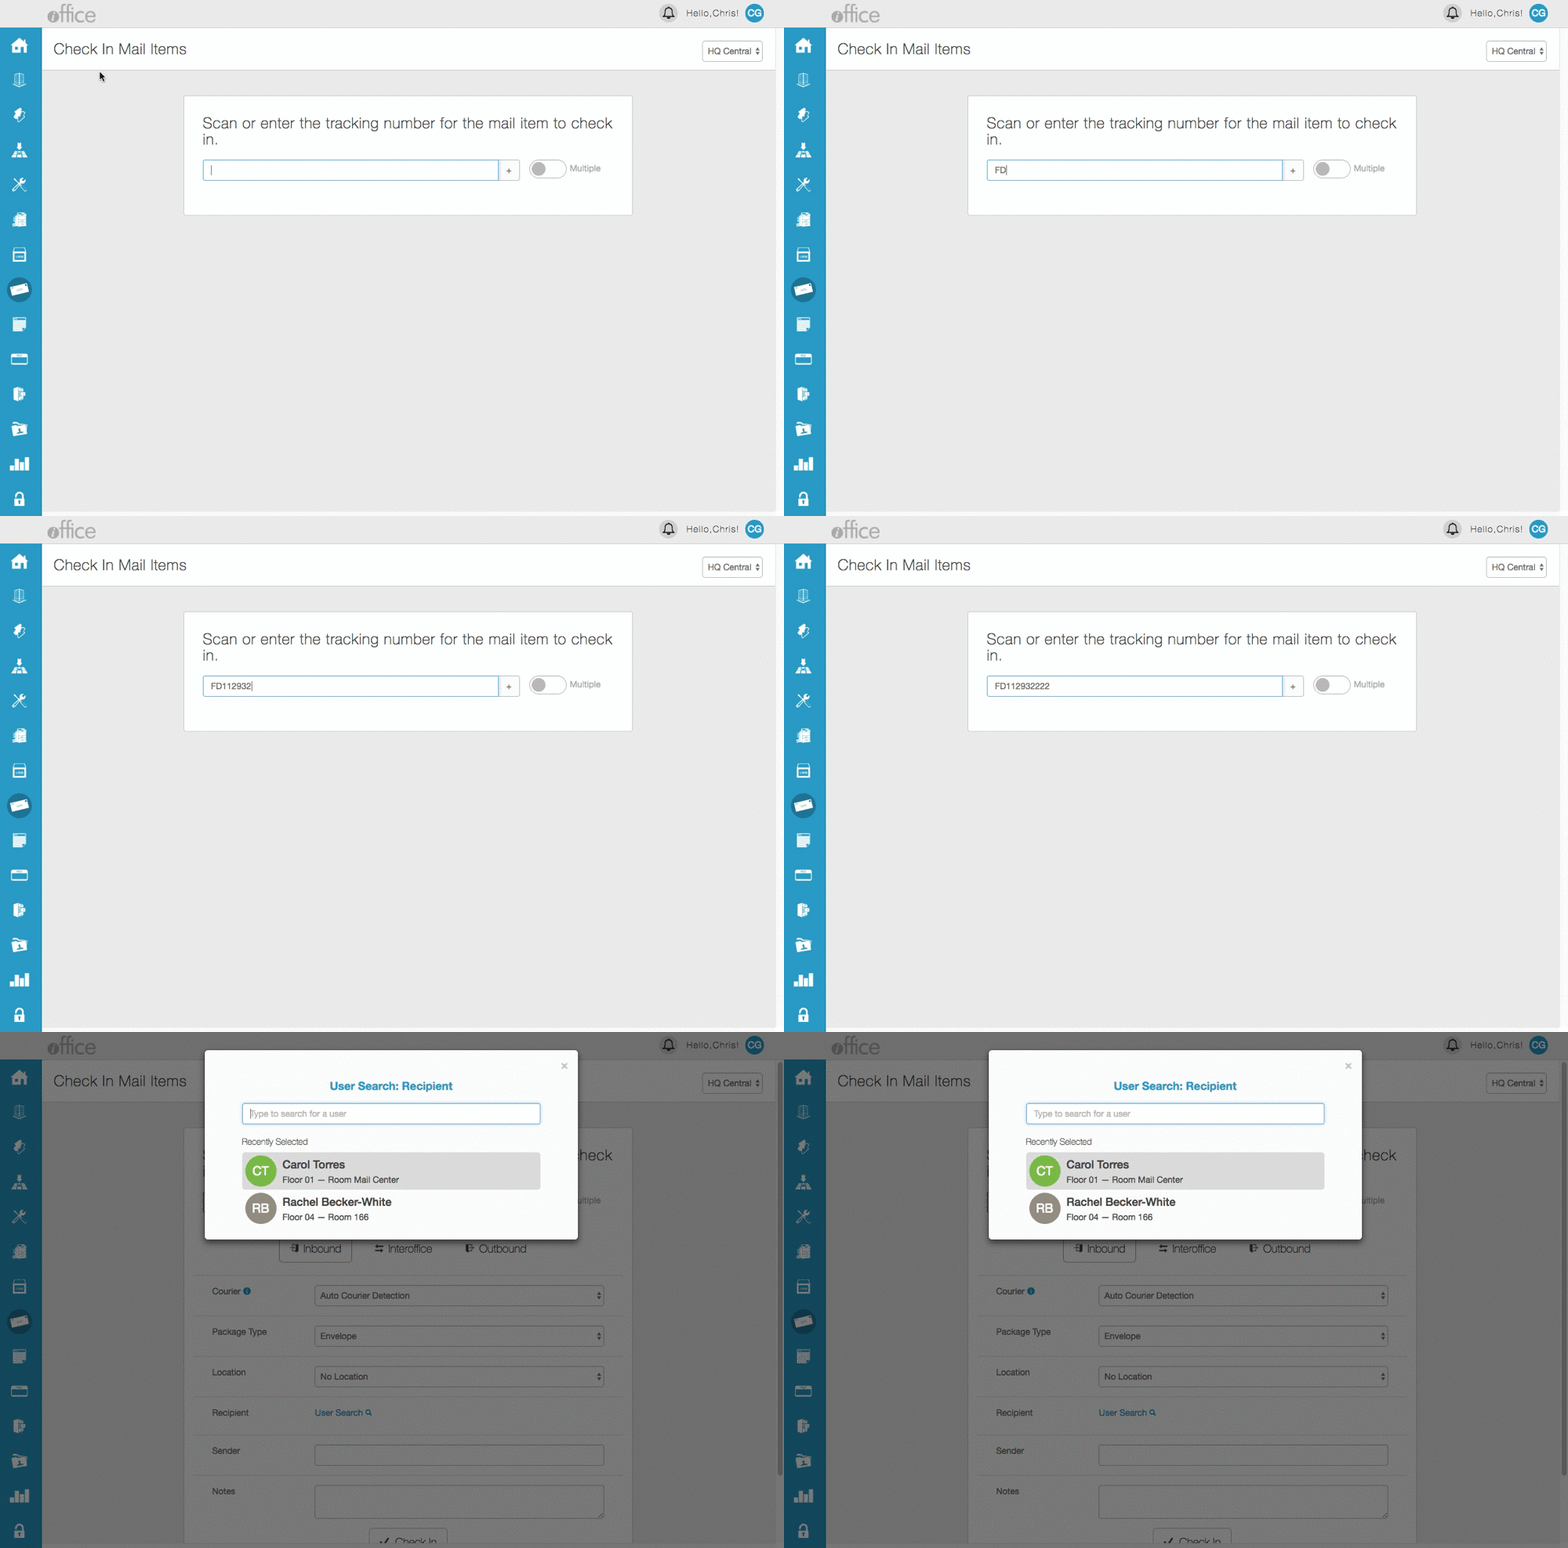
- Locate and select the package recipient. The selected recipient displays in the Recipient field and the User Search window closes.
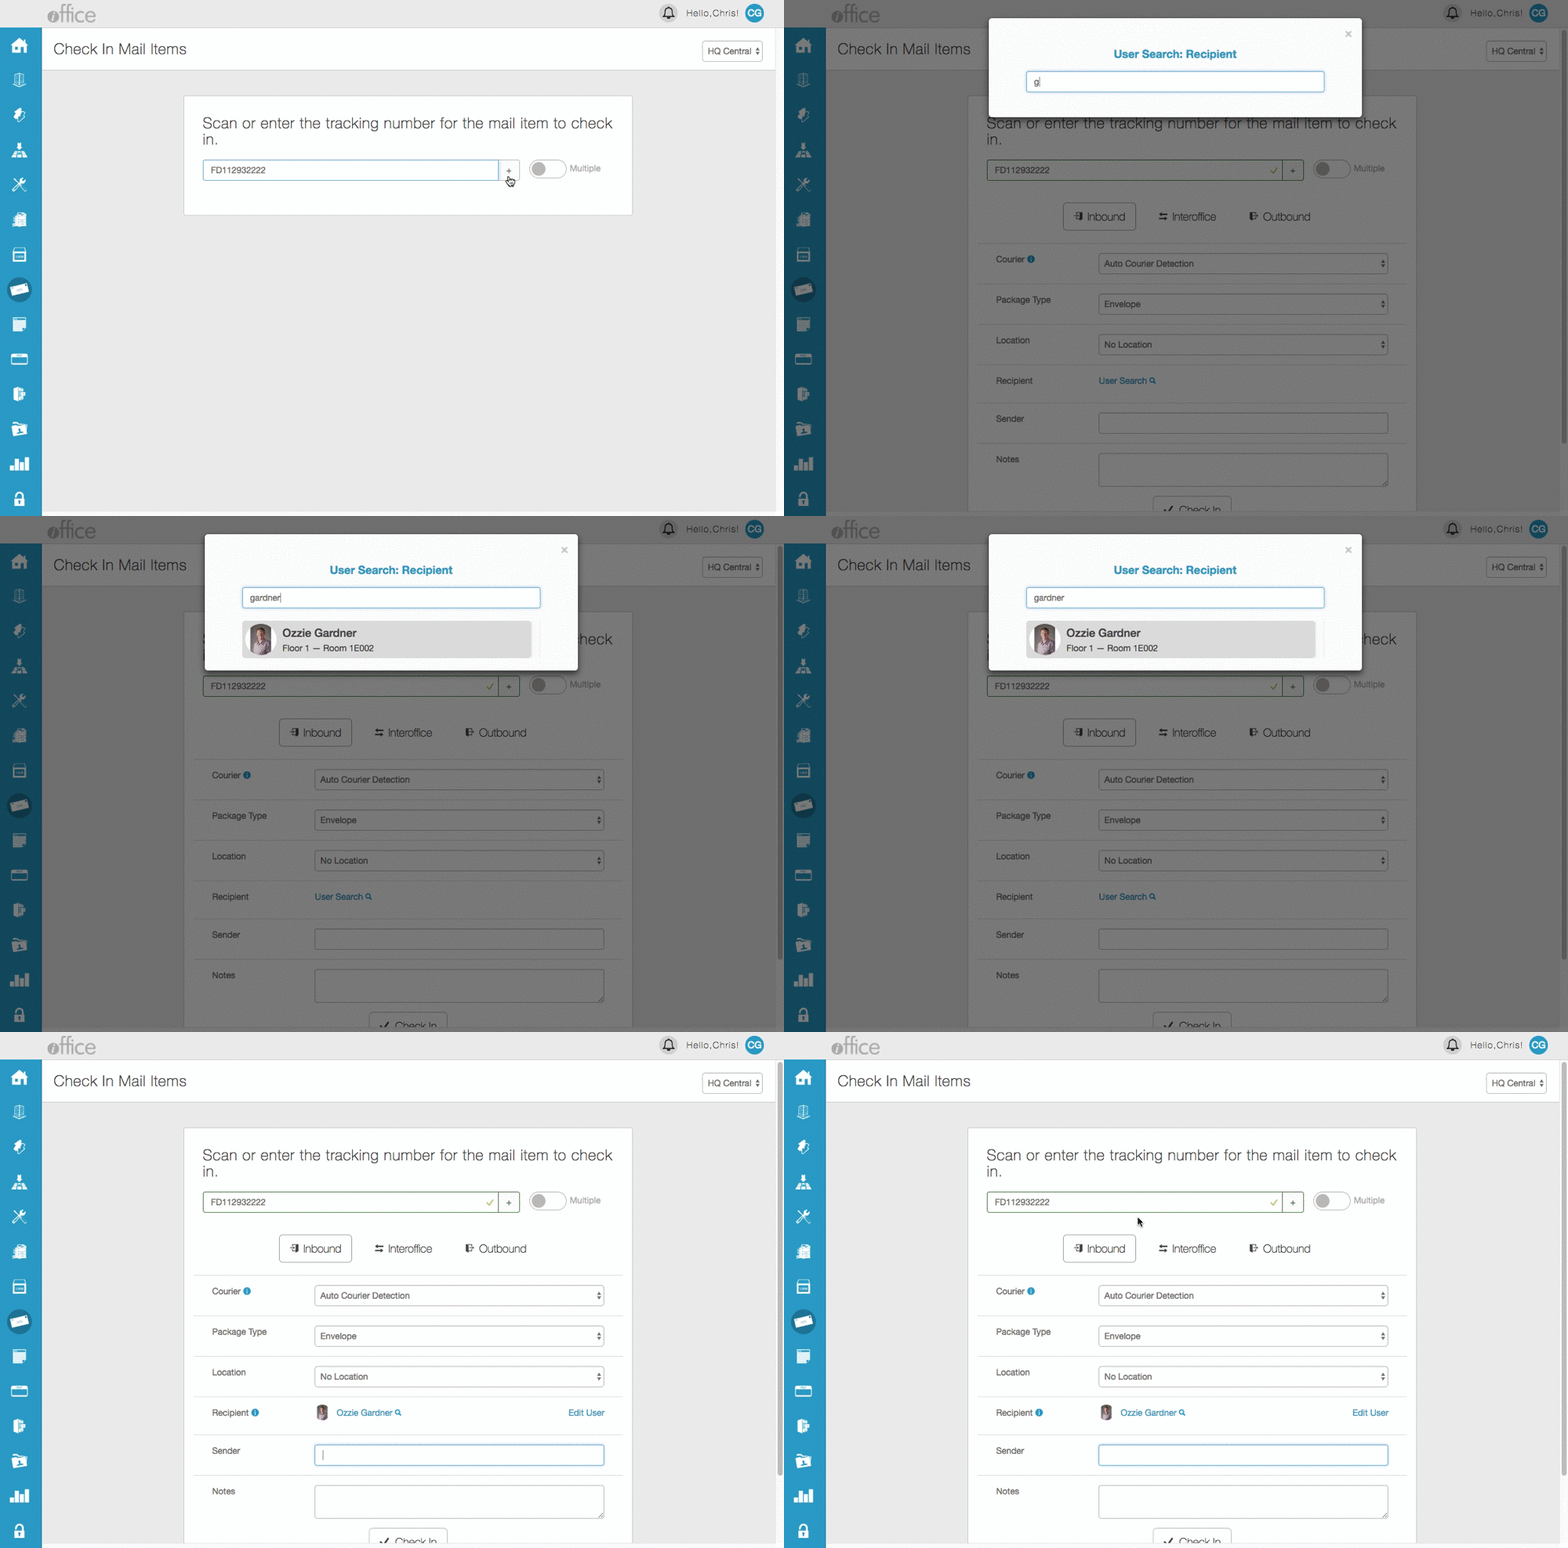
- Select whether the package is Inbound, Interoffice, or Outbound by selecting the corresponding package type. The fields displayed on screen are automatically updated to match the package type, allowing you to quickly enter the remaining information for the package.
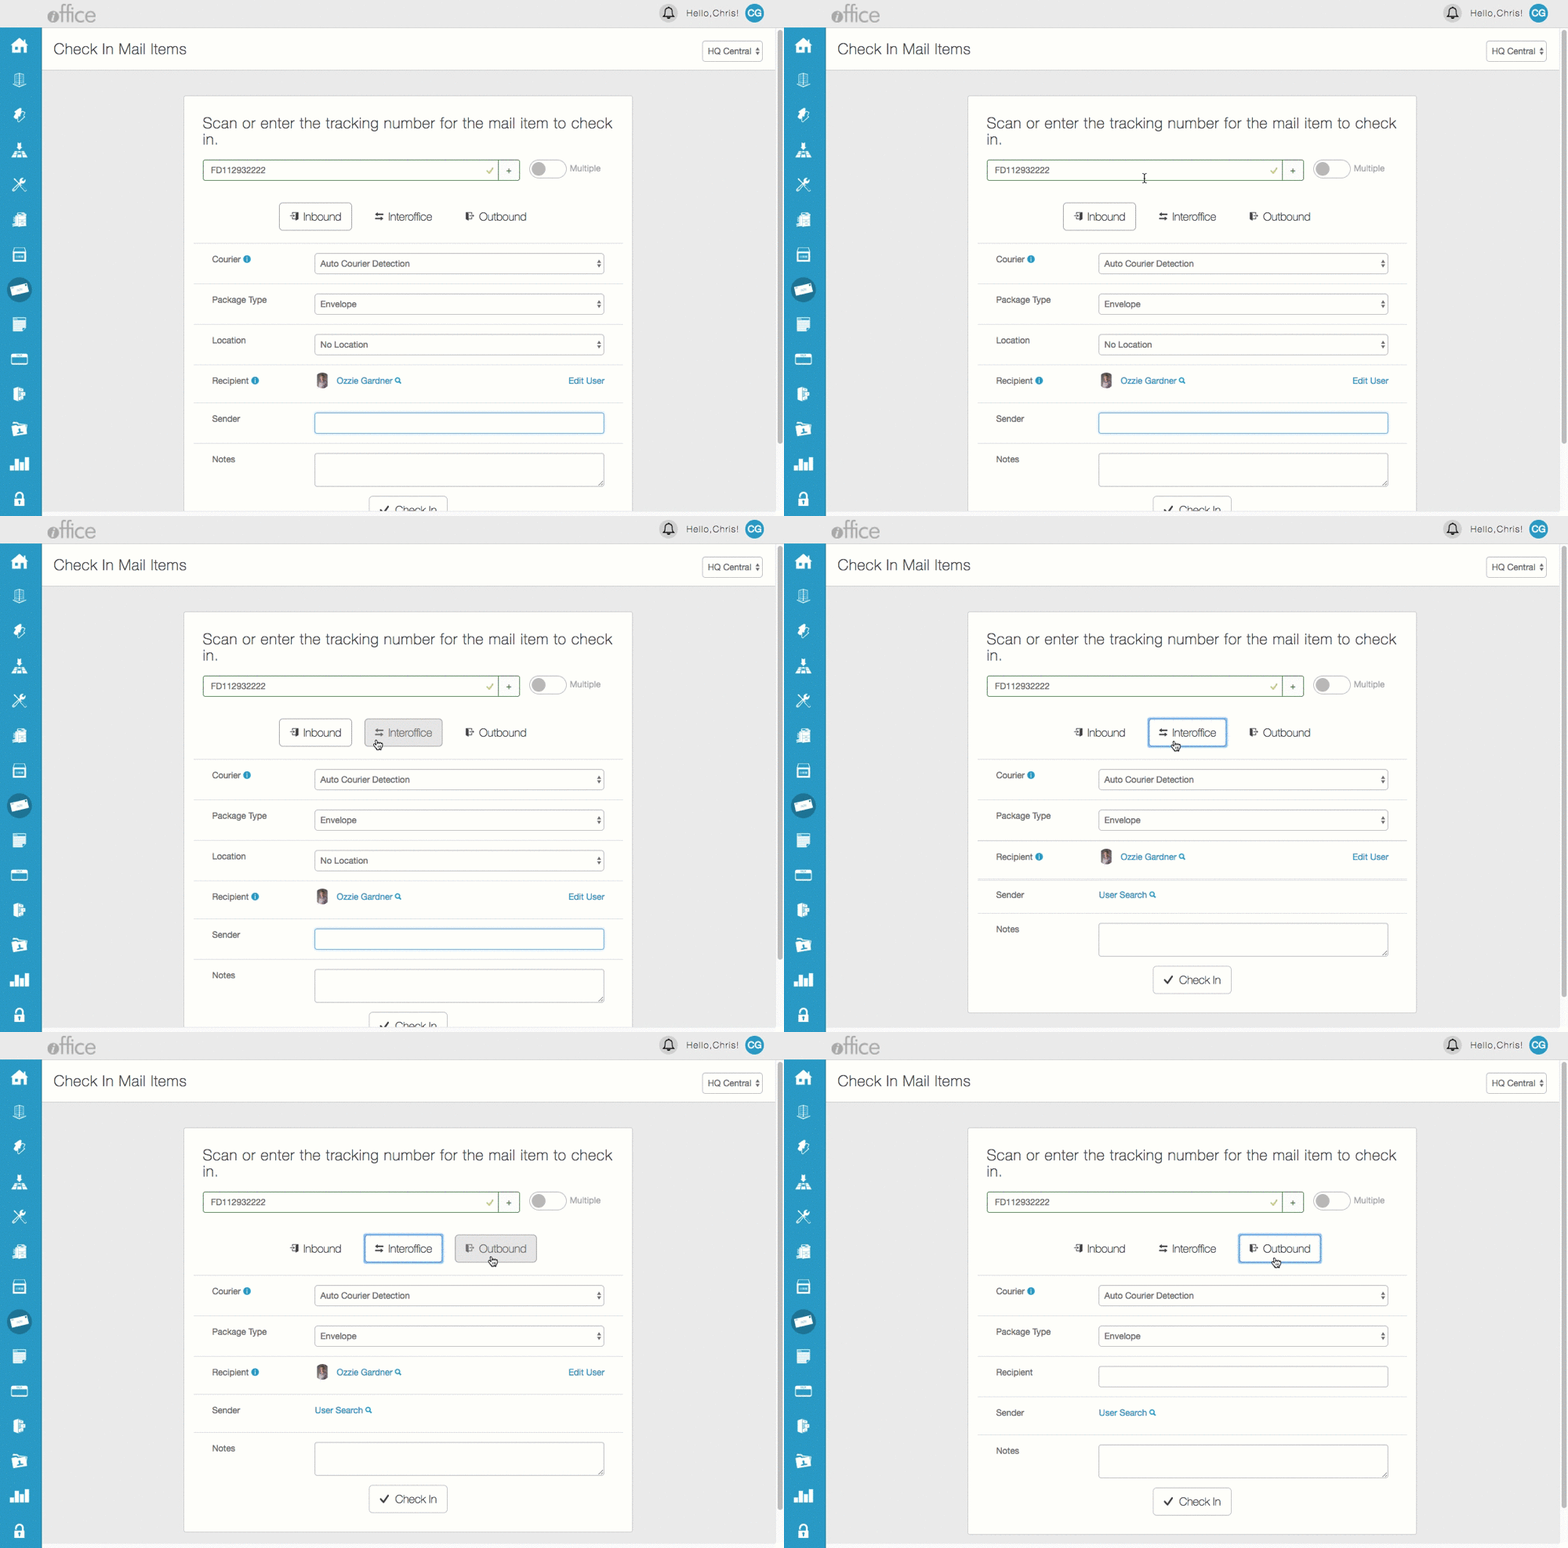
- Enter additional package information and click the Check In button to complete the check in process.
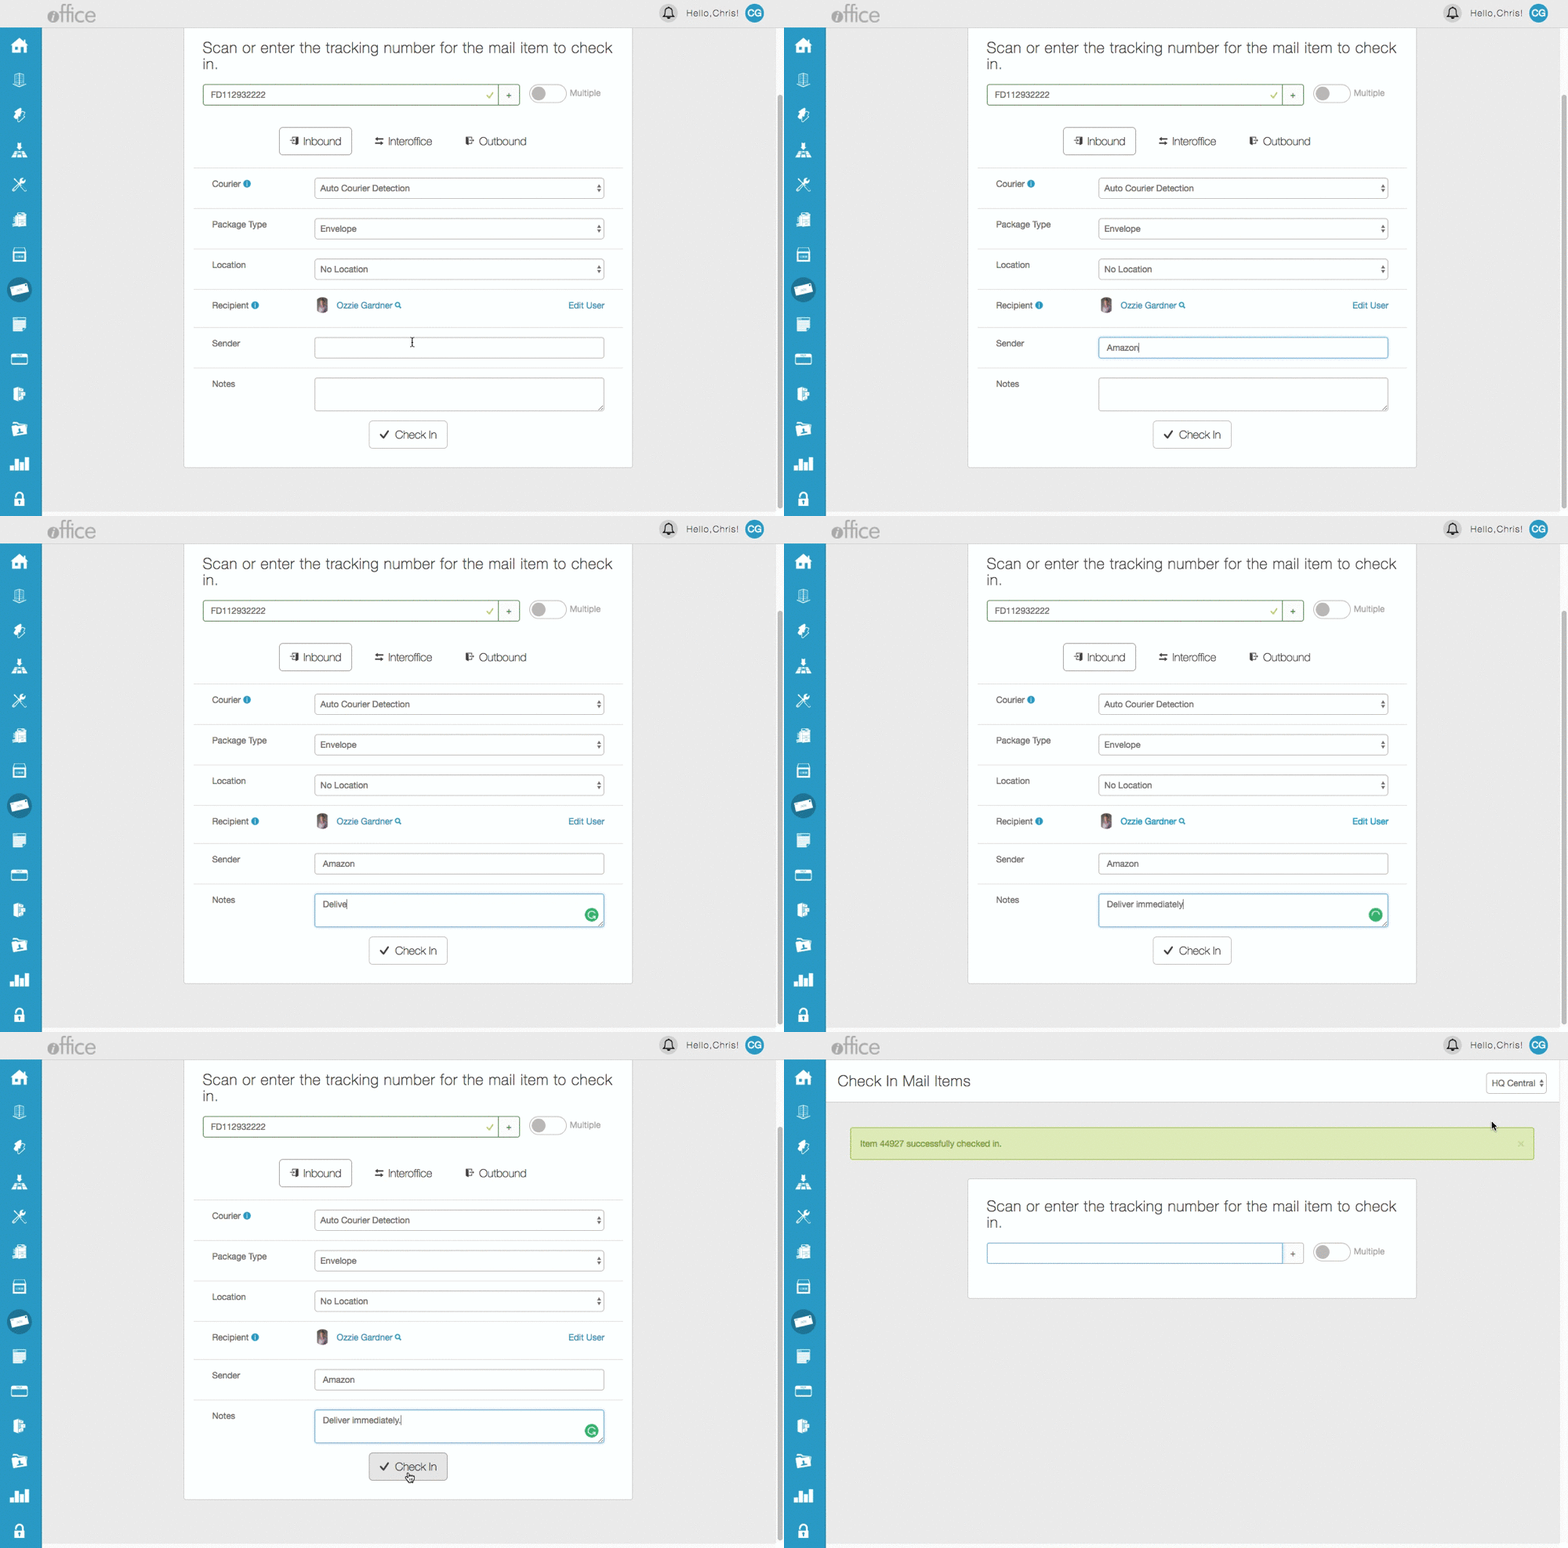
The package is checked in, and you can continue with the next package in your queue.
The updated Check In screen provides employees with a streamlined, user-friendly process for checking in packages, increasing efficiency when entering packages in the Mail module.
New Check In Process - Multiple Packages
The process of entering multiple packages for the same recipient has also been improved. To allow you to easily enter multiple tracking numbers for the same recipient, a new Recipient toggle has been added to the Check In screen. To check in multiple packages for the same recipient, simply click the Multiple toggle to the right of the  (Add) button prior to entering the first package. A new field displays allowing you to enter a second tracking number.
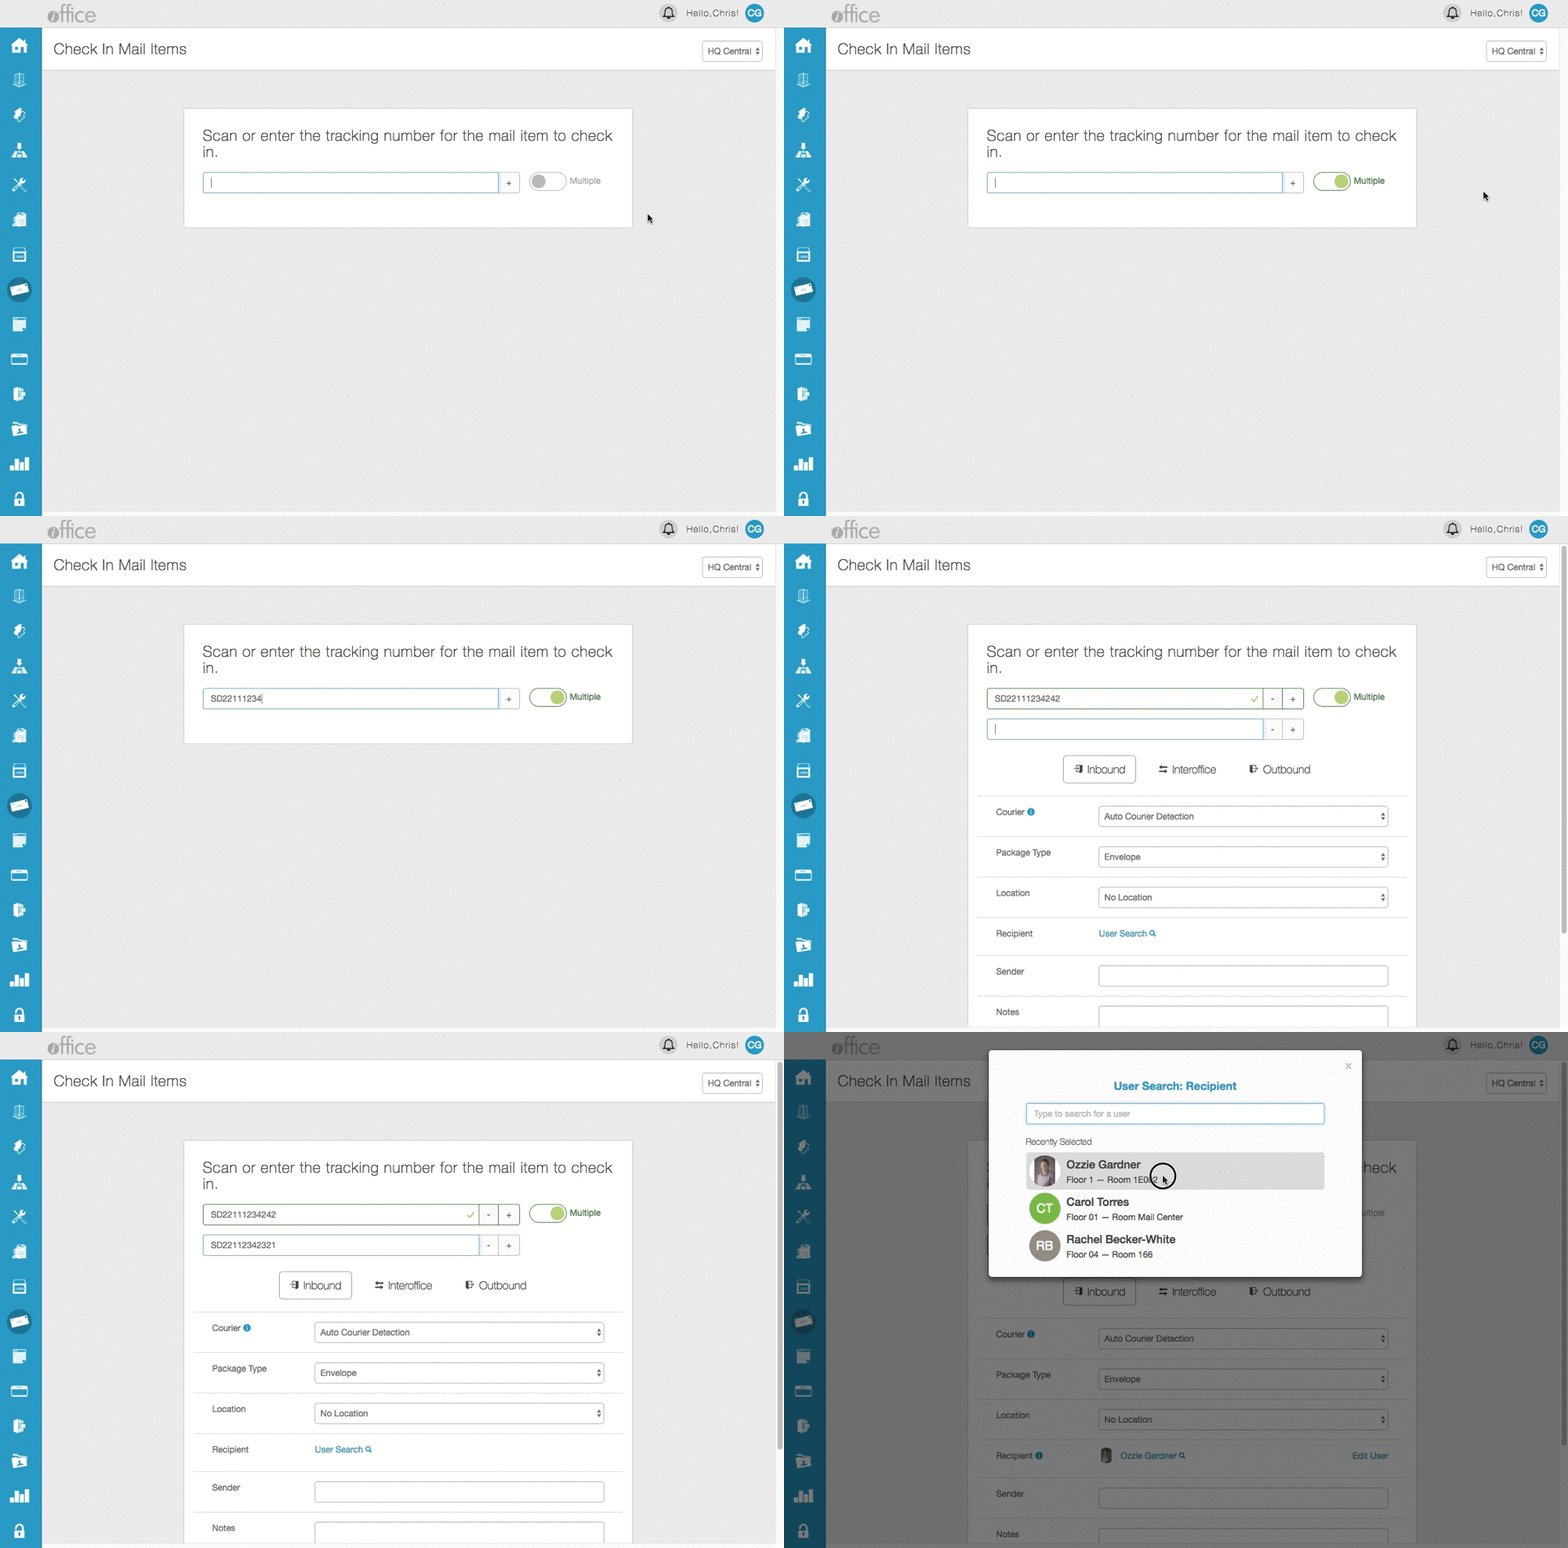
Repeat this process until all tracking numbers are entered for the recipient. Once the associated tracking numbers are entered, you can enter the recipient by deselecting the Multiple toggle and pressing the TAB key or by clicking the User Search link in the Recipient field directly. The User Search window displays, allowing you to easily search for and select the corresponding recipient.
The new Multiple toggle provides users with an intuitive option for checking in multiple packages for the same recipient, increasing efficiency when entering more than one package.
Responsive Alerts for Required Fields
If all required fields have not been completed, a warning message displays to the left of the Check In button. The message lists the remaining required entries, allowing you to quickly identify and enter the missing information. Simply enter the necessary information and click the Check In button to complete the process.
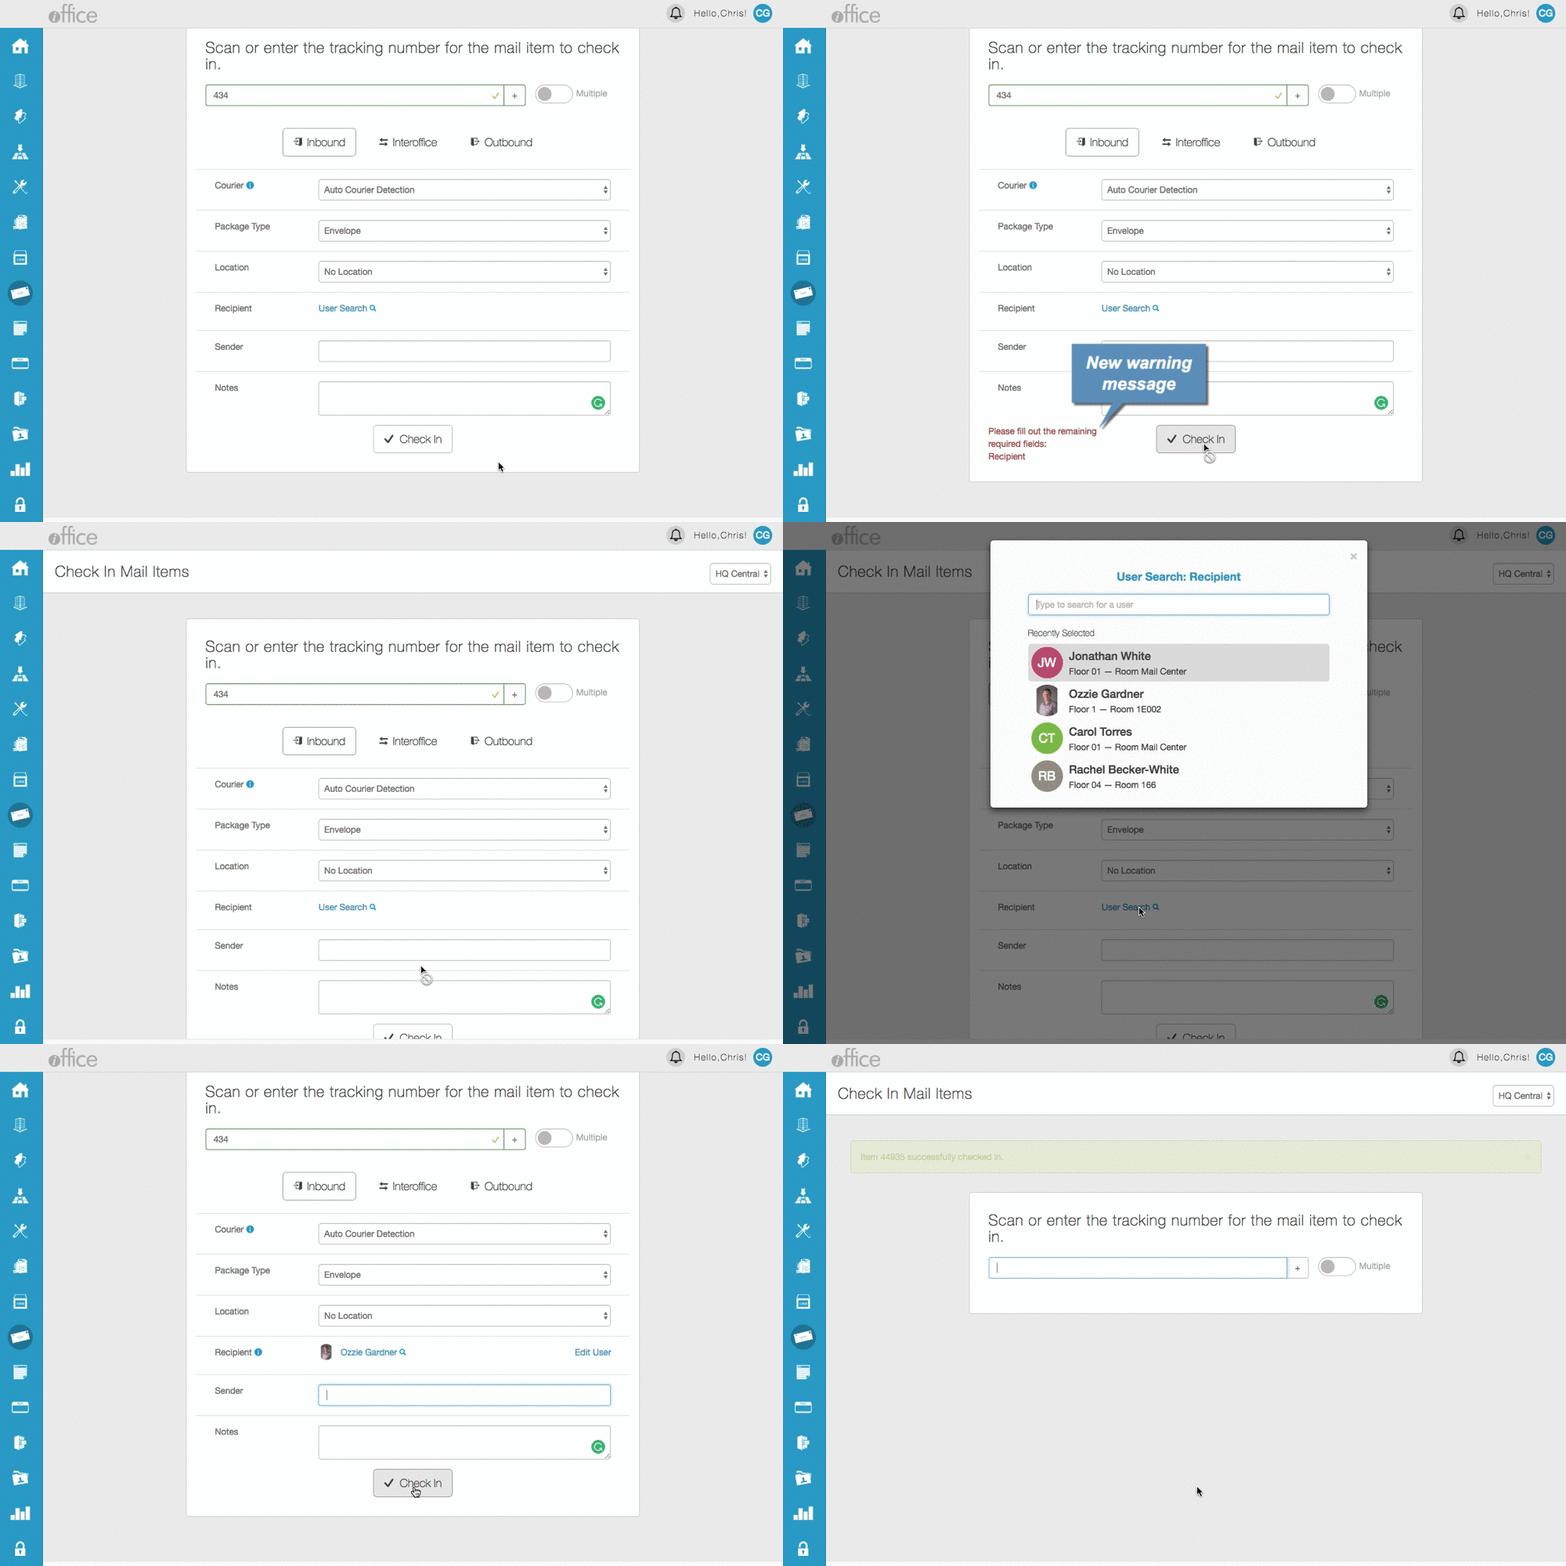
This enhancement can be especially useful for new employees who are still learning which information is required before a package can be checked in.
New Transfer Option - Replaces "Speedy" Check In
At hub-and-spoke mail centers that transfer packages from a central processing center to a destination center, the "Speedy Check In" option has been replaced with a new Transfer option. This change reduces confusion by more clearly indicating the action being taken, allowing operators at the central location to mark packages as transferred to the destination center with fewer keystrokes.
To register a package as transferred to the destination center, simply enter the tracking number for the package in the Tracking Number field and press the TAB key. The new Transfer option displays, allowing you to easily mark the package as transferred to the destination center.
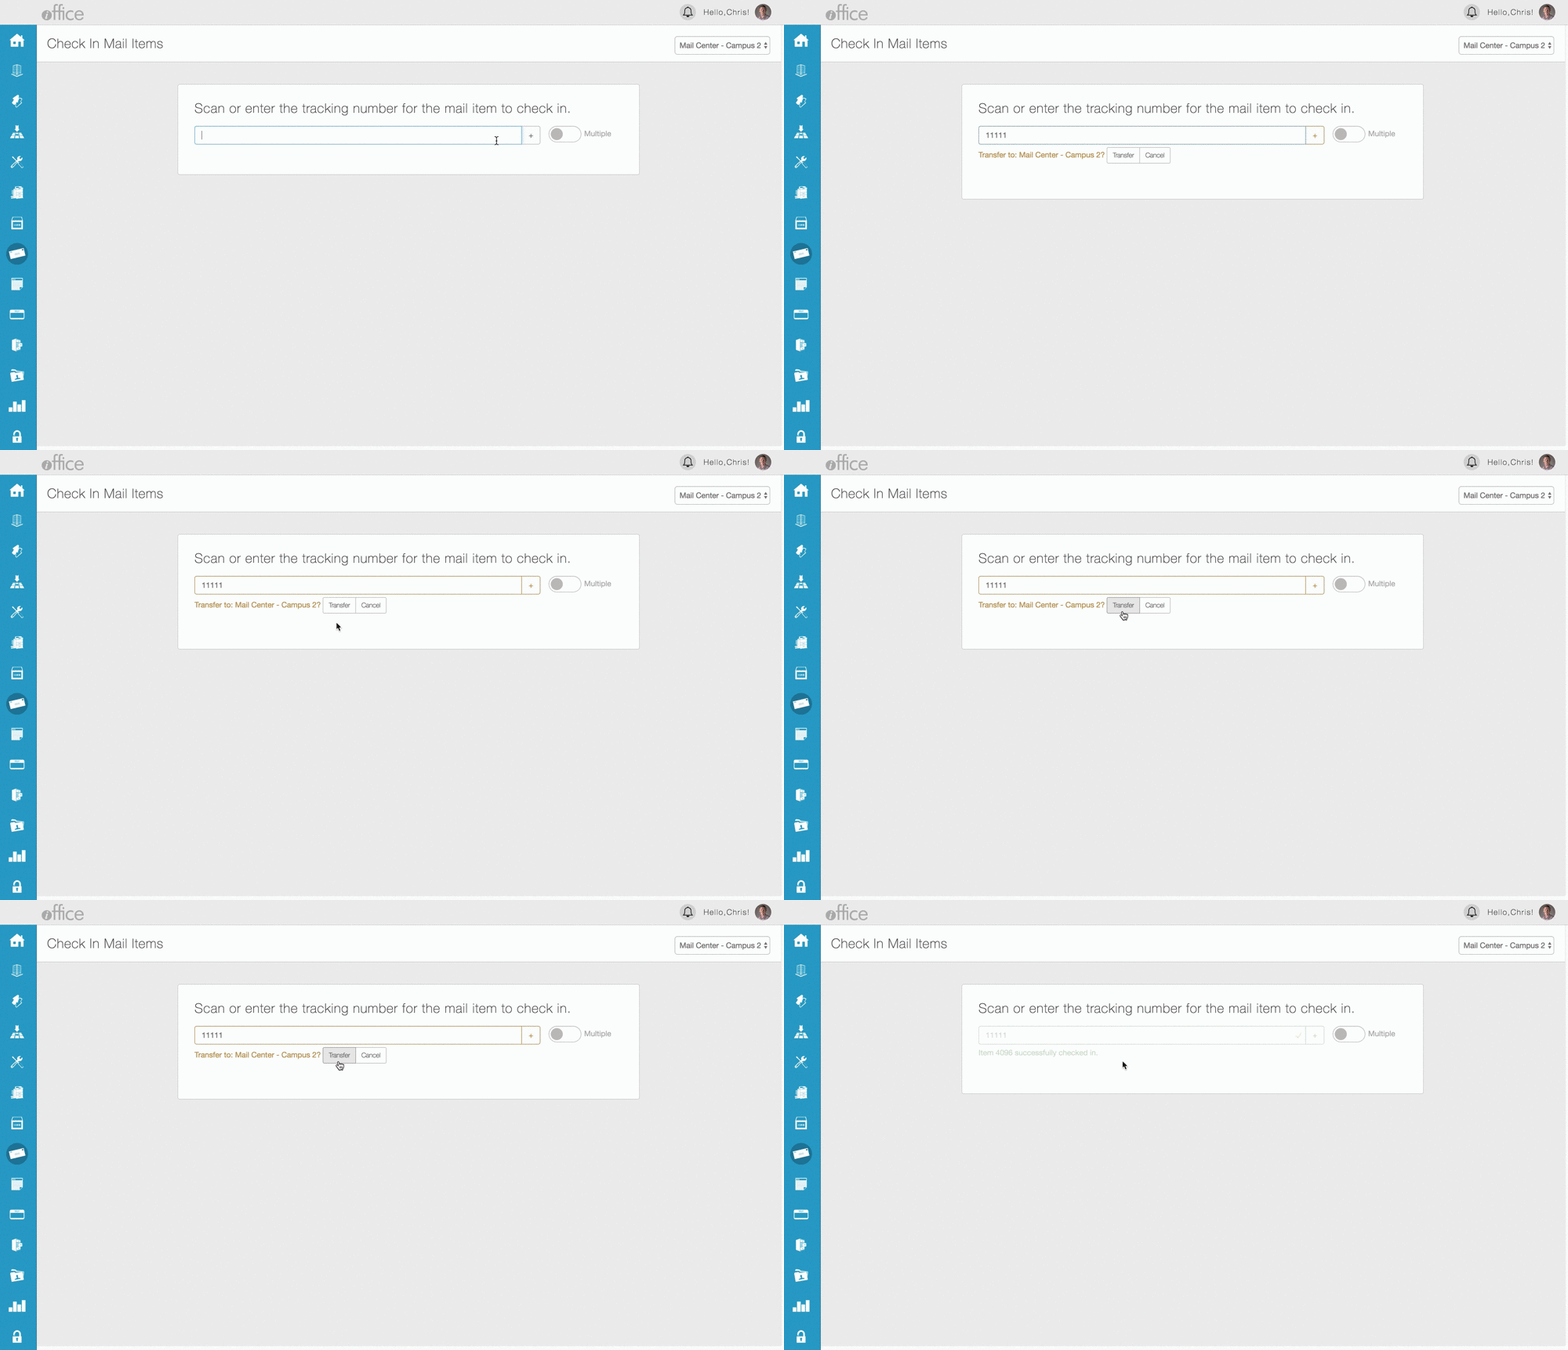
Note: The destination center must be selected in the Center field in the top-right portion of the screen for the transfer option to display.
This new feature simplifies the process of transferring packages between centers by eliminating the need to select a different package type to transfer packages between centers.
Improved Check Out Screen
With this enhancement, the Check Out screen in the Mail module will also be updated with a more modern look and feel. Using larger fonts and clearly defined buttons, the new design will be more consistent with other recently updated screens in the iOffice application.
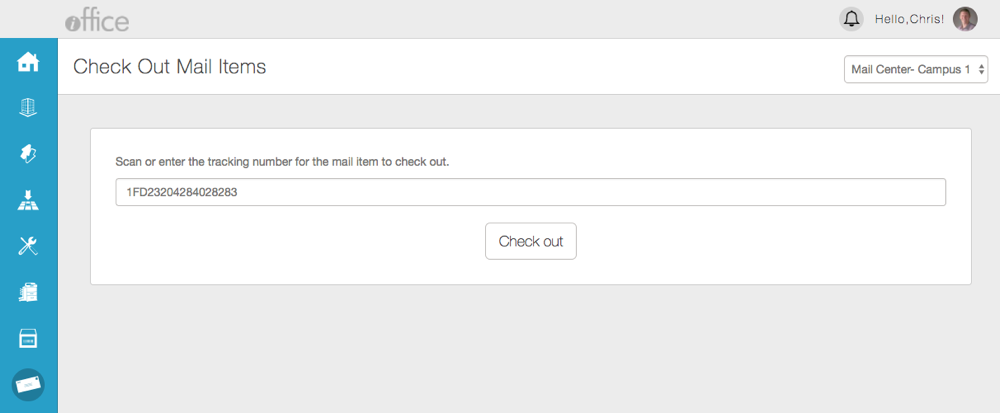
The updated Check In and Check Out screens provide you with a simple, user-friendly experience, allowing you to check packages in and out using a consistent and effective process. The new layout will be rolled out incrementally over the next few weeks. If you have any questions, please call 713-526-1029, or send an email to support@iofficecorp.com.
