Submit a Scheduled Task
Level: Administrator and Operator
To allow Administrators and Operators to create scheduled tasks, you need to have this setting enabled. Learn more in Edit Service Request Preferences.
You can quickly submit a scheduled task. When scheduled tasks are set up, they automatically populate the Request Queue based on the schedule requirements.
1. Navigate to Service Request > Submit Request. The Service Request screen displays.
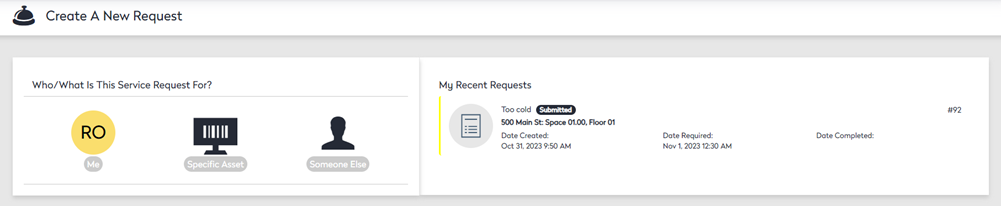
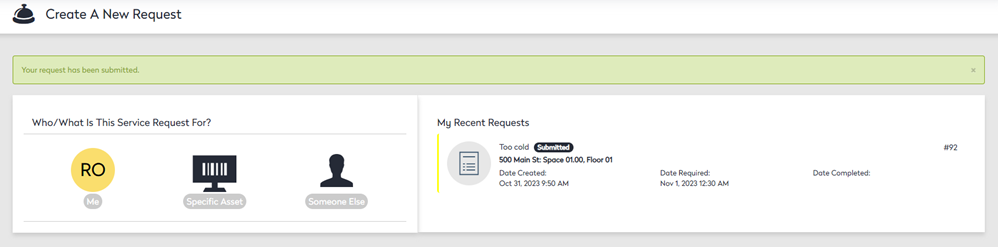
- Select whether the request is for me, another person, or a specific asset. In this example, the service request is for myself.
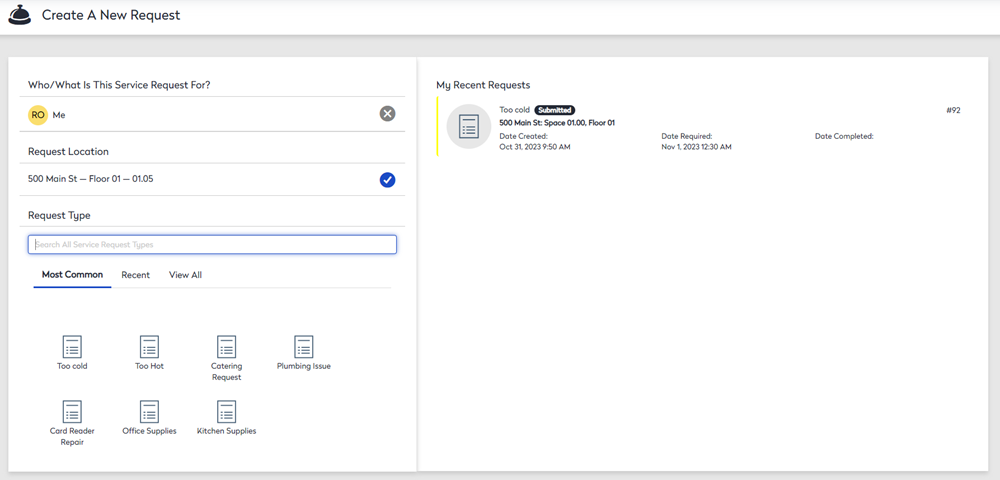
Additional options are selected automatically based on whether the request type is associated with a person or an asset.
- If you create a ticket for yourself, your location is selected by default. If a location is not defined automatically or differs from the default selection, enter the correct location in the Location field.
- In the Request Type section, select a request type. The available request types are narrowed as you select the new request in this section.
After you select a request type, then you can complete the details:
- Click the toggle for One Time or Recurring.
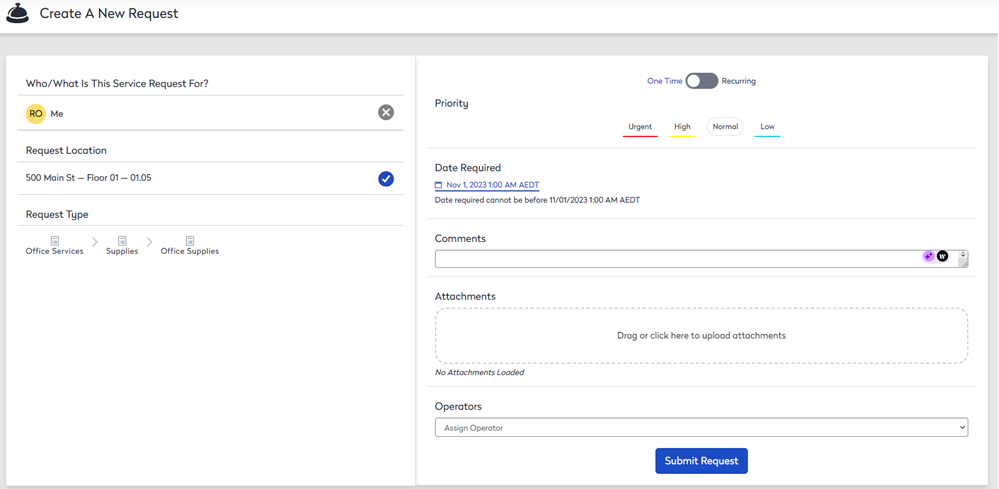
One Time
- Click the Priority level, either Urgent, High, Normal, or Low.
- Click the Date Required picker to select the date and time.
- In the Comments field, enter any comments.
- If you need an upload an attachment, then either drag and drop an attachment to the field or click the attachment field and then select the file to upload.
- If you know who the operator is, then from the Operators drop-down, select an operator.
- Click the Submit Request button.
Recurring
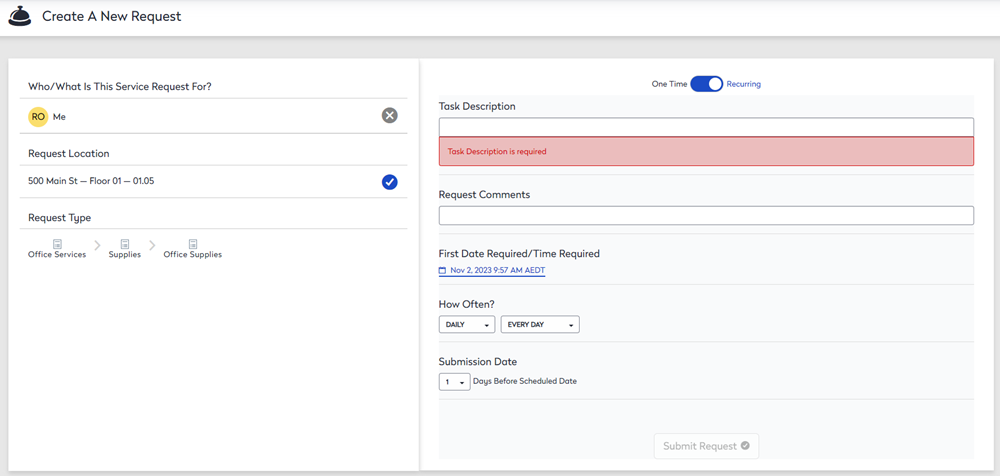
- In the Request Comments field, enter any comments.
- Click the First Date Required/Time Required picker to select the date and time.
- From the How Often? drop-down, select the frequency.
- In the Submission Date drop-down, select the number of days before the schedule date.
- Click the Submit Request button.
A message displays the service request ticket number and you will receive an email notification.
Schedule Task Validation
When a service request is submitted, the date required and assigned operator will be checked.
- Date Required - If you start to create a ticket, the date and time will be accurate. However, if you wait until the following day to submit the ticket, the date and time will no longer be valid. If you submit your ticket with an outdated time required, the date and time will be updated to the current time plus the notice time set by the service request's priority.
- Operators - Each service request verifies that any operators assigned are on the auto-assignment list and available for the task assigned. This is important because the request type may specify that the operator auto-accepts. If so, the system can set the operator's status to "assigned." Otherwise, the status would be set to wait, holding up your request.
After these validations are complete, the specified operator(s) receive the notification email letting them know there are tasks for them.