Integrate Microsoft 365 Calendar
Level: Eptura Implementation team / Client IT team
Early Access
The Calendar Service Integration documentation has been released early and this integration will be coming soon to Eptura Workplace.
Prerequisites
In order to successfully integrate a Microsoft 365 calendar, you will need to be an Admin user within your Microsoft 365 account.
If you are using a hosted Exchange provider, you may need to reach out to your provider for more details.
Create a Service Account for Eptura Workplace to access the server
You will need create (or use an existing) a service account for use with the integration. In addition to the Calendar Service’s instructions, the service account may need to be an administrator, so that it can grant permission to Eptura Workplace on behalf of the organization. This is dependent on the organization's user consent settings and for a list of roles that can consent. Also, note that the account must have a 365 license assigned and also be an Admin account with the permission to consent to the OAuth app permissions.
Permission for the Eptura Workplace Service Account to control the Room Resources
There are two ways to access a mailbox:
- Impersonation - Impersonation allows the service account to manage events on behalf of your office’s room resource calendars, regardless of who originally created the event. This is done by acting as an authorized user.
- Delegate access - Delegate access acts on behalf of an authorized user with that user’s explicit permission.
We strongly recommend granting your Eptura Workplace service account the admin role for impersonation rather than using delegate access for Microsoft 365.
For security-minded customers, we recommend limiting the scope of impersonation to conference rooms only, which will allow Eptura Workplace to function normally. When you set up the Eptura Workplace service account in this way this will reduce the chances of running into Microsoft throttling limits when using delegate access. For information on how to Limit Scope of Access, see Impersonation Rights in Exchange.
Notes:
- Using delegate access for the user account will create unexpected results and communication from Microsoft Products stating there is an error with access. Eptura Workplace is unable to provide assistance or a solution to this error message using this configuration.
- Throttling limits the number of transactions or concurrent calls (by script or code) a single user can perform. If the calendar account is on Full Access Delegate, and there are a number of room resource calendars associated, Microsoft is going to prevent these concurrent calls (syncing of reservations made to the room, cancellations, etc.).
The End Event Early function still requires complete impersonation access to all mailboxes.
Impersonation
In order to use Impersonation, you will need to fulfill the requirements listed below:
- Have a Eptura Workplace account with administrator permissions.
- Have access to the Exchange Management Shell with admin access.
To set up Impersonation through the Exchange Management Console, complete the following:
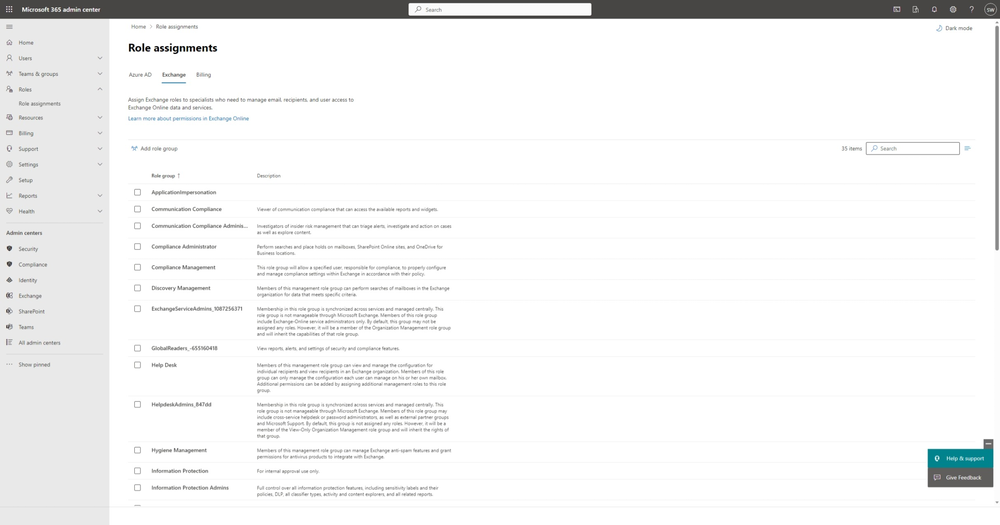
- Log into the Microsoft 365 Admin Center.
- From the menu, click the Admin > Exchange.
- Click Roles > Admin Roles. The Admin roles screen displays.
- Click the Add role group button.
The Set up the basics screen displays.
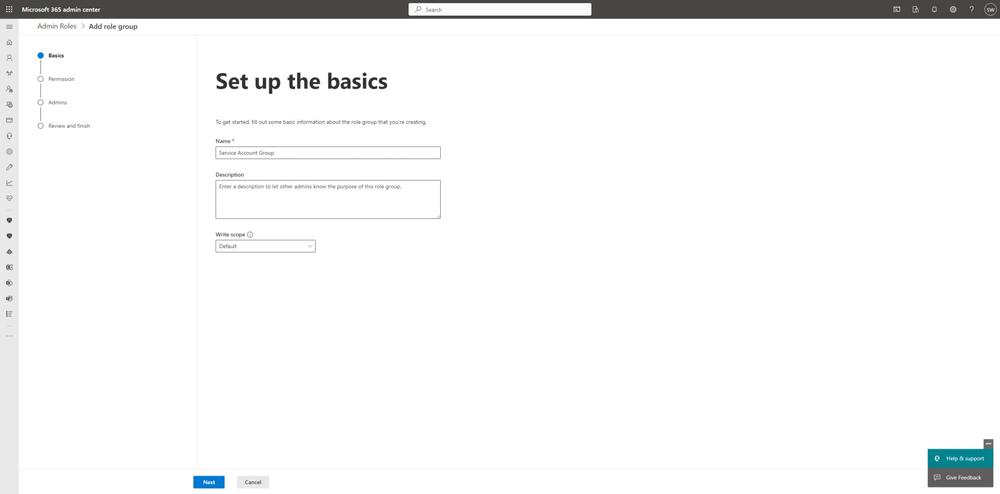
- In the Name field, enter the role group name. For example, Service Account group.
- Leave the Write scope drop-down as Default.
- Click the Next button.
The Add Permissions screen displays.
- In the Search field, enter ApplicationImpersonation.
- Check the ApplicationImpersonation checkbox.
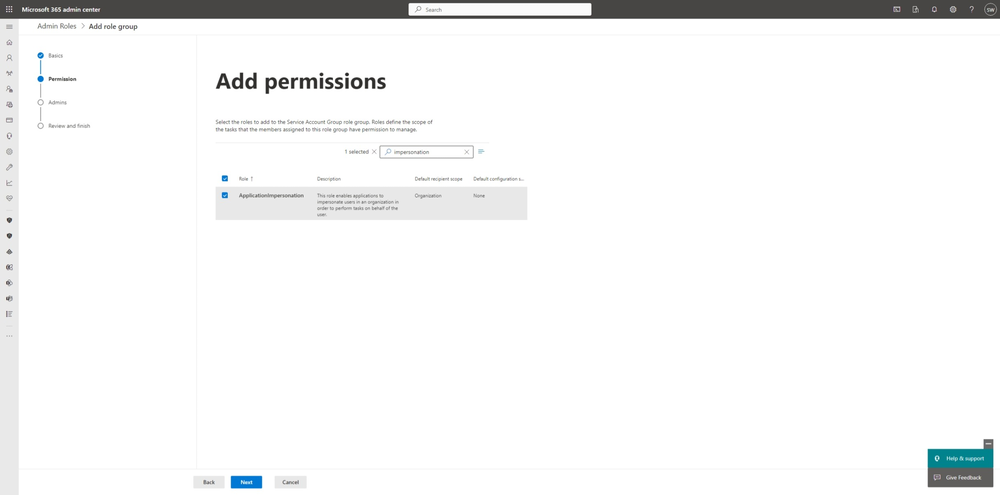
- Click the Next button.
The Assign admins screen displays.
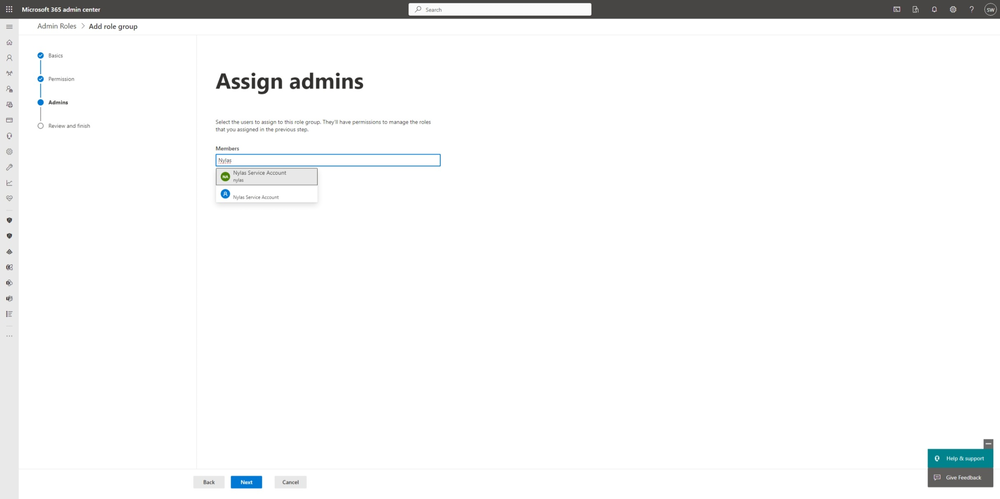
- In the Members field, enter the service account. For example, Eptura Service Account (this was previously created).

- Click Add role group button. The Status screen displays.
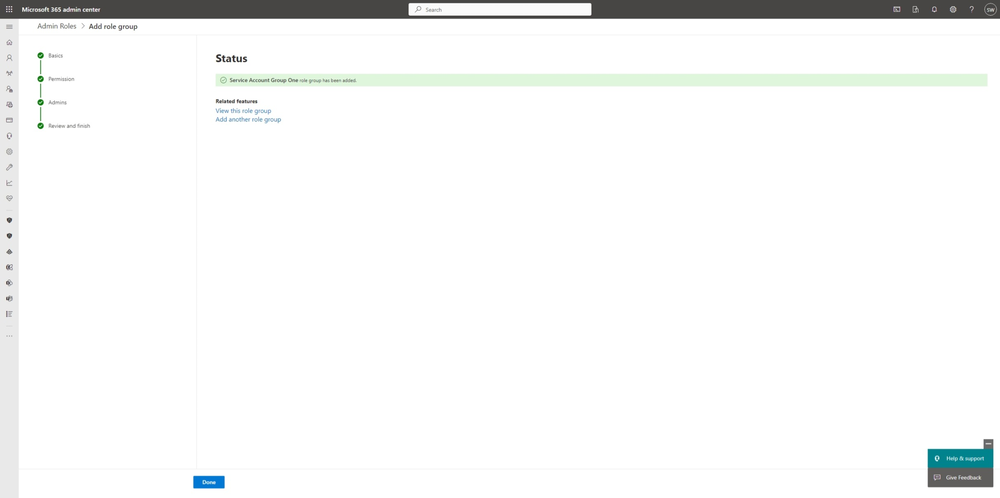
Good job! Your listed user now has impersonation rights, next you will need to complete the activation in Eptura Workplace.