Activate Office 365 in Eptura Workplace
Level: Implementation Team / Client IT
Early Access
The Calendar Service Integration documentation has been released early and this integration will be coming soon to Eptura Workplace.
Now that you have set up access, you are ready to connect an Office 365 account to Eptura Workplace.
From Eptura Workplace, complete the following:
- Navigate to Admin > Calendar Integration.
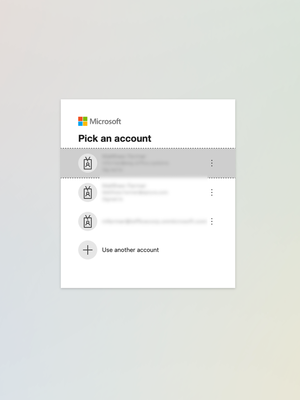
- Click the Office 365 button. You will be prompted to sign in to Office365.
- Click on your account.
You will be prompted to enter your password.
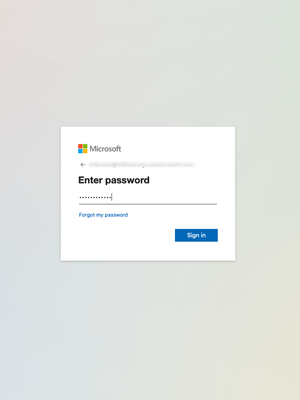
- Enter your password.
The Permissions requested screen displays.
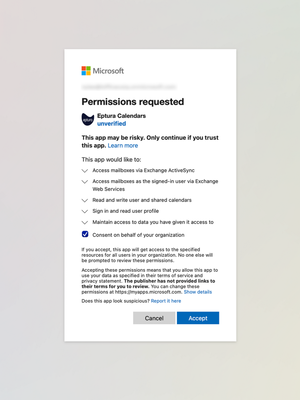
- Click the Accept button.
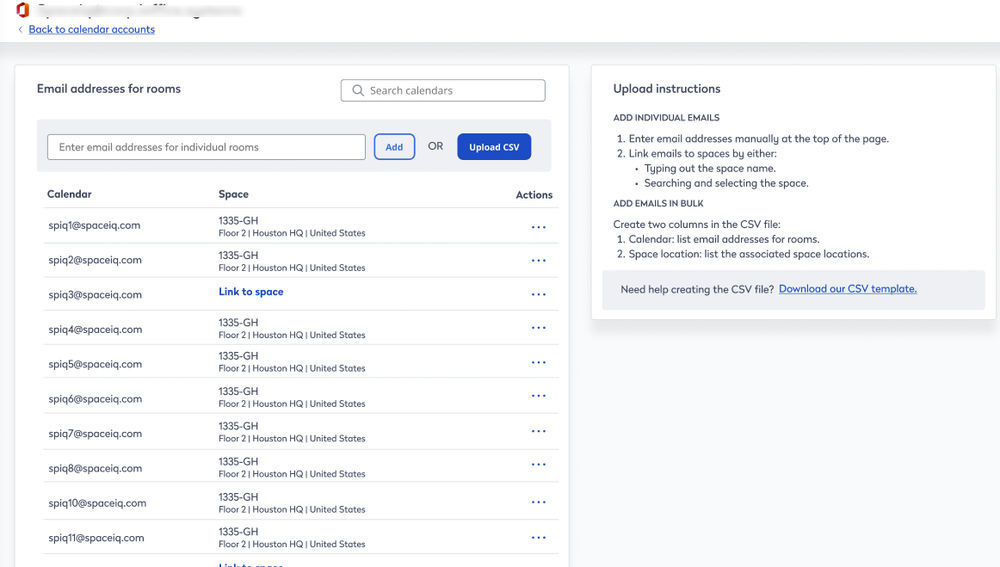
The email address for rooms screen displays.
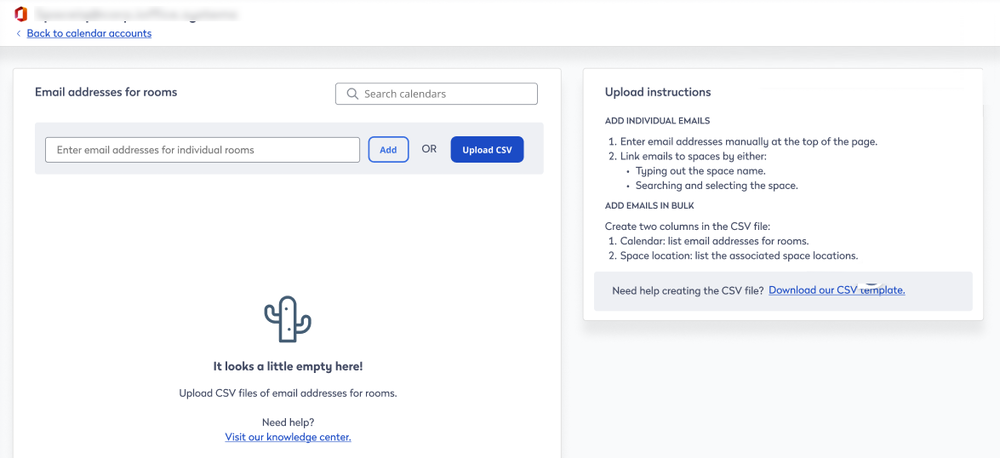
- You can either manually link the calendar emails or upload the links in bulk.
Manually Link the Calendar Emails
Link the email to the space, by either:
- Search for the calendar and click Link to space
- From the list find the calendar and click Link to space
Bulk Link the Calendar Emails
- Download the CSV template.
- Complete the columns:
- Calendar - this is the calendar email address
- Space Locations - this is the associated space location
- Click the Upload CSV button.
- Navigate to and select the file.
That’s it! Your Microsoft 365 account is now integrated with Eptura Workplace, and you can change Room Resource settings. You will receive an email directed to the sync account informing you which calendars we have synced with.